
Want to give your car a fresh, eye-catching look without spending a fortune? Wrapping your car with 3M vinyl is one of the best ways to do just that.
But if you’ve never tried it before, the process might seem tricky or even overwhelming. Don’t worry—you’re closer to mastering this skill than you think. In this guide, you’ll discover simple, step-by-step instructions to wrap your car like a pro.
By the end, you’ll have the confidence to transform your ride and turn heads wherever you go. Ready to get started? Let’s dive in!
Credit: epdwindowfilm.com
Choosing The Right 3m Vinyl
Choosing the right 3M vinyl is key for a smooth car wrap. The right vinyl ensures lasting quality and a perfect look. It protects your car and gives it a fresh style. Knowing the types, colors, and tools helps you pick the best option. This section guides you through these choices simply.
Types Of 3m Vinyl Wraps
3M offers different vinyl types for car wraps. Each suits a specific need or surface. Cast vinyl is thin and flexible, ideal for curves. It lasts longer and resists fading. Calendered vinyl is thicker and less flexible. Best for flat surfaces and short-term use. Choose cast vinyl for durability and smooth finish.
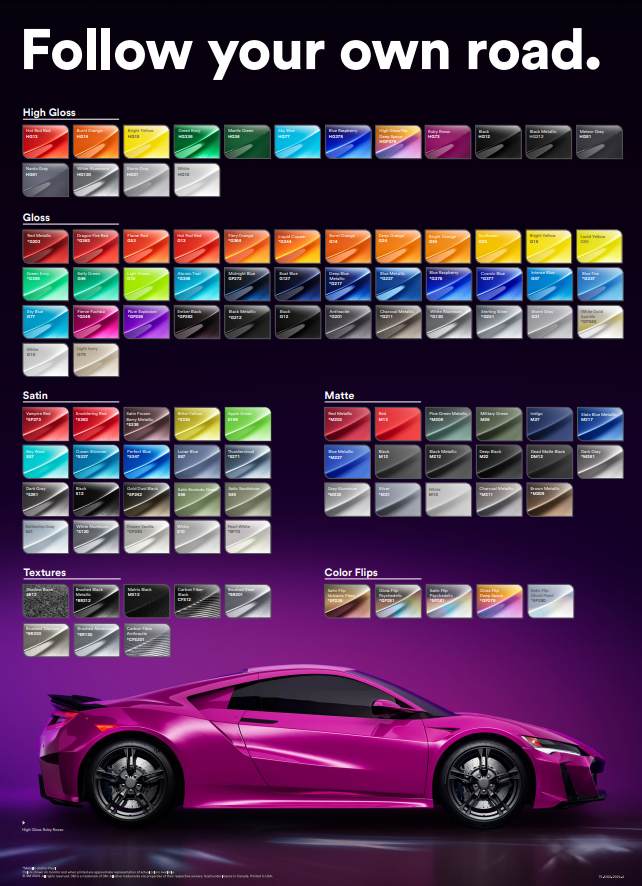
Color And Finish Options
3M vinyl comes in many colors and finishes. Glossy vinyl gives a shiny, smooth look. Matte vinyl offers a flat, non-reflective surface. Satin finish lies between glossy and matte. Metallic and chrome finishes add extra shine. Pick a color and finish that matches your style and car model.
Tools And Materials Needed
Use the right tools for a clean vinyl wrap. A squeegee helps remove air bubbles. A heat gun softens vinyl for tight curves. A sharp utility knife cuts vinyl precisely. Cleaning supplies prepare the car surface. Gloves keep fingerprints off the vinyl. These tools make wrapping easier and cleaner.
Credit: www.tintingchicago.com
Preparing Your Car For Wrapping
Preparing your car before wrapping with 3M vinyl is key to a smooth and lasting finish. This step ensures the vinyl sticks well and looks perfect. A clean, smooth surface helps avoid bubbles and wrinkles. Follow simple steps to get your car ready for wrapping.
Cleaning And Degreasing
Start by washing your car thoroughly. Use soap and water to remove dirt and dust. After drying, apply a degreaser to clear oils and grease. These substances stop the vinyl from sticking properly. Use a clean cloth to wipe the surface after degreasing. Make sure no residue remains before moving on.
Removing Obstacles And Accessories
Remove items like mirrors, antennas, and trim pieces. These parts can block the vinyl and cause wrinkles. Unscrewing or detaching them makes wrapping easier. Keep the screws and parts safe for reassembly later. Clear surfaces make the vinyl application smooth and seamless.
Repairing Surface Imperfections
Check the car’s paint for chips, scratches, or dents. Fix small problems with touch-up paint or filler. Smooth the repaired areas with fine sandpaper. A flat surface helps the vinyl lie flat without bumps. Well-prepared surfaces improve the wrap’s look and durability.
Measuring And Cutting The Vinyl
Measuring and cutting the vinyl is the first step to a smooth car wrap. It sets the stage for the entire project. Accurate measurements and clean cuts help the vinyl fit perfectly. This avoids wrinkles, bubbles, or gaps. Proper handling also keeps the vinyl safe from damage. Let’s explore how to measure and cut 3M vinyl correctly.
Taking Accurate Measurements
Start by cleaning the car surface. Use a tape measure to get exact lengths and widths. Measure each part of the car separately. Doors, hood, roof, and bumpers all need their own measurements. Write down each size carefully. Add a few extra inches for overlap and trimming. Double-check every number before cutting.
Cutting Techniques For Precision
Use a sharp utility knife or vinyl cutter. Place the vinyl on a flat, clean surface. Use a straight edge or ruler to guide your cuts. Cut slowly and steadily to avoid jagged edges. Trim excess vinyl after the initial cut. Keep the blade sharp for the best results. This keeps the edges smooth and clean.
Handling Large Vinyl Sheets
Vinyl sheets can be big and heavy. Work in a spacious, dust-free area. Roll out the vinyl carefully to avoid creases. Use weights or tape to hold it in place. Fold the vinyl in loose loops to manage large pieces. Avoid stretching the vinyl during handling. Clean hands and tools prevent dirt marks on the vinyl.
Credit: shop.spandex.com
Applying The Vinyl Wrap
Applying the vinyl wrap is the most important step in the car wrapping process. It requires patience and care to get the best results. This stage decides how smooth and neat your wrap will look. Every small detail matters. Follow these steps carefully to apply the vinyl wrap properly.
Positioning The Vinyl Correctly
Start by placing the vinyl on the car surface. Align it carefully to cover the entire area. Use magnets or tape to hold the vinyl in place. Check that the edges match the car’s shape. Avoid stretching the vinyl too early. Make sure it sits flat before moving on.
Using Heat To Stretch And Shape
Heat helps the vinyl become flexible. Use a heat gun or a hairdryer on low heat. Warm the vinyl gently, focusing on curved areas. This makes it easier to stretch and mold. Stretch the vinyl slowly to avoid tears. Heat allows the vinyl to follow the car’s shape perfectly.
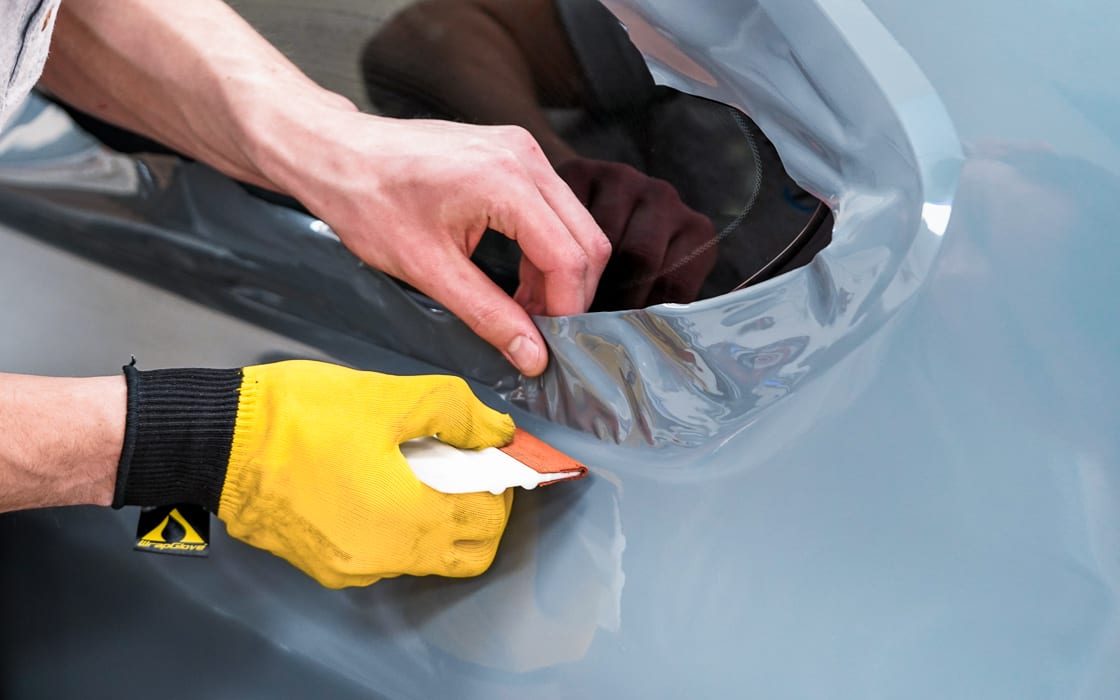
Smoothing Out Bubbles And Wrinkles
Use a squeegee to press the vinyl down. Start from the center and push outwards. This removes air bubbles and wrinkles. Work slowly and carefully to avoid damage. For stubborn bubbles, lift the vinyl gently and reapply. Heat can also help smooth out wrinkles.
Finishing Touches
Finishing touches make your car wrap look professional and last longer. This step ensures clean lines and strong edges. It protects your work and keeps the vinyl looking fresh. Follow these simple steps to complete your 3M vinyl wrap perfectly.
Trimming Excess Vinyl
Use a sharp blade to cut the extra vinyl carefully. Trim close to the edges without cutting the car’s paint. Take your time to avoid mistakes. Small cuts create neat lines and prevent peeling later.
Sealing Edges For Durability
Apply edge sealant along all trimmed edges. The sealant stops dirt and moisture from getting under the vinyl. Use a soft cloth to press the edges firmly. This step strengthens the wrap and stops lifting over time.
Curing Time And Care Instructions
Let the vinyl cure for at least 24 hours before washing. Avoid high-pressure water or harsh chemicals during this period. Wash the car gently with soap and water. Keep the wrap clean and dry to extend its life.
Common Mistakes To Avoid
Wrapping a car with 3M vinyl can be a rewarding project. Avoiding common mistakes saves time and money. Many beginners make errors that can ruin the wrap’s look and durability. Understanding these mistakes helps achieve a smooth, professional finish.
Ignoring Surface Prep
Clean the car surface thoroughly before applying vinyl. Dirt, dust, or grease stops the vinyl from sticking properly. Even small particles cause bubbles or peeling later. Use a good cleaner and wipe the surface well. Do not skip this step to ensure a strong bond.
Rushing The Application Process
Take your time with each section of the wrap. Quickly stretching or applying vinyl causes wrinkles and air bubbles. Smooth the vinyl slowly using a squeegee or soft cloth. Work in small parts and check your progress often. Patience results in a cleaner, longer-lasting wrap.
Improper Use Of Heat Gun
Use a heat gun carefully to shape and stretch the vinyl. Too much heat can melt or damage the material. Too little heat makes the vinyl hard to bend around curves. Keep the heat gun moving and test on a small area first. Proper heat control helps the wrap fit perfectly.
Maintaining Your Vinyl Wrap
Maintaining your 3M vinyl wrap is key to keeping your car looking fresh and new. Proper care helps the wrap last longer and stay vibrant. Simple steps can protect your investment and keep the surface smooth.
Cleaning Tips For Longevity
Use a gentle soap and water mix to clean the wrap. Avoid harsh chemicals that might damage the vinyl. Wash your car by hand with a soft cloth or sponge. Rinse well to remove all soap residue. Dry the wrap with a microfiber towel to prevent water spots. Clean the wrap regularly, especially after driving on salty roads or dirt.
Repairing Minor Damages
Small scratches or lifts can happen. Use a heat gun carefully to soften the vinyl and smooth out bubbles or wrinkles. For tiny cuts, clear vinyl repair tape can be a quick fix. Avoid pulling or stretching the wrap too much. Patch kits designed for vinyl wraps can help fix minor tears. Act fast to stop damage from getting worse.
When To Seek Professional Help
Large tears or deep scratches need expert care. Professionals have the tools and skills to fix serious damage. They can replace damaged sections without harming the rest of the wrap. If the wrap starts peeling off in many areas, it might need reapplication. Visit a specialist for advice and repairs to keep your wrap perfect.
Frequently Asked Questions
What Tools Are Needed To Wrap A Car With 3m Vinyl?
You need a squeegee, heat gun, utility knife, gloves, and cleaning supplies. These tools help apply vinyl smoothly and remove air bubbles effectively.
How Long Does It Take To Wrap A Car With 3m Vinyl?
Wrapping a car typically takes 1 to 3 days. Time varies by car size, vinyl complexity, and installer experience.
Can 3m Vinyl Wrap Protect My Car’s Original Paint?
Yes, 3M vinyl acts as a protective layer. It shields paint from scratches, UV rays, and minor debris.
Is Professional Installation Necessary For 3m Vinyl Car Wrap?
Professional installation is recommended for best results. Experts ensure smooth application, perfect fit, and durable adhesion.
Conclusion
Wrapping your car with 3M vinyl takes patience and care. Follow the steps slowly and check your work often. Use the right tools to avoid bubbles and wrinkles. Clean the surface well before starting to help the vinyl stick better.
Take your time to smooth out the vinyl for a neat look. With practice, your car wrap will look smooth and last longer. Keep these tips in mind for a fresh, new car appearance.


