
Are you looking to give your table a fresh new look without spending a fortune? Wrapping your table with vinyl is a smart and stylish way to transform its appearance quickly and easily.
Whether you want to protect your table from scratches or completely change its color and texture, vinyl wrap can do the trick. In this guide, you’ll learn simple, step-by-step tips to wrap your table like a pro—no special skills needed.
Ready to turn your old table into something eye-catching? Keep reading and discover how you can do it yourself with confidence.

Credit: www.youtube.com
Choosing The Right Vinyl
Choosing the right vinyl is the first step to a great table wrap. The right vinyl can protect your table and change its look. It must fit your style and the table’s use. Knowing different types and patterns helps you pick well. Measuring carefully ensures the vinyl fits perfectly.
Types Of Vinyl For Tables
There are several vinyl types for tables. Adhesive vinyl sticks well and is easy to apply. It works great for smooth surfaces. Outdoor vinyl lasts longer and resists water and sun. Heat transfer vinyl needs heat to stick and is less common for tables. Choose vinyl that is strong and easy to clean.
Colors And Patterns
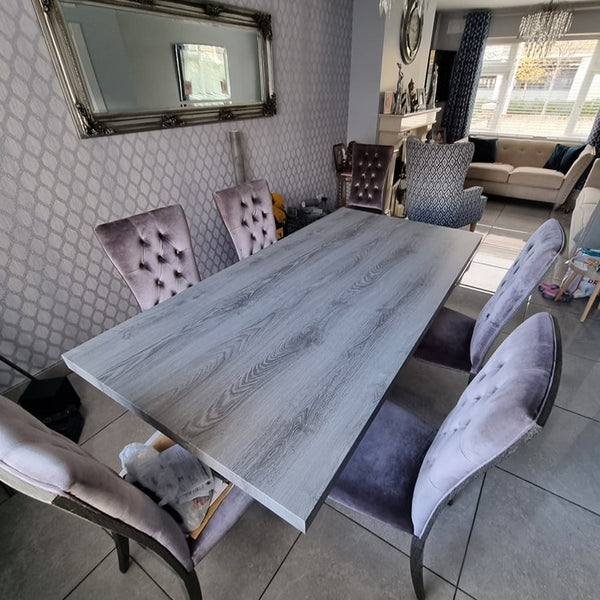
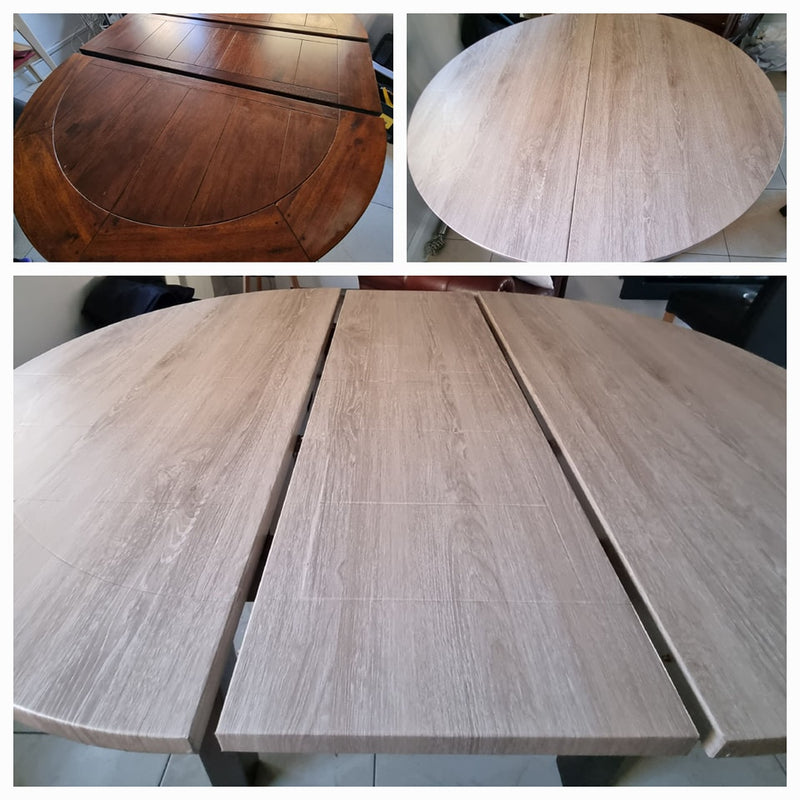
Vinyl comes in many colors and patterns. Solid colors give a simple, clean look. Wood grain or marble patterns mimic real materials. Bright colors add fun and personality. Choose colors that match your room and style. Light colors show dirt faster. Dark colors hide stains better.
Measuring For Vinyl
Measure your table carefully before buying vinyl. Measure the top, sides, and edges. Add extra inches for wrapping around corners. Use a tape measure for accuracy. Write down all measurements. This helps avoid buying too little or too much vinyl. Proper measuring saves time and money.
Credit: layed.com
Preparing The Table Surface
Preparing the table surface is the first step to a smooth vinyl wrap. A clean and even surface helps the vinyl stick well and last longer. It also makes the table look better after wrapping. Take time to prepare the surface carefully.
Cleaning And Sanding
Start by wiping the table with a damp cloth. Remove all dust, dirt, and grease. Use a mild soap if needed. Let the table dry completely. Next, sand the surface lightly with fine-grit sandpaper. This roughens the surface for better vinyl grip. Wipe off sanding dust with a clean cloth.
Removing Old Finish
Check if the table has old paint or varnish. Use a chemical stripper or sandpaper to remove it. Removing old finish helps vinyl stick directly to the wood or material. Make sure to remove all flakes and chips. A smooth base prevents bubbles under the vinyl.
Repairing Imperfections
Look for cracks, dents, or holes on the table. Use wood filler or putty to fill these spots. Let the filler dry as per instructions. Sand the repaired areas smooth and level. Fixing imperfections stops bumps from showing through the vinyl wrap.
Cutting The Vinyl
Cutting the vinyl is a key step in wrapping a table. It needs care and precision. The right cut ensures the vinyl fits well and looks neat. This part of the process helps avoid mistakes that waste material or cause wrinkles. Follow these simple tips to cut your vinyl perfectly.
Measuring Vinyl Pieces
Measure the table’s length and width first. Use a tape measure for accuracy. Write down the numbers to avoid forgetting. Add extra inches to cover edges and corners. Mark these dimensions on the vinyl with a pencil or chalk. Double-check your marks before cutting. Precise measuring saves time and material.
Using Sharp Tools
Use a sharp utility knife or scissors for cutting. Dull tools can tear or stretch the vinyl. Cut slowly and steadily along the marks. Keep the blade clean for smooth cuts. Use a cutting mat or a hard surface underneath. This protects your workspace and the vinyl from damage.
Allowing For Overhang
Leave extra vinyl around the edges for wrapping. About two to three inches is enough. This overhang helps tuck the vinyl under the table sides. It also makes smoothing easier and hides imperfections. Check that the vinyl covers the whole surface plus the overhang. This step creates a clean, finished look.
Applying Adhesive
Applying adhesive is a key step in wrapping a table with vinyl. It helps the vinyl stick firmly to the surface. Using the right glue and applying it correctly makes the wrap smooth and long-lasting. Take your time with this step to avoid problems later.
Choosing The Right Glue
Select a glue made for vinyl and wood or metal surfaces. Some glues dry too fast or too slow. Pick one that gives you time to spread it evenly. Check if the glue is waterproof and strong. This helps the wrap last longer on your table.
Spreading Evenly
Use a brush or roller to spread the glue. Cover the whole table surface in a thin, even layer. Thick glue can cause bumps under the vinyl. Thin glue might not hold the vinyl well. Aim for a smooth coat that covers every part.
Avoiding Bubbles
Bubbles make the vinyl look bad and can peel off later. Press the vinyl slowly onto the glued surface. Use a flat tool or your hand to smooth out air bubbles. Work from the center outwards to push air out. Take care to keep the vinyl flat and tight.
Wrapping The Table
Wrapping a table with vinyl can change its look quickly and affordably. The key is to apply the vinyl smoothly. Careful handling helps avoid bubbles and wrinkles. Follow simple steps to make your table look neat and fresh.
Starting From The Center
Place the vinyl sheet on the table surface. Begin by pressing the center firmly. This holds the vinyl in place. Work outwards from the center slowly. Stretch and smooth the vinyl gently. Avoid pulling too hard to prevent tears.
Smoothing Out Wrinkles
Use a soft cloth or squeegee to smooth the vinyl. Push air bubbles towards the edges. Small wrinkles can be lifted and repositioned. Take your time to smooth each section. Smooth vinyl means a clean, professional finish.
Handling Edges And Corners
Trim extra vinyl around edges carefully. Fold the vinyl neatly over corners. Use a heat gun or hair dryer to soften the vinyl. Soft vinyl bends easier around corners. Press firmly to stick the vinyl well. This keeps the wrap secure and neat.
Credit: layed.com
Finishing Touches
Finishing touches make your vinyl-wrapped table look neat and last longer. This final step gives the table a clean, professional appearance. It also protects the vinyl from lifting or peeling. Taking time here ensures your work stays perfect for years.
Trimming Excess Vinyl
Carefully trim the extra vinyl around the table edges. Use a sharp utility knife or scissors for clean cuts. Cut close to the edge but avoid cutting into the table surface. Small, slow cuts help prevent mistakes. Removing excess vinyl stops it from wrinkling or bubbling later.
Sealing The Edges
Seal the edges to keep the vinyl from peeling up. Use a heat gun or hairdryer to warm the edges gently. Press the vinyl down firmly with a plastic scraper or your fingers. This helps the vinyl stick tightly to the table edges. Sealing adds a smooth, finished look and protects against water damage.
Curing Time
Let the vinyl cure before using the table. Avoid placing heavy objects or cleaning the surface for at least 24 hours. Curing allows the adhesive to bond strongly with the table. This step ensures the vinyl stays in place and looks great over time.
Maintaining Your Vinyl Table
Maintaining your vinyl table keeps it looking fresh and new for a long time. Proper care prevents damage and extends the life of the vinyl wrap. Simple steps can protect your table from wear and tear.
Cleaning Tips
Use a soft cloth to clean the vinyl surface. Warm water with mild soap works best. Avoid harsh chemicals or abrasive cleaners that can damage the vinyl. Wipe gently to remove dust and spills. Dry the surface with a clean cloth after cleaning.
Avoiding Damage
Keep sharp objects away from the table. Do not drag heavy items across the vinyl wrap. Avoid placing hot pots or pans directly on the surface. Use coasters and placemats to protect the vinyl. Keep the table out of direct sunlight to prevent fading.
Repairing Small Tears
Small tears can be fixed quickly. Use vinyl repair kits available in stores. Clean the damaged area before applying the repair solution. Follow the kit instructions carefully for best results. Repairing tears early stops them from getting worse.
Frequently Asked Questions
How Do You Prepare A Table For Vinyl Wrapping?
Clean the table surface thoroughly to remove dust and grease. Sand lightly if the surface is glossy. Dry the table completely before applying vinyl for better adhesion and a smooth finish.
What Tools Are Needed To Wrap A Table With Vinyl?
Essential tools include vinyl wrap, a squeegee, a sharp utility knife, a heat gun, and a measuring tape. These help in precise cutting, smooth application, and securing the vinyl edges properly.
Can Vinyl Wrapping Protect The Table Surface?
Yes, vinyl wrapping adds a protective layer against scratches and spills. It preserves the original table surface and is easy to clean, making it ideal for both aesthetic and practical purposes.
How Long Does Vinyl Wrapping On A Table Last?
Vinyl wraps typically last 5 to 7 years with proper care. Avoid sharp objects and excessive moisture to extend the lifespan and maintain the wrap’s appearance.
Conclusion
Wrapping a table with vinyl can change its look fast. Start with clean, smooth surfaces for best results. Take your time to cut and stick the vinyl carefully. Small bubbles can be smoothed out with a squeegee or cloth. This project saves money and adds a personal touch to furniture.
With practice, your skills will improve, and results will look great. Try different vinyl patterns to fit your style. Enjoy your refreshed table and the satisfaction of doing it yourself.


