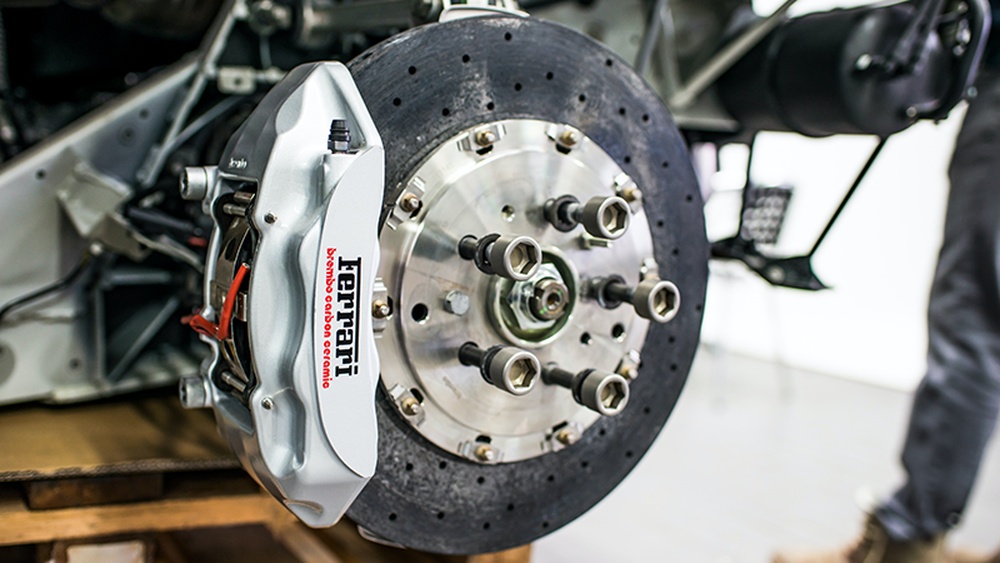
If you want to keep your car safe and running smoothly, knowing how to do brakes and rotors is a skill you don’t want to miss. Your brakes are what stop you when it matters most, and worn-out rotors can make your ride bumpy or even dangerous.
Imagine saving money and gaining confidence by fixing these parts yourself. This guide will walk you through each step clearly and simply, so you can tackle the job with ease. Ready to take control of your car’s safety? Let’s get started.
Tools And Materials Needed
Replacing brakes and rotors requires the right tools and materials. Having everything ready helps the job go smoothly. It also keeps you safe and saves time. This section lists essential tools, how to pick brake parts, and safety gear to use.
Essential Tools List
Start with a good jack and jack stands. These lift and hold your car safely. You need a lug wrench to remove wheel nuts. A socket set with ratchet helps remove caliper bolts. A C-clamp or brake caliper tool compresses the caliper pistons. Also, use a wire brush to clean rust and debris. Keep a torque wrench to tighten bolts correctly. A flathead screwdriver or pry bar helps remove old brake pads.
Choosing The Right Brake Parts
Select brake pads and rotors made for your vehicle model. Check the owner’s manual for correct sizes. Choose quality parts to ensure safety and performance. Some parts last longer but cost more. Avoid cheap parts; they can wear quickly and fail.
Safety Gear Essentials
Wear safety glasses to protect your eyes from dust and debris. Use gloves to keep your hands clean and safe. A dust mask stops breathing brake dust. Wear closed shoes to protect feet from heavy parts. Have a fire extinguisher nearby in case of emergencies.

Credit: vatire.com
Preparing Your Vehicle
Preparing your vehicle is the first step to doing brakes and rotors. It keeps you safe and makes the job easier. Take your time and follow each step carefully. Proper preparation helps prevent accidents and damage.
Parking And Securing The Car
Park your car on a flat, solid surface. Avoid soft or sloped ground. Put the car in park or first gear. Apply the parking brake firmly. Place wheel chocks behind the wheels still on the ground. This stops the car from rolling.
Loosening Lug Nuts
Before lifting the car, loosen the lug nuts on the wheel. Use a lug wrench or breaker bar. Turn the nuts counterclockwise. Loosen them just enough to break free. Do not remove the nuts completely yet. This step is easier with the car on the ground.
Lifting The Vehicle Safely
Use a reliable jack to lift the vehicle. Find the correct lifting points in your owner’s manual. Place the jack under these points only. Lift the car until the wheel is off the ground. Support the car with jack stands. Never rely only on the jack for support.
Removing Old Brakes And Rotors
Removing old brakes and rotors is the first step in a brake replacement. It clears space for new parts and ensures safety. This process requires care and the right tools. Follow each step closely for best results.
Taking Off The Wheel
Start by loosening the lug nuts while the car is on the ground. Use a wrench or socket to turn them counterclockwise. Then, lift the car with a jack and secure it with jack stands. Remove the lug nuts completely and pull the wheel off. Set the wheel aside in a safe place.
Detaching The Brake Caliper
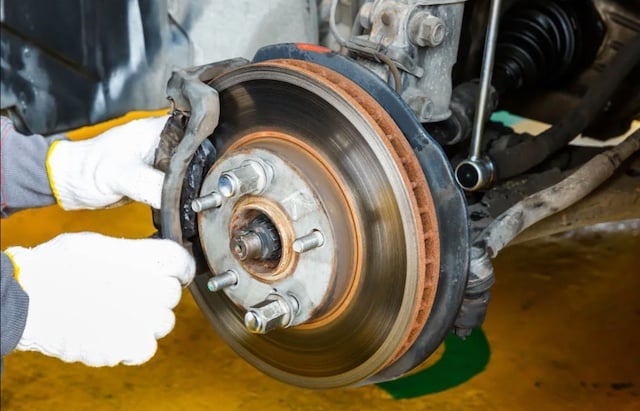
Locate the brake caliper, which holds the brake pads. Use a wrench to remove the bolts on the caliper. Carefully lift the caliper off the rotor. Do not let the caliper hang by the brake hose. Support it with a bungee cord or wire to avoid damage.
Removing The Rotor
The rotor sits behind the brake caliper. Sometimes, it may be stuck due to rust. Tap the rotor gently with a rubber mallet to loosen it. Pull the rotor straight off the wheel hub. Clean the hub surface before installing a new rotor to ensure a good fit.
Inspecting Brake Components
Inspecting brake components is a key step in brake and rotor maintenance. It helps ensure your vehicle stops safely. Regular checks can catch problems early. This saves money and prevents accidents. Focus on three main parts: brake pads, rotors, and calipers. Each part needs careful inspection for wear or damage.
Checking Brake Pads
Brake pads wear down as you drive. Check their thickness regularly. Thin pads need replacement soon. Look for uneven wear or cracks. Listen for squealing sounds when braking. It signals worn pads. Replace pads before they wear completely. This protects your rotors from damage.
Examining Rotors For Damage
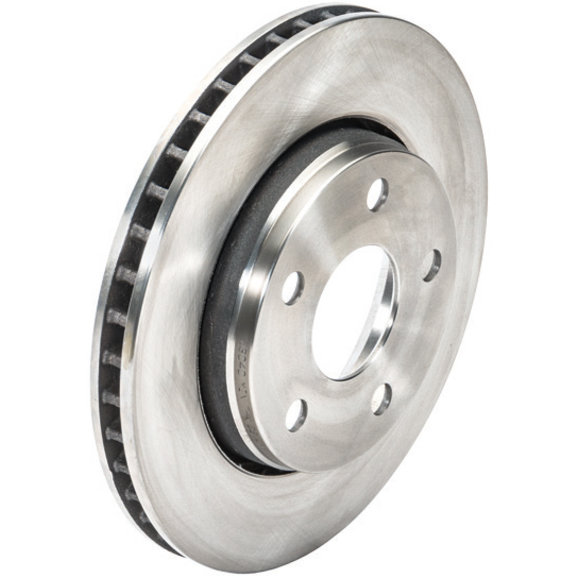
Rotors are metal discs that the brake pads press against. Inspect rotors for grooves, cracks, or rust. Smooth rotors ensure better braking. Rough or damaged rotors cause noise and vibration. Use a flashlight to see the rotor surface clearly. If rotors are damaged, consider resurfacing or replacing them.
Assessing Caliper Condition
Calipers press the brake pads against rotors. Check calipers for leaks or stuck parts. Look for uneven brake pad wear caused by caliper issues. Test caliper movement by gently pushing it. Sticky calipers reduce braking efficiency. Clean or replace faulty calipers to keep brakes working well.
Installing New Rotors And Pads
Installing new rotors and pads is a key step in brake maintenance. Proper installation ensures safe and smooth braking. Follow each step carefully for the best results. This guide helps you install rotors and pads with ease.
Cleaning The Hub Surface
Start by cleaning the hub surface. Remove any rust and dirt. Use a wire brush or sandpaper for this. A clean surface helps the rotor sit flat. This prevents vibrations and uneven wear later.
Mounting The New Rotor
Place the new rotor onto the hub carefully. Align the holes with the wheel studs. Press the rotor firmly against the hub. Use screws or clips to hold it in place. Make sure the rotor does not move.
Installing Brake Pads Correctly
Insert the brake pads into the caliper bracket. Check the orientation; pads should face the rotor. Secure the pads with clips or pins. Avoid touching the pad surface with your hands. This keeps the pads clean and effective.
Credit: www.quadratec.com
Reassembling The Brakes
Reassembling the brakes is a careful process. It ensures safety and proper brake function. Each step must be done right. Small mistakes can cause big problems later. Follow the steps to put everything back correctly.
Reattaching The Brake Caliper
Start by placing the brake caliper over the new rotor. Align it with the mounting points carefully. Avoid forcing the caliper to prevent damage. Slide the caliper into position until it fits snugly. Check that the brake pads sit correctly on the rotor.
Tightening Bolts To Specification
Use a torque wrench to tighten the caliper bolts. Each car has a specific torque value. Find this number in the manual or online. Tighten bolts evenly to prevent uneven pressure. Over-tightening can strip the threads or break bolts.
Replacing The Wheel
Place the wheel back onto the hub. Align the holes with the wheel studs. Hand-tighten the lug nuts first to hold the wheel. Lower the vehicle slightly, then tighten the lug nuts fully. Use a star pattern to ensure even tightening.
Testing Brake Performance
Testing brake performance is a vital step after installing new brakes and rotors. It ensures that your braking system works safely and efficiently. Proper testing helps you identify any issues before driving on busy roads. This process involves a few simple checks and a slow test drive.
Lowering The Vehicle
After replacing brakes and rotors, carefully lower the vehicle. Use a jack to bring the car down slowly and steadily. Ensure all bolts and parts are tight before removing the jack. This step prevents any damage and prepares the car for testing.
Checking Brake Pedal Feel
Press the brake pedal several times to check its feel. The pedal should feel firm, not spongy or soft. A soft pedal may mean air is still in the brake lines. Pump the brakes gently until the pedal feels solid and responsive.
Performing A Slow Test Drive
Drive the car slowly in a safe, open area. Apply the brakes lightly at first, then increase pressure gradually. Listen for any unusual noises or vibrations. The car should stop smoothly and straight. If anything feels off, stop and inspect the brakes again.
Maintenance Tips For Longevity
Maintaining your brakes and rotors helps them last longer and work better. Good care keeps you safe on the road. Small actions today avoid big problems later. Follow these tips to keep your brakes in top shape.
Regular Brake Inspections
Check your brakes often. Look for signs like squeaking or grinding sounds. Watch for vibration when braking. Inspect brake pads for thickness. Thin pads need replacing soon. Check rotors for grooves or rust. Clean dust and dirt from parts. Regular checks catch issues early. This saves money and improves safety.
Avoiding Common Brake Issues
Do not brake hard all the time. Sudden stops wear pads quickly. Drive smoothly and keep distance from cars. Avoid riding the brake pedal. This heats up parts and causes damage. Use quality brake parts for replacements. Cheap parts wear out fast. Keep brake fluid clean and topped up. Old fluid can cause brake failure.
When To Seek Professional Help
Some brake problems need expert care. If brakes feel soft or spongy, see a mechanic. Strange noises or smells need checking. If the car pulls to one side when braking, get help. Professionals can fix hidden issues. Do not ignore warning lights on the dashboard. Timely service keeps brakes reliable and safe.
Credit: www.buybrakes.com
Frequently Asked Questions
How Do I Know When To Replace Brakes And Rotors?
You should replace brakes and rotors when you hear squealing, grinding sounds, or feel vibration. Visual inspection for wear below 3mm thickness also indicates replacement.
What Tools Are Needed To Do Brakes And Rotors?
Basic tools include a jack, lug wrench, socket set, C-clamp, screwdriver, and brake cleaner. Specific vehicles may require additional tools like a torque wrench.
Can I Replace Brakes And Rotors Myself Safely?
Yes, with proper tools, safety precautions, and a repair manual. Always work on a flat surface, use jack stands, and follow step-by-step instructions carefully.
How Long Does It Take To Replace Brakes And Rotors?
Typically, replacing brakes and rotors takes about 1 to 2 hours per axle. Experience and the vehicle model may affect the time required.
Conclusion
Changing brakes and rotors can save money and keep you safe. Follow each step with care and take your time. Use the right tools and double-check your work. Test your brakes gently before driving fast. Regular brake checks help your car run smoothly.
Stay patient, and don’t rush the process. You can do this with some practice and focus. Safe driving starts with good brake maintenance. Keep your vehicle ready for the road ahead.