Are your mountain bike brakes feeling less responsive or making strange noises? It might be time to clean your brakes and rotors.
Keeping these parts clean is key to safe, smooth rides and better control on tough trails. In this guide, you’ll learn simple, effective steps to clean your brakes and rotors quickly. By the end, you’ll know exactly how to maintain your bike’s stopping power and enjoy every ride with confidence.
Ready to get your brakes back in top shape? Let’s dive in!

Credit: off.road.cc
Tools Needed
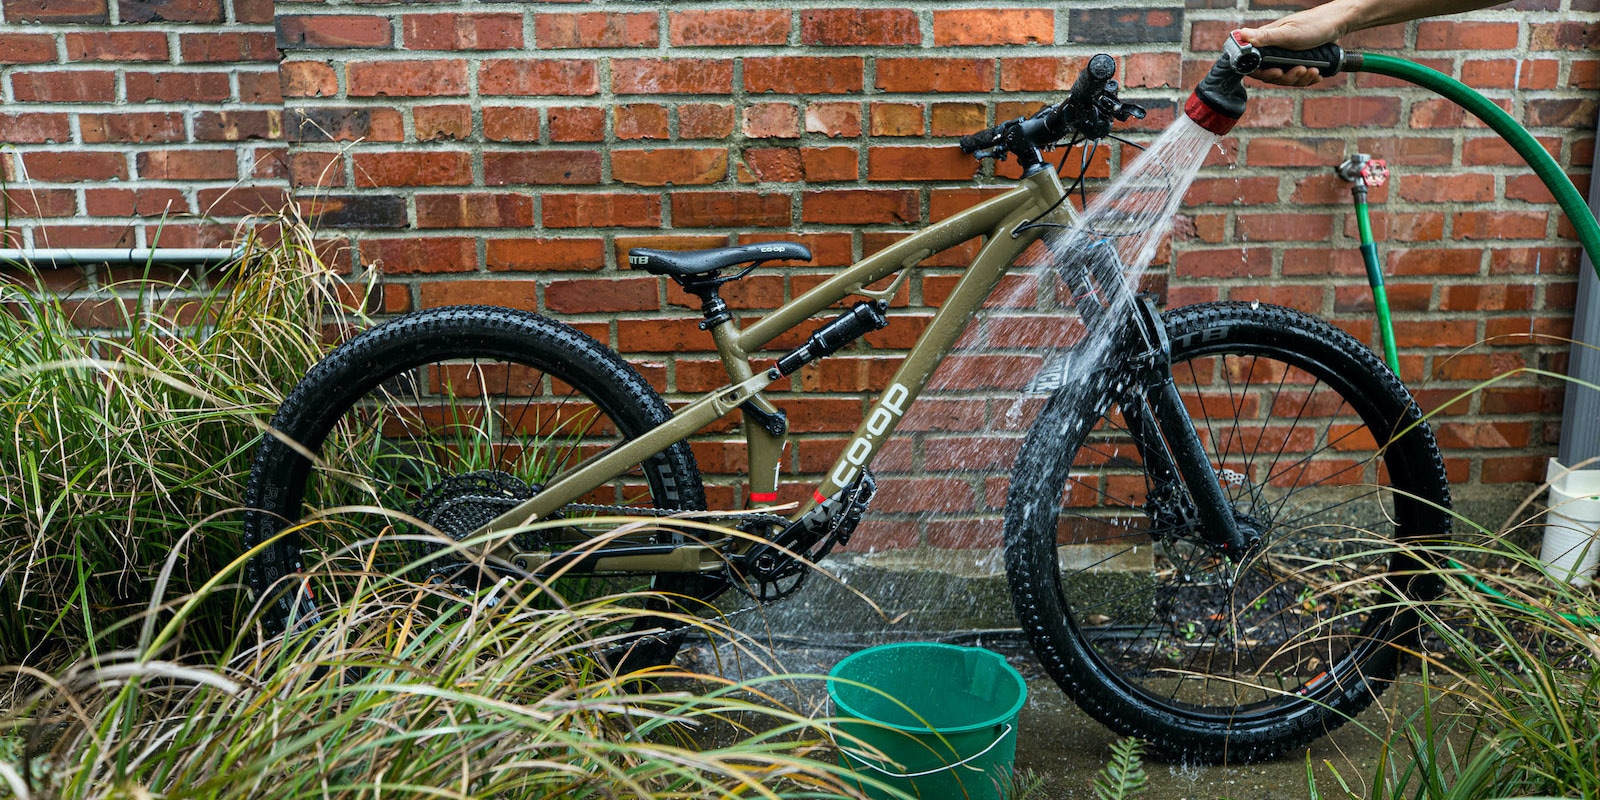
Preparing your bike properly makes cleaning brakes and rotors much easier. It helps you work safely and reach all parts. Taking time now saves effort later. Follow these steps to get your bike ready for a thorough clean.
Removing Wheels
Start by taking off the wheels. This gives full access to the brakes and rotors. Use a quick-release lever or wrench, depending on your bike. Gently pull the wheel free from the frame or fork. Keep the wheel close to avoid losing small parts.
Securing The Bike
Next, secure your bike to keep it steady. Use a bike stand or lean it against a solid surface. Stability helps prevent accidents and damage. Make sure the bike is balanced before cleaning. This step protects both you and your bike during the process.
Preparing Your Bike
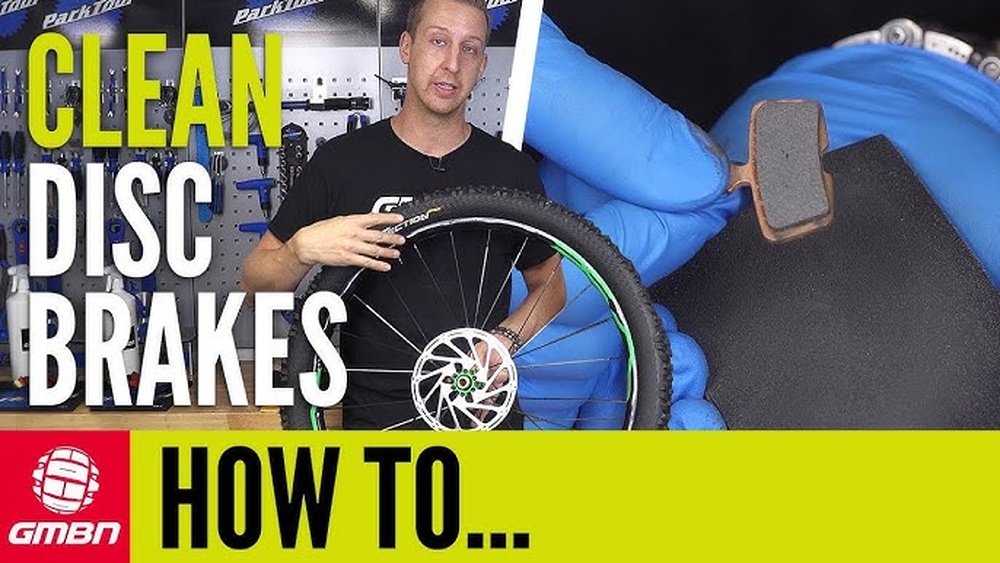
Cleaning brake rotors is an important part of mountain bike maintenance. Dirt and oil build-up reduce braking power. Clean rotors help your brakes work better and last longer.
Brake rotors need proper care to avoid noise and poor performance. Using the right method keeps your ride safe and smooth. Follow simple steps to clean rotors correctly.
Choosing The Right Cleaner
Select a cleaner made for bike brakes or disc brakes. Avoid oily or greasy products that harm brake pads. Isopropyl alcohol is a good choice. It cleans well without leaving residue.
Do not use soap or household cleaners. They may leave a film that reduces braking power. Use a spray or wipe that dries quickly. This prevents dirt from sticking to the rotor.
Step-by-step Cleaning Process
Start by removing the wheel from your bike. This gives full access to the brake rotor. Use a clean cloth to wipe off loose dirt and dust.
Apply the cleaner on the rotor surface. Let it sit for a minute to break down grime. Use a clean cloth or paper towel to wipe the rotor. Repeat if needed until the rotor is clean.
Check the rotor for any oil or grease spots. Clean again if necessary. Allow the rotor to dry completely before reattaching the wheel. Dry rotors work best for strong braking.
Cleaning Brake Rotors
Cleaning brake pads is key for safe mountain biking. Dirt and oil can reduce braking power. Regular cleaning keeps pads working well and extends their life. It also prevents noise and uneven wear. Knowing how to clean brake pads helps you ride with confidence.
Identifying Pad Types
Brake pads come in two main types: organic and metallic. Organic pads feel softer and quieter. Metallic pads last longer and handle heat better. Each type needs different care. Check your bike’s manual or pad surface to identify the type. This helps choose the right cleaning method.
Effective Cleaning Techniques
Start by removing the pads from your bike. Use a clean cloth to wipe off dirt and dust. For tougher grime, use rubbing alcohol or a special brake cleaner. Avoid using oil or grease near the pads. Let the pads dry completely before reinstalling. Lightly sanding the pad surface can remove glazing and improve grip. Always handle pads with clean hands to avoid contamination.
Cleaning Brake Pads
Inspecting brake components is a key step in keeping your mountain bike safe. Dirt, mud, and dust can build up on brakes and rotors. Regular checks help spot problems early. This prevents bigger damage and keeps your brakes working well. Knowing what to look for saves time and money. It also gives you confidence on the trails.
Checking For Wear And Damage
Start by looking closely at the brake pads. Pads wear down over time and need replacing. Check if the pad surface is thin or uneven. Look for cracks or chunks missing from the pads. Next, inspect the rotors. Rotors can get scratched or bent from rough rides. A warped rotor will cause noise and poor braking. Use your fingers to feel the rotor edges. Sharp or rough edges mean damage. Clean dirt and debris before checking to see true wear.
When To Replace Pads And Rotors
Replace brake pads when the material is less than 3 millimeters thick. Thin pads reduce braking power and can damage rotors. Swap pads if they are cracked or contaminated by oil. Rotors need replacement if they are warped or deeply grooved. Also, change rotors if they are thinner than the manufacturer’s limit. New pads and rotors restore strong and smooth braking. Keep spare pads and rotors ready for quick fixes on the trail.
Preventing Brake Contamination
After cleaning your brakes and rotors, put everything back carefully. Proper reassembly ensures your bike works safely and smoothly. Testing the brakes is key before riding again. This section guides you through reinstalling wheels and checking brake performance.
Reinstalling Wheels
Place the wheel back into the fork or frame. Make sure the rotor fits correctly between brake pads. Tighten the axle or quick release securely. Spin the wheel to check for rubbing. Adjust if the rotor touches the brake pads.
Brake Performance Check
Press the brake lever firmly several times. The lever should feel firm, not spongy. Squeeze the brake to see if the wheel stops quickly. Listen for any unusual noises or rubbing sounds. Test your brakes at slow speed before riding fast.

Credit: www.youtube.com
Inspecting Brake Components
Maintaining your mountain bike’s brakes and rotors is key to safe rides. Dirt, mud, and dust can build up and reduce braking power. Regular care helps your brakes work well and last longer. Follow these simple tips to keep your bike ready for tough trails.
Regular Cleaning Schedule
Clean your brakes and rotors after every few rides. Use a soft brush or cloth to remove dirt and dust. Avoid oily or greasy cleaners that can damage brake pads. Use a brake-specific cleaner or isopropyl alcohol for the rotors. Dry the parts completely before riding again. This routine prevents build-up and keeps brakes sharp.
Signs Of Brake Issues
Listen for squealing or grinding sounds when braking. Feel if the brake lever pulls too close to the handlebar. Notice if your bike stops slower than usual. Check if rotors look warped or damaged. These signs mean your brakes need attention. Fixing problems early avoids bigger repairs and unsafe rides.
Credit: www.rei.com
Frequently Asked Questions
How Often Should I Clean My Mountain Bike Brakes?
Clean your mountain bike brakes after every few rides or when you notice dirt buildup. Regular cleaning ensures optimal braking performance and safety. Neglecting brake maintenance can lead to reduced stopping power and increased wear on components.
What Is The Best Way To Clean Bike Rotors?
Use isopropyl alcohol and a clean cloth to wipe rotors. Avoid oily or greasy cleaners as they reduce braking efficiency. Always dry rotors completely before riding to prevent rust and maintain smooth braking.
Can I Use Household Cleaners On Bike Brakes?
No, avoid household cleaners as they may damage brake pads and rotors. Use brake-specific or isopropyl alcohol-based cleaners for safe, effective cleaning. Proper cleaners preserve braking performance and extend component life.
How Do I Avoid Contaminating Brake Pads?
Handle pads with clean hands and avoid touching the rotor surface. Keep lubricants and oils away from brakes during maintenance. Contaminated pads reduce braking power and cause noise, requiring replacement.
Conclusion
Cleaning your brakes and rotors keeps your mountain bike safe and smooth. Dirt and dust can cause noise and reduce stopping power. Use gentle soap and water with a soft brush. Avoid harsh chemicals that can damage parts. Regular cleaning helps your bike last longer and perform better.
Take a few minutes after each ride to care for your brakes. Small steps make a big difference in your biking experience. Stay safe and enjoy your rides with clean brakes and rotors.

