Have you ever wondered how hard it really is to replace your brakes and rotors? You might think it’s a job only experts can handle, but what if you could save time and money by doing it yourself?
Understanding the process can give you confidence and help you avoid costly repairs down the road. You’ll discover exactly what’s involved, how tricky it can be, and whether it’s something you can tackle on your own. Keep reading—you might be surprised at how doable this task really is.
Signs Of Worn Brakes And Rotors
Brakes and rotors are key parts of your car’s safety system. Over time, they wear out and need replacement. Knowing the signs of worn brakes and rotors helps keep your car safe. Early detection can prevent bigger problems and costly repairs.
Worn brakes and rotors show clear symptoms. These signs warn you that it is time for maintenance or replacement. Watch for sounds, feelings, and visual clues while driving. These hints can save you from brake failure and accidents.
Common Brake Symptoms
Brake pads wear down with use and cause changes you can notice. One common sign is a squealing or screeching noise when you press the brake pedal. This sound comes from a small metal piece built to make noise when pads are thin. Another sign is a grinding noise, which means the pads are completely worn out.
You may also feel the brake pedal becoming soft or spongy. This means the brakes are not gripping properly. Sometimes, the car pulls to one side during braking. This uneven braking is dangerous and shows that brakes or rotors need attention.
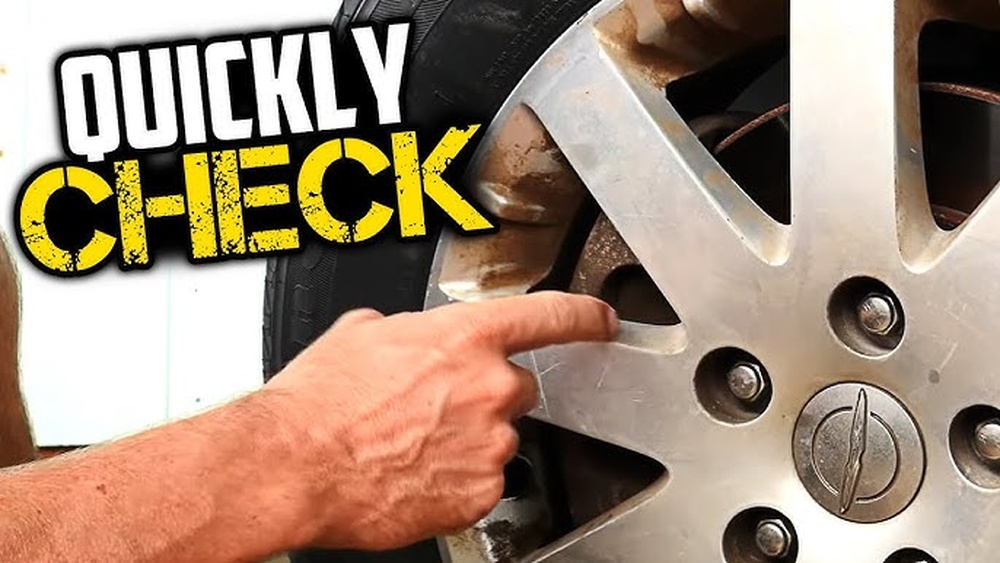
Rotor Damage Indicators
Rotors work with brake pads to stop your car. Damaged rotors cause vibrations or shaking when braking. You may feel this in the brake pedal or steering wheel. Another sign is visible grooves or scoring on the rotor surface. These marks happen when pads wear down and scrape the metal.
Rotors can also crack from too much heat. Cracks may not be easy to see but cause poor brake performance. If the rotor surface looks rusty or uneven, it needs inspection. Damaged rotors reduce braking power and increase stopping distance.
Tools And Materials Needed
Replacing brakes and rotors needs specific tools and parts. Having the right items makes the job easier and safer. Missing tools can slow down the process or cause mistakes. Preparing all tools and materials before starting saves time and stress.
Essential Tools
Start with a jack to lift the car safely. Use jack stands to keep the vehicle stable. A lug wrench helps remove the wheel nuts. A socket set is key for bolts on brakes and rotors. Brake caliper tools push back the piston easily. A C-clamp or brake piston tool works well. Screwdrivers help remove clips and dust shields. A torque wrench ensures bolts are tightened correctly. A wire brush cleans rust and dirt from parts. Gloves protect your hands from dirt and sharp edges.
Replacement Parts Checklist
New brake pads match your car’s make and model. Rotors must fit your vehicle exactly. Brake grease helps parts move smoothly. Brake cleaner removes dust and grime from new parts. New hardware kits include clips and pins needed. Brake fluid might need topping off after replacement. Check the owner’s manual for any specific parts. Having all parts ready avoids multiple trips to the store.
Step-by-step Replacement Process
Replacing brakes and rotors involves several clear steps. Each step is important for safety and performance. Understanding the process helps you decide if you want to do it yourself or hire a mechanic.
The steps include removing old parts, installing new ones, and ensuring everything fits correctly. Taking time on each part avoids mistakes and keeps your vehicle safe on the road.
Removing Old Brakes And Rotors
Start by lifting the car and removing the wheel. Use a wrench to take off the brake caliper bolts. Carefully hang the caliper with a wire to avoid strain on the brake hose. Remove the brake pads from the caliper bracket.
Next, remove the caliper bracket bolts and take off the bracket. The rotor may be stuck due to rust. Tap it gently with a rubber mallet to loosen it. Remove the rotor and clean the hub surface before installing new parts.
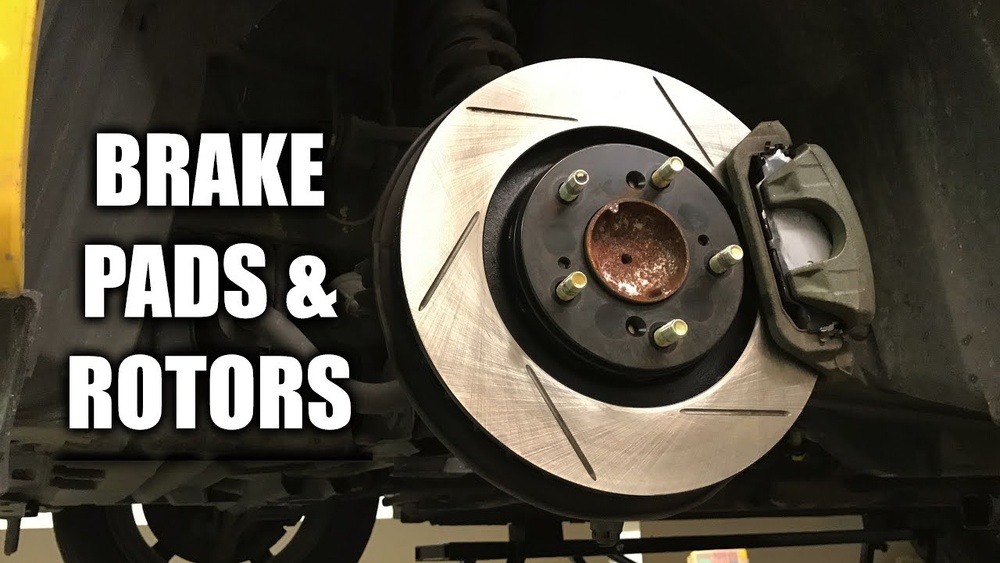
Installing New Components
Place the new rotor on the hub carefully. Reattach the caliper bracket and tighten the bolts. Insert the new brake pads into the bracket. Compress the caliper piston with a tool to fit over the new pads.
Mount the caliper back over the pads and rotor. Tighten the caliper bolts to secure it. Make sure no parts are loose or missing before moving to the next step.
Ensuring Proper Alignment
Check the rotor spins freely without rubbing. The brake pads should touch the rotor evenly. Spin the wheel by hand to feel for any resistance.
Lower the car and tighten the wheel nuts in a star pattern. Pump the brake pedal several times to set the pads. This step restores proper brake pressure before driving.

Credit: www.wikihow.com
Common Challenges And Solutions
Replacing brakes and rotors can bring some challenges. Knowing common problems helps you prepare and fix them fast. This section covers two big issues and how to handle them. Simple tips make the job easier and safer.
Dealing With Stuck Bolts
Bolts can get stuck from tight fitting or old age. Rust and dirt make them hard to turn. Use a good wrench or breaker bar for more power. Spray some penetrating oil and wait a few minutes. Tap the bolt lightly with a hammer to loosen it. Avoid too much force to stop damage. Patience helps avoid stripped bolts and extra work.
Handling Rust And Corrosion
Rust builds up on rotors and brake parts over time. It causes parts to stick or wear unevenly. Clean rusty areas with a wire brush or sandpaper. Apply anti-rust spray or brake cleaner to stop more rust. Replace parts with heavy corrosion for safety. Keep parts dry and clean to slow rust returning.
Time And Skill Level Required
Replacing brakes and rotors requires some time and skill. The job is not very hard but needs care. Knowing how long it takes and the skill level helps you decide if you can do it yourself. This section explains the time needed and offers tips for beginners.
Estimated Duration
Replacing brakes and rotors usually takes about 1 to 2 hours. This depends on the car model and tools available. Experienced mechanics often finish faster. Beginners may take longer due to careful steps.
Simple jobs like changing brake pads can take around 30 to 45 minutes. Replacing rotors adds extra time. Cleaning and inspecting parts also add minutes. Taking time ensures safety and proper work.
Skill Tips For Beginners
Start by reading the car manual carefully. Use the right tools for the job. Wear gloves and eye protection to stay safe. Keep parts organized to avoid confusion.
Work slowly and check each step twice. Watch online videos for visual help. Ask someone with experience for advice if unsure. Practice patience. Mistakes can cost more time and money.

Credit: vatire.com
Safety Precautions During Replacement
Replacing brakes and rotors requires care and attention to safety. Taking the right precautions helps avoid injuries and damage. Safety measures protect both you and your vehicle during the process.
Proper Lifting And Support
Always lift the car on a flat, solid surface. Use a reliable jack to raise the vehicle. Never rely on the jack alone. Place jack stands under the frame for extra support. Make sure the car is stable before working under it. Double-check the stands and jack placement. This prevents the vehicle from falling unexpectedly.
Protective Gear Recommendations
Wear safety glasses to protect your eyes from dust and debris. Use gloves to keep your hands clean and safe from sharp edges. Consider wearing a dust mask to avoid inhaling brake dust. Dress in long sleeves and pants to protect your skin. Avoid loose clothing that can get caught in tools or parts.
Cost Comparison: Diy Vs Professional Service
Replacing brakes and rotors involves costs that differ a lot. Choosing between doing it yourself or hiring a professional depends on these expenses. Knowing the cost breakdown helps make a smart choice. Below, we explore the main costs in both options.
Parts And Tool Expenses
Buying brake pads and rotors costs about $50 to $150. Quality parts might cost more but last longer. DIY work needs tools like a jack, wrench, and brake caliper tool. These tools can cost $30 to $100 if you don’t own them. Professionals already have these tools included in their service price. For simple repairs, parts cost is the main expense in DIY.
Labor Costs
Labor for brake and rotor replacement usually costs $100 to $200. This depends on your car model and location. Professionals work fast, so you pay for skill and time saved. DIY labor costs are zero but take several hours, risking mistakes. Mistakes can lead to extra costs or unsafe brakes. Labor is the biggest price difference between DIY and professional service.
Post-replacement Testing
After replacing brakes and rotors, testing is very important. It ensures the new parts work well and keep you safe. Proper testing can find problems early. It helps avoid brake failure or uneven wear. Taking time for post-replacement testing means better performance and longer part life.
Brake Performance Checks
Start by pressing the brake pedal several times. The pedal should feel firm, not soft or spongy. Next, test the brakes at low speed in a safe area. The car should stop smoothly without pulling to one side. Listen for unusual noises like grinding or squealing. Check if the brake warning light stays off. These simple checks confirm the brakes are working properly.
Rotor Runout Inspection
Rotor runout means the rotor may wobble while spinning. This wobble causes brake vibration and uneven pad wear. Use a dial indicator tool to measure runout. The tool shows if the rotor surface moves more than allowed. If runout is too high, the rotor may need resurfacing or replacement. Checking rotor runout helps keep braking smooth and safe.

Credit: www.reddit.com
Frequently Asked Questions
How Hard Is It To Replace Brake Pads And Rotors?
Replacing brake pads and rotors requires basic mechanical skills and tools. It takes about 1-2 hours for beginners. Proper safety and correct procedures are essential. With patience, it is manageable but might be challenging for first-timers.
What Tools Do I Need To Replace Brakes And Rotors?
You need a jack, lug wrench, socket set, C-clamp, and screwdrivers. Some vehicles require specific tools like a brake caliper tool. Having the right tools ensures safety and efficiency during replacement.
Can I Replace Brakes And Rotors Without Professional Help?
Yes, if you have mechanical skills and proper tools. Follow a reliable guide or tutorial. Mistakes can affect braking safety, so know your limits and consider professional help if unsure.
How Often Should Brake Pads And Rotors Be Replaced?
Brake pads typically need replacement every 30,000 to 70,000 miles. Rotors last longer but should be checked for wear or warping. Regular inspections help determine the right replacement time.
Conclusion
Replacing brakes and rotors takes some basic tools and patience. It is not too hard but needs care and focus. Knowing each step helps avoid mistakes and keeps you safe. Taking your time makes the job easier and less stressful.
You can save money by doing it yourself. Just follow instructions closely and check your work. Brake and rotor replacement is doable for many car owners. A little effort goes a long way to keep your vehicle running well.