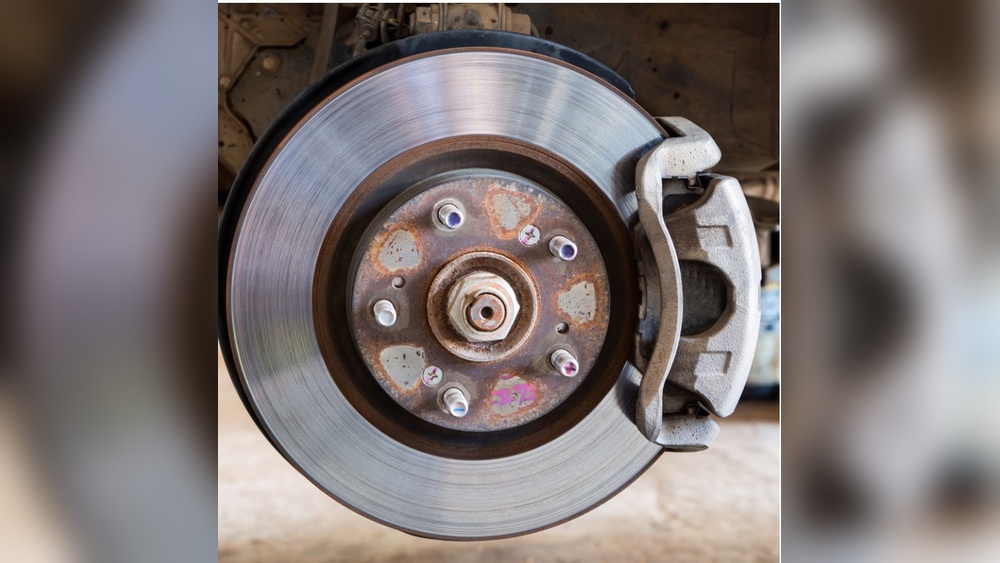
How easy is it to change brakes and rotors? If you’ve ever wondered whether you can do this yourself, you’re not alone.
Changing brakes and rotors might sound complicated, but with the right steps, it can be simpler than you think. Imagine saving money, gaining confidence, and keeping your car in top shape—all by doing this job on your own. You’ll discover exactly what it takes, what tools you need, and how to avoid common mistakes.
By the end, you’ll know if this is a task you can tackle or if it’s better left to the pros. Ready to find out? Let’s dive in.
Tools And Materials Needed
Changing brakes and rotors requires some basic tools and materials. Having the right items makes the job easier and safer. Knowing what you need helps you prepare and avoid interruptions.
Essential Tools
Start with a jack to lift the car. Use jack stands for safety. A lug wrench removes the wheel nuts. A socket set helps take off bolts on the brake caliper. A C-clamp or brake piston tool pushes the piston back. A screwdriver or pry bar may be needed to remove old parts. A torque wrench tightens bolts to the right strength.
Replacement Parts
New brake pads are necessary for each wheel. Choose pads that fit your car model. New rotors replace worn or damaged ones. Some rotors come with a protective coating to prevent rust. Brake grease helps parts move smoothly. Brake cleaner removes dust and dirt during the process.
Safety Gear
Wear gloves to protect your hands. Safety glasses keep dirt and debris out of your eyes. Use a dust mask to avoid breathing brake dust. Work on a flat surface to prevent accidents. Always keep a fire extinguisher nearby in case of emergencies.
Preparing Your Vehicle
Preparing your vehicle is the first key step in changing brakes and rotors. Proper setup ensures safety and makes the job easier. Taking time now can save trouble later. Follow simple steps to get your car ready.
Parking And Securing
Park your car on a flat, stable surface. Avoid slopes or soft ground. Engage the parking brake firmly to stop movement. Place wheel chocks behind the wheels that stay on the ground. This prevents the car from rolling. Always double-check that the car is secure before lifting it.
Removing The Wheel
Use a lug wrench to loosen the wheel nuts slightly before lifting. Never remove them completely while the car is on the ground. Use a jack to raise the car safely. Position the jack under the correct lift point shown in your owner’s manual. After lifting, remove the lug nuts fully and take off the wheel. Keep the nuts in a safe place for later use.
Removing Old Brakes And Rotors
Removing old brakes and rotors is a key step in brake maintenance. It lets you prepare the parts for replacement. This process is straightforward with the right tools and steps. Safety is important; always secure the vehicle before starting. The process starts with detaching the brake caliper, then taking out the brake pads, and finally removing the rotor.
Detaching Brake Caliper
First, locate the brake caliper. Use a wrench to remove the bolts holding it in place. Be careful not to damage the brake line attached to the caliper. Gently lift the caliper away from the rotor. Support it with a hanger or rest it on a stable surface. Avoid letting it hang by the brake line to prevent damage.
Taking Out Brake Pads
Brake pads sit inside the caliper bracket. Pull the pads out carefully. Check for any clips or pins that hold them in place. Remove these fasteners before taking out the pads. Inspect the old pads for wear to compare with new ones. Keep track of their position for easier reassembly.
Removing The Rotor
Rotors often sit tight on the wheel hub. Remove any screws or clips that hold the rotor. Tap the rotor gently with a rubber mallet if it sticks. Avoid using metal tools that can damage the rotor surface. Slide the rotor off the hub carefully. Clean the hub before installing the new rotor.

Credit: www.youtube.com
Installing New Brakes And Rotors
Installing new brakes and rotors is a key step in car maintenance. It keeps your vehicle safe and running smoothly. The process involves several clear steps. Each step requires care and attention to detail. This guide explains the main parts of the installation.
Cleaning The Hub
Start by cleaning the hub surface. Remove rust and dirt with a wire brush. A clean hub ensures the rotor sits evenly. This prevents wobbling and noise during driving. Use brake cleaner for a final wipe. Let the area dry completely before moving on.
Mounting The New Rotor
Place the new rotor onto the hub carefully. Align it so it fits snugly over the wheel studs. Some rotors have screws to hold them in place. Tighten these screws lightly. Avoid forcing the rotor or it may bend. Check that it spins freely without rubbing.
Inserting New Brake Pads
Next, prepare to insert the new brake pads. Compress the caliper piston with a C-clamp or brake tool. This creates space for the thicker pads. Slide the pads into the caliper bracket. Make sure they fit tightly and align with the rotor. Do not touch the pad surface with greasy hands.
Reattaching Brake Caliper
Finally, reattach the brake caliper over the pads. Align it with the mounting bolts and tighten securely. Check that the caliper moves smoothly on its slides. Reconnect any brake hardware or sensors. Test the brake pedal for firmness before driving.
Final Checks And Testing
Final checks and testing are crucial after changing brakes and rotors. They ensure everything works safely and correctly. Skipping these steps can cause brake failure or damage. Taking time now avoids problems later.
Reinstalling The Wheel
Place the wheel back onto the hub carefully. Align the holes with the wheel studs. Hand-tighten the lug nuts to keep the wheel in place. Avoid using power tools at this stage. This prevents cross-threading or damage to the studs.
Lowering The Vehicle
Slowly lower the vehicle using the jack. Keep the jack steady during this process. Once the car is on the ground, tighten the lug nuts fully. Use a torque wrench for accurate tightness. Proper torque prevents wheel wobble and unsafe conditions.
Brake Performance Test
Press the brake pedal several times before driving. This helps build pressure in the brake system. Start driving slowly in a safe area. Test the brakes with gentle stops first. Listen for unusual noises or vibrations. Confirm the brakes respond smoothly and firmly.

Credit: vatire.com
Common Challenges And Tips
Changing brakes and rotors can be straightforward but has common challenges. These issues can slow you down or cause mistakes. Understanding these challenges and following simple tips helps the job go smoothly. It also improves safety and brake performance.
Dealing With Rust And Stuck Parts
Rust often forms on brake parts, making removal hard. Stuck bolts and seized calipers are common problems. Use a rust penetrant spray to loosen stuck bolts. Let it sit for a few minutes before trying again. Tap gently with a hammer if parts do not move. Avoid using too much force to prevent damage.
Avoiding Brake Noise
Brake noise annoys most drivers. It usually comes from poor installation or dirty parts. Clean rotors and pads before fitting them. Use brake grease on contact points to reduce noise. Check that all bolts are tight but not over-tightened. Worn parts should be replaced to avoid squealing or grinding sounds.
When To Seek Professional Help
Some brake jobs require expert skills and tools. If parts are badly stuck or damaged, call a mechanic. Brake systems are vital for safety. Mistakes can lead to serious accidents. When unsure about the process, ask a professional. It saves time, money, and keeps you safe on the road.

Credit: www.wikihow.com
Frequently Asked Questions
How Long Does It Take To Change Brakes And Rotors?
Changing brakes and rotors usually takes 1 to 2 hours for a beginner. Experienced mechanics may complete it faster. Time depends on the vehicle type and tools used. Proper preparation speeds up the process and ensures safety.
What Tools Are Needed To Change Brakes And Rotors?
Basic tools include a jack, lug wrench, socket set, C-clamp, and brake cleaner. A torque wrench helps tighten bolts correctly. Having the right tools makes the job easier and safer. Some vehicles may require specialized tools.
Can I Change Brakes And Rotors Myself Safely?
Yes, with proper knowledge, tools, and safety precautions, DIY brake and rotor changes are possible. Follow vehicle manuals and wear safety gear. If unsure, consult a professional to avoid risks and ensure correct installation.
How Do I Know When To Change Brakes And Rotors?
Signs include squeaking brakes, vibration, reduced braking power, and visible rotor wear. Regular inspections help detect issues early. Replacing worn parts maintains vehicle safety and performance. Always follow manufacturer recommendations for replacement intervals.
Conclusion
Changing brakes and rotors is not as hard as it seems. With basic tools and clear steps, anyone can try it. Take your time and follow safety rules closely. Doing this job yourself can save money and help you learn.
Remember to check everything twice before finishing. It feels good to keep your car safe and working well. Practice makes perfect, so don’t worry if it takes time. Overall, it’s a doable task with patience and care.