Are your brakes making strange noises or feeling less responsive? You might be wondering, how hard is it to replace rotors and brake pads yourself.
It may sound complicated, but with the right guidance, you could save time and money by doing it on your own. You’ll discover exactly what’s involved, step-by-step, so you can decide if this is a job you want to tackle.
Keep reading, because knowing the truth about brake repair might just give you the confidence to get your hands dirty and keep your car safe.

Credit: www.reddit.com
Tools Needed
Replacing rotors and brake pads requires certain tools. Having the right tools makes the job safer and easier. Without them, the process can become frustrating and slow. This section covers the essential tools you need. Understanding these tools helps you prepare before starting the work.
Basic Tools List
Start with a simple set of tools. A jack and jack stands lift and hold the car safely. Lug wrench or tire iron removes the wheel bolts. A socket set helps to remove caliper bolts and other fasteners. A C-clamp or brake piston tool pushes the brake caliper piston back. A flat-head screwdriver helps pry off clips and pads. A hammer may be needed to loosen stuck rotors. Gloves protect your hands from dirt and sharp edges.
Specialized Equipment
Some tasks require special tools. A brake caliper wind-back tool is useful for certain vehicles. A torque wrench ensures bolts are tightened to the correct specifications. A brake cleaner spray removes dust and grease from parts. A wire brush cleans rust and debris from the rotor hub. These tools improve the quality of the repair and reduce mistakes.
Preparation Steps
Preparation is key before starting to replace rotors and brake pads. Proper steps help ensure safety and make the job easier. Skipping these steps can cause problems and delays. Take your time to prepare well.
Gather the right tools and materials. Check the new parts to match your vehicle model. Clear a clean workspace to keep parts organized. Now, let’s discuss important preparation steps.
Safety Precautions
Wear gloves to protect your hands from dirt and sharp edges. Use safety glasses to guard your eyes from dust and debris. Work on a flat, stable surface to prevent the car from moving. Always use wheel chocks to block the wheels. Never rely on a jack alone; use jack stands to support the vehicle. Safety is the top priority in brake work.
Vehicle Positioning
Park your car on a level ground. Engage the parking brake fully to keep the vehicle still. Place wheel chocks behind the wheels that stay on the ground. Loosen the lug nuts slightly before lifting the car. Use a reliable jack to raise the car high enough to remove the wheel. Secure the car with jack stands before working under it. Proper positioning makes the job safer and smoother.
Removing Old Brake Pads
Removing old brake pads is a key step in replacing rotors and pads. It needs care and the right tools. Doing this well helps your brakes work safely and smoothly.
Each part must be handled carefully. Old pads can be stuck or dirty. Taking your time avoids damage and keeps everything in good shape.
Wheel Removal
First, loosen the wheel nuts before lifting the car. Use a jack to raise the vehicle safely. Remove the wheel to see the brake parts clearly. This step gives you easy access to the brake pads.
Caliper Detachment
Locate the brake caliper above the rotor. Use a wrench to remove the bolts holding it in place. Gently pull the caliper away from the rotor. Support the caliper so it does not hang by the brake hose.
Pad Extraction
Old brake pads sit inside the caliper bracket. Slide them out carefully. They may be tight or stuck from use. Use a small tool or your fingers to free the pads. Check the pads for wear and damage before discarding.
Replacing Rotors
Replacing rotors is a key step in maintaining your vehicle’s brake system. It helps keep your brakes working well and ensures safety on the road. The process involves removing the old rotors, checking the parts, and fitting new ones. Each step requires some care and the right tools.
Rotor Removal
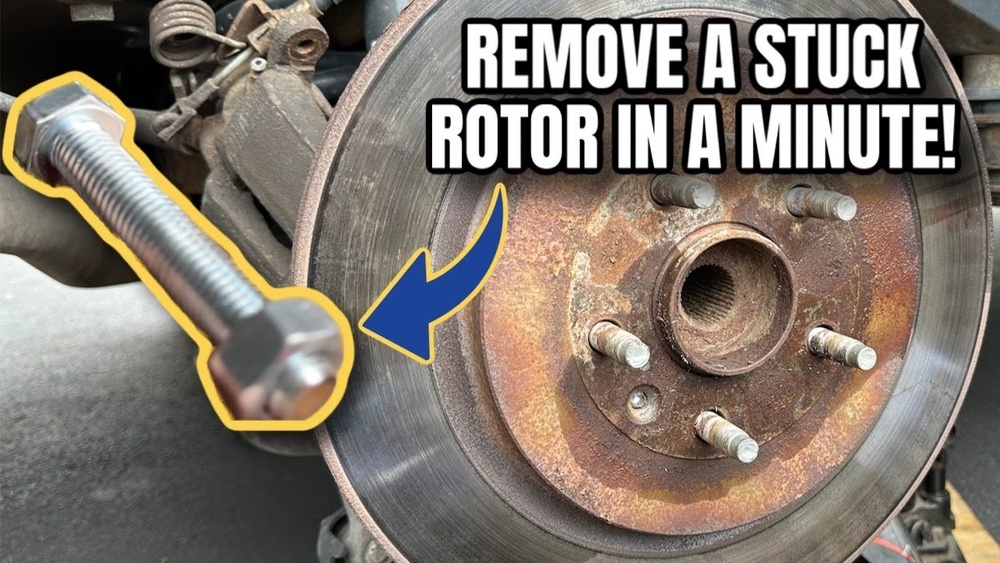
Start by lifting the vehicle and removing the wheel. Next, take off the brake caliper carefully. Use a wrench to remove the bolts holding the rotor. Sometimes, the rotor may stick due to rust. Tap it gently with a hammer to loosen it. Removing the rotor can take time if it is stuck tight.
Cleaning And Inspection
After removal, clean the hub surface. Use a wire brush to remove rust and dirt. Check the rotor for cracks or deep grooves. Also, inspect brake pads and caliper parts. Any damaged parts should be replaced. Clean parts help the new rotor fit well and work properly.
Installing New Rotors
Place the new rotor onto the hub carefully. Align it with the bolt holes. Tighten the rotor bolts securely but do not overtighten. Reinstall the brake caliper and pads. Make sure all parts fit tightly and work smoothly. Test the brakes lightly before driving. Proper installation ensures good brake performance and safety.
Installing New Brake Pads
Installing new brake pads is a key step in replacing rotors and brake pads. It ensures your brakes work smoothly and safely. This process requires care and attention to detail. Each part must fit perfectly to avoid problems later.
Applying Brake Grease
Start by applying brake grease to the back of the brake pads. This helps reduce noise and vibration. Use only a small amount on the metal parts. Avoid getting grease on the pad surface. This keeps the brakes effective and quiet.
Positioning Pads
Next, place the new brake pads into the caliper bracket. Make sure they fit snugly and align properly. The pads must sit flat against the rotor surface. Check both sides carefully before moving on. Proper positioning prevents uneven wear and brake issues.
Reattaching Caliper
Finally, reattach the caliper over the brake pads. Secure it with the bolts and tighten them to spec. Avoid overtightening, which can damage parts. Once attached, check that the caliper moves freely. This step restores the brake system’s function and safety.
.jpg)
Credit: www.cbac.com
Final Checks
After replacing rotors and brake pads, final checks are crucial. These steps ensure your brakes work well and keep you safe. Never skip these simple but important tests.
Brake Fluid Level
Check the brake fluid reservoir under the hood. The fluid should be between the minimum and maximum marks. Low brake fluid can cause poor braking performance. Add the correct type of brake fluid if needed.
Brake Pedal Test
Press the brake pedal gently with your foot. It should feel firm and steady. A soft or spongy pedal means air might be in the brake lines. Pump the pedal a few times to build pressure before driving.
Test Drive Tips
Start driving slowly in a safe area. Test the brakes with light pressure at first. Listen for unusual noises or vibrations. Gradually increase brake pressure to ensure full stopping power. Stop immediately if you notice any problems.
Common Challenges
Replacing rotors and brake pads seems simple but often has common challenges. These problems can slow down the process and cause frustration. Knowing these issues helps prepare better and avoid mistakes.
Stuck Bolts
Bolts holding the rotor and pads often get stuck. Rust and dirt cause them to seize tightly. Removing stuck bolts needs extra tools and patience. Applying penetrating oil and using the right wrench helps. Careful effort prevents stripping or breaking the bolts.
Warped Rotors
Rotors may warp due to heat or wear. Warped rotors cause vibration and uneven braking. Replacing them is necessary to restore smooth braking. Checking for warping before installation saves time. Proper installation avoids future warping problems.
Uneven Pad Wear
Brake pads wear unevenly from poor alignment or caliper issues. Uneven wear reduces braking efficiency and safety. Inspecting calipers and sliders helps identify the cause. Replacing pads without fixing the root problem leads to quick wear again.

Credit: vatire.com
Time And Skill Estimates
Replacing rotors and brake pads takes both time and skill. Knowing what to expect helps plan the repair properly. The job varies based on experience and tools available. It can be a quick task or a longer project.
Beginner Timelines
Beginners usually take 2 to 4 hours to replace brake parts. This includes removing the wheels, old pads, and rotors. Extra time is needed for cleaning and checking parts. Slower work avoids mistakes and ensures safety. Rushing can cause errors or damage.
Having the right tools speeds up the process. Common tools include a jack, lug wrench, and socket set. A brake caliper tool helps compress pistons easily. Watching video guides before starting can save time. Taking breaks helps keep focus and precision.
Expert Tips
Experts often finish the job in 1 to 2 hours. They know how to quickly remove stuck parts and avoid common problems. Using power tools reduces manual effort and time. Experts check the brake system carefully for wear or leaks.
Proper torque on bolts is important to avoid future issues. Experts clean all brake components thoroughly before assembly. They test brakes after replacement to ensure full function. Good lighting and organized tools make the work smoother. Experience helps spot potential problems early.
Frequently Asked Questions
How Difficult Is Replacing Brake Rotors And Pads?
Replacing brake rotors and pads requires moderate mechanical skills. Basic tools and safety knowledge are essential. Following a step-by-step guide simplifies the process. It usually takes 1-2 hours for an average DIYer. Proper care ensures safe and effective brake performance.
Can I Replace Rotors And Brake Pads Myself?
Yes, you can replace rotors and pads yourself if you have basic tools and mechanical know-how. Watch tutorials, follow safety steps, and ensure you have the correct parts. This DIY task saves money and helps you understand your vehicle better.
What Tools Are Needed To Replace Rotors And Pads?
You need a jack, lug wrench, socket set, C-clamp, and brake cleaner. Additional tools include a torque wrench and screwdriver. Having the right tools ensures a smooth and safe brake replacement process.
How Often Should Brake Rotors And Pads Be Replaced?
Brake pads typically need replacement every 30,000-70,000 miles. Rotors last longer but may need replacement every 50,000-70,000 miles. Regular inspections help detect wear early and maintain braking efficiency.
Conclusion
Replacing rotors and brake pads takes some effort but is doable. You need basic tools and careful steps. It helps to follow clear instructions or videos. Take your time to avoid mistakes and ensure safety. With patience, you can save money and learn new skills.
Remember to check your work before driving. Regular brake care keeps your car safe on the road. Simple tasks can make a big difference in vehicle performance.