

Wondering how long it takes to replace your front brakes and rotors? Knowing the answer can save you time, stress, and even money.
Your brakes are one of the most important parts of your car, and keeping them in good shape means safer drives and smoother stops. You’ll discover exactly how long the job should take, what affects the timing, and why it’s crucial not to wait too long.
Stick with me, and you’ll be ready to handle your brake repair like a pro.
.jpg)
Credit: www.cbac.com
Signs You Need Front Brake Replacement
Front brakes wear down over time. Knowing the signs helps keep you safe on the road. Early detection can save money and avoid bigger repairs. Watch for these key signs that mean your front brakes need replacement.
Squeaking And Grinding Noises
High-pitched squeaks often mean brake pads are worn out. Grinding sounds show metal parts rubbing together. This noise is a clear warning to replace brakes soon. Ignoring these sounds can damage rotors and raise repair costs.
Vibrations When Braking
Feel shaking or pulsing in the brake pedal? Vibrations often mean warped rotors. Warped rotors reduce braking control and safety. Changing the rotors and pads fixes this problem fast.
Visible Rotor Damage
Look at the rotors through the wheel spokes. Deep grooves, cracks, or rust are bad signs. Damaged rotors affect braking power and need immediate attention. Clean rotors should look smooth and even.
Reduced Braking Performance
Slower stopping or longer brake pedal travel can signal brake wear. The car may pull to one side while braking. These issues mean your brakes don’t work well anymore. Replace pads and rotors to restore full braking strength.

Credit: www.youtube.com
Tools And Materials Required
Replacing front brakes and rotors requires specific tools and materials. Having the right equipment makes the job easier and safer. This section covers the basic tools and items you need to complete the task efficiently.
Basic Hand Tools
Start with common hand tools. A socket wrench set is essential for removing bolts. You also need a flathead screwdriver to pry off parts carefully. A C-clamp helps to compress the brake caliper piston. A lug wrench is necessary to remove the wheel nuts. These simple tools are the foundation of any brake job.
Brake Pads And Rotors
New brake pads and rotors must match your vehicle’s make and model. Choose high-quality parts for better performance and safety. Always replace both pads and rotors together for even wear. Check the specifications to ensure proper fit and function.
Safety Equipment
Safety gear protects you during the brake replacement. Wear gloves to avoid cuts and dirt. Use safety glasses to shield your eyes from dust and debris. A dust mask prevents inhaling brake dust, which can be harmful. Proper safety equipment keeps the job safe and clean.
Brake Cleaner And Lubricants
Brake cleaner removes dust and grease from rotors and pads. Spray it generously on parts before installation. Use brake lubricant on caliper slides and contact points. This prevents squeaking and ensures smooth brake function. Clean parts and proper lubrication improve brake life.
Step-by-step Replacement Process
Replacing front brakes and rotors is a task that anyone can do with the right steps. This guide breaks down the process into clear, simple actions. Each step is important to ensure safety and good performance. Follow along to understand how long it takes and what to expect.
Lifting And Securing The Vehicle
Start by parking on a flat surface. Use a jack to lift the front of the car. Secure the vehicle with jack stands. Never rely on the jack alone. This keeps the car stable and safe during work.
Removing The Wheel
Loosen the lug nuts with a wrench before lifting. Remove the nuts completely once the car is raised. Take off the wheel carefully. Set it aside where it won’t roll or get damaged.
Taking Off The Old Brake Pads
Locate the brake caliper. Remove the bolts holding it in place. Lift the caliper off the rotor. Be careful not to stretch the brake line. Slide out the old brake pads. Inspect them for wear and damage.
Removing And Inspecting The Rotors
Remove any screws or clips on the rotor. Pull the rotor off the hub. Check the rotor surface for grooves or rust. Measure thickness to see if replacement is needed. Clean the hub before installing a new rotor.
Installing New Rotors And Pads
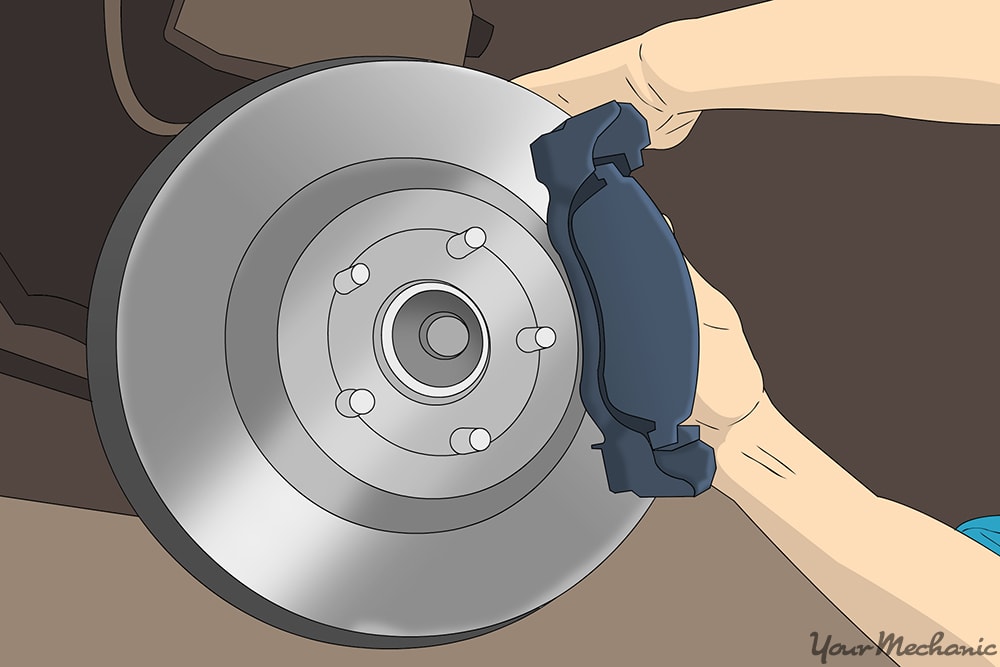
Place the new rotor onto the hub. Secure it with screws or clips. Insert new brake pads into the caliper bracket. Compress the caliper piston to fit over the pads. Reinstall the caliper carefully onto the rotor.
Reassembling And Testing
Put the wheel back on the hub. Tighten the lug nuts by hand first. Lower the car and then fully tighten the nuts. Press the brake pedal several times to set the pads. Test drive slowly to ensure brakes work well.
Estimated Time For Replacement
Knowing the estimated time to replace front brakes and rotors helps plan your car maintenance. It varies based on skills and conditions. Understanding these times can make the process less stressful.
Average Time For Beginners
Beginners usually take 2 to 3 hours to replace front brakes and rotors. They need more time to remove parts carefully. Reading instructions and double-checking work adds to the time. Taking time helps avoid mistakes and ensures safety.
Time For Experienced Mechanics
Experienced mechanics often finish the job in 45 minutes to 1 hour. They know the steps and tools well. Their speed comes from practice and skill. Quick work does not mean rushing but working smartly.
Factors Affecting Replacement Time
Several factors can change the time needed to replace brakes and rotors. Rusty or stuck parts take longer to remove. Different car models have different designs and parts. The condition of the tools and workspace also matters. Weather and lighting can affect how fast one works.
Tips For Quick And Safe Brake Replacement
Replacing front brakes and rotors can be quick and safe with the right approach. Proper preparation and careful steps reduce risks and save time. Follow these tips to get the job done smoothly and securely.
Prepping Your Workspace
Clear the area around your car. Remove any tools or objects that might cause trips. Good lighting helps you see parts clearly. Lay down a clean cloth or mat to keep small parts from rolling away. Keep a container nearby for bolts and screws. A tidy workspace speeds up the process.
Using The Right Tools
Use tools made for brake work. A jack and jack stands keep the car stable. A lug wrench removes the wheel nuts easily. Brake caliper tools help press pistons back safely. Avoid using worn or broken tools. Proper tools prevent damage and make work faster.
Checking Brake Fluid
Brake fluid affects how your brakes work. Check the fluid level before starting. Low fluid might mean a leak or worn brakes. After replacing parts, top up the brake fluid if needed. Use the type your car’s manual recommends. Clean fluid keeps brakes responsive and safe.
Post-replacement Brake Testing
Test brakes in a safe space after installation. Press the brake pedal slowly to feel firmness. Listen for unusual sounds like squeaks or grinding. Drive at low speed to check brake response. If brakes feel soft or weak, recheck your work. Testing ensures your brakes work properly.
Common Mistakes To Avoid
Replacing front brakes and rotors requires care and attention. Avoiding common mistakes helps ensure safety and better performance. Many drivers make errors that can cause damage or reduce brake life.
Understanding these mistakes saves time and money. It also keeps your vehicle working properly. Below are common errors to avoid during brake and rotor replacement.
Ignoring Rotor Condition
Rotors must be checked carefully before replacement. Damaged or worn rotors can cause brake noise and vibration. Installing new pads on bad rotors leads to quick wear. Always inspect rotors for cracks, grooves, or warping.
Overtightening Bolts
Bolts hold the brake parts firmly. Tighten them to the right torque only. Too tight bolts can strip threads or warp rotors. Use a torque wrench to avoid over-tightening. Follow the manufacturer’s torque specifications strictly.
Skipping Test Drive
After replacing brakes and rotors, test drive is essential. It helps check brake feel and performance. Skipping this step can hide problems like noise or pulling. Drive slowly at first to ensure brakes work smoothly.
Not Using Safety Gear
Safety gear protects you during brake work. Gloves prevent cuts and dirt on hands. Safety glasses protect eyes from dust and debris. Avoid working without proper protection to stay safe and clean.
Credit: www.yourmechanic.com
Frequently Asked Questions
How Long Does It Take To Replace Front Brakes And Rotors?
Replacing front brakes and rotors typically takes about 1 to 2 hours. The exact time depends on vehicle type and mechanic experience. Proper tools and preparation can speed up the process. DIY replacements may take longer for beginners.
Can I Drive Immediately After Replacing Brakes And Rotors?
Yes, but avoid hard braking for the first 100 miles. This allows brake pads to properly bed in. Soft braking helps ensure maximum braking performance and safety. Follow any specific break-in instructions from your mechanic or manufacturer.
What Factors Affect Brake And Rotor Replacement Time?
Vehicle make, model, and rotor size impact replacement time. The mechanic’s skill and equipment quality also matter. Additional repairs like caliper or brake line issues can extend the process. Proper cleaning and inspection add to total time.
Is It Cheaper To Replace Brakes And Rotors Together?
Yes, replacing both simultaneously saves money on labor costs. It also ensures balanced braking performance and longer component life. Doing both reduces future repair frequency and improves overall vehicle safety.
Conclusion
Replacing front brakes and rotors usually takes about one to two hours. This depends on your car model and mechanic’s experience. Regular checks help you know when to replace them. Worn brakes can cause safety risks. Don’t wait until you hear loud noises or feel vibrations.
Timely replacement keeps your car safe and running smoothly. Always trust a professional for this job. Remember, good brakes protect you and others on the road. Stay safe by keeping your brakes in good shape.
