Applying vinyl wrap to curves can seem tricky at first. You might worry about wrinkles, bubbles, or the wrap not sticking right.
But what if you could master this skill with simple steps? Imagine giving your car, furniture, or gadgets a flawless, custom look that turns heads. In this guide, you’ll discover easy, practical tips to handle curves like a pro. By the end, you’ll feel confident and ready to transform any surface smoothly.
Ready to learn how to make your vinyl wrap look perfect on every curve? Let’s dive in!

Credit: www.rickandanns.com
Choosing The Right Vinyl Wrap
Choosing the right vinyl wrap is key to a smooth application on curves. The right material makes wrapping easier and the result neater. This section explains how to pick vinyl that fits curved surfaces well. Consider vinyl type, adhesive strength, color, and finish to get the best outcome.
Types Of Vinyl For Curves
Some vinyl films stretch better than others. Cast vinyl is flexible and fits curves smoothly. It molds to shapes without bubbling or wrinkling. Calendered vinyl is less stretchy and best for flat surfaces. Choose cast vinyl for complex curves and bends.
Selecting The Best Adhesive
Adhesive type affects how well vinyl sticks on curves. Permanent adhesives hold firmly but can be hard to remove. Removable adhesives allow repositioning and are less sticky. Pressure-sensitive adhesives react to touch and heat for better grip. Pick adhesives made for curved surfaces to prevent peeling.
Color And Finish Considerations
Color and finish impact the final look on curves. Matte finishes hide imperfections better than glossy ones. Glossy vinyl shows reflections and looks shiny. Dark colors may show stretch marks more clearly. Light or metallic colors often mask small flaws on curves.
Preparing The Surface
Preparing the surface is the first step to apply vinyl wrap on curves successfully. A smooth, clean surface helps the vinyl stick better. It also avoids bubbles and wrinkles during application. Proper preparation saves time and effort later.
Take your time with this step. The surface must be perfect before you start wrapping. Follow the right cleaning and setup methods to get the best result.
Cleaning Techniques
Use a mild soap and water to wash the surface. Remove all dirt, dust, and grease spots. Rinse well and dry with a clean cloth. Avoid using oily or waxy cleaners. They leave a residue that stops vinyl from sticking well.
After washing, wipe the area with rubbing alcohol. This removes any leftover oils. Use a lint-free cloth for this step. It ensures the surface is completely clean and ready.
Removing Imperfections
Check the surface for scratches, dents, or bumps. Use fine sandpaper to smooth rough spots gently. Fill deep scratches or holes with body filler. Let it dry completely, then sand it smooth. Imperfections cause bubbles under the vinyl. Fixing them first gives a flat surface to work on.
Remove any old stickers or decals carefully. Clean off sticky residue with adhesive remover. This prevents lifting and peeling of the new vinyl wrap.
Temperature And Environment Setup
Apply vinyl wrap in a warm, dust-free place. Ideal temperature is between 60°F and 80°F (15°C and 27°C). Cold weather makes vinyl stiff and hard to stretch. Heat helps vinyl become flexible for curves.
Keep the work area clean and dry. Dust or moisture can trap under the vinyl. Use a fan or air purifier if needed. Good lighting helps spot any mistakes early. Prepare the environment to avoid problems during application.
Tools For Vinyl Wrapping
Applying vinyl wrap to curves requires the right tools. The right equipment makes the process easier and improves results. Each tool has a specific role to help shape, cut, and fix the vinyl smoothly. Understanding these tools helps anyone wrap curved surfaces better.
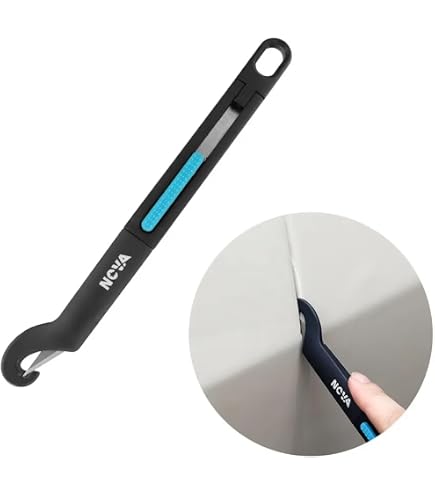
Essential Application Tools
A squeegee is a must-have for applying vinyl. It smooths out air bubbles and wrinkles during installation. Use soft felt edges to avoid scratches on the vinyl. Gloves help keep the vinyl clean and prevent fingerprints. A measuring tape ensures precise cuts and placement.
Heating Devices For Flexibility
Heat guns and hair dryers soften vinyl, making it flexible. Warm vinyl stretches easily around curves without tearing. Heat controls the vinyl’s shape and adhesion. Avoid overheating, which can damage the material. Use gentle, even heat for best results.
Cutting And Trimming Tools
Sharp utility knives or craft blades cut vinyl with clean edges. Precision is key to avoid jagged or uneven cuts. Use a cutting mat to protect surfaces and blades. Scissors can trim small pieces but are less precise. Always replace dull blades to maintain clean cuts.

Credit: www.youtube.com
Techniques For Wrapping Curves
Applying vinyl wrap to curves requires some special techniques. Curved surfaces can be tricky to cover without wrinkles or bubbles. Using the right methods helps the vinyl fit smoothly over rounded edges. The vinyl must stretch gently and stick firmly for a clean look.
Stretching And Heating Methods
Heat softens the vinyl, making it easier to stretch. Use a heat gun or hair dryer on low heat. Warm the vinyl evenly to avoid damage. Stretch the vinyl gently over the curve. Do not pull too hard, or it may tear. Keep the vinyl warm to maintain flexibility.
Managing Overlaps And Seams
Curves often need small overlaps to cover fully. Cut the vinyl into sections if needed. Overlap edges slightly for a seamless look. Use a squeegee to press down overlaps firmly. Trim excess vinyl carefully to avoid bulk. Proper seam handling makes the wrap last longer.
Avoiding Air Bubbles And Wrinkles
Start applying vinyl from the center of the curve. Push air outwards with a squeegee. Work slowly to catch bubbles early. Use heat to soften wrinkles and smooth the surface. If bubbles appear, lift the vinyl gently and reapply. Careful technique keeps the wrap smooth and neat.
Dealing With Complex Curves
Applying vinyl wrap on curves can be tricky. Complex curves need careful handling to avoid wrinkles and bubbles. The key is to work slowly and use the right techniques. This section explains how to deal with deep recesses, edges, and corners. It also covers how to use relief cuts for a smooth finish.
Handling Deep Recesses
Deep recesses create tight bends in the vinyl. Warm the vinyl with a heat gun to make it flexible. Stretch it gently into the recess without forcing. Use a squeegee to press the vinyl down evenly. Avoid pulling too hard to prevent tears.
Working Around Edges And Corners
Edges and corners need special attention. Wrap the vinyl around the edge, not just over it. Use heat to soften the vinyl at corners. Press firmly with a squeegee to keep it tight. Cut excess vinyl carefully after applying.
Using Relief Cuts Effectively
Relief cuts help the vinyl fit curves better. Make small, spaced cuts on the vinyl backing. These cuts allow the vinyl to stretch and bend. Avoid large or deep cuts to prevent damage. Place cuts where they are less visible for a neat look.
Post-application Tips
After applying vinyl wrap to curves, some important steps follow. These steps help the wrap stay smooth and last longer. Taking time for post-application care protects your work and keeps the wrap looking great.
Sealing The Edges
Press down all edges firmly. This stops dirt and water from getting under the wrap. Use a heat gun on low setting to soften edges. Carefully roll edges with a squeegee or cloth. This seals the vinyl tightly to the surface. Check edges regularly for lifting or peeling.
Curing And Setting Times
Let the wrap sit without touching for at least 24 hours. Heat helps the adhesive bond well. Keep the wrapped surface in a warm place during this time. Avoid washing or heavy contact. Proper curing ensures the wrap stays on curves without bubbles or wrinkles.
Maintenance For Longevity
Clean the vinyl with mild soap and water only. Avoid harsh chemicals or abrasive tools. Dry the surface gently with a soft cloth. Park the vehicle or item in shade when possible. Regular care keeps the vinyl shiny and prevents fading or cracking. Check the wrap often and fix small problems fast.
Troubleshooting Common Issues
Troubleshooting common issues is important when applying vinyl wrap to curves. Small problems can affect the final look. Knowing how to fix these issues saves time and improves results.
This section covers easy ways to fix wrinkles, bubbles, tears, and lifts. It also explains how to reapply parts that don’t stick well. These tips help keep your vinyl wrap smooth and strong.
Fixing Wrinkles And Bubbles
Wrinkles and bubbles appear if the vinyl is not stretched correctly. Use a heat gun to warm the area gently. This makes the vinyl more flexible and easier to smooth out.
Press the vinyl down with a soft cloth or squeegee from the center outward. This pushes air and wrinkles out. For small bubbles, use a pin to release trapped air carefully.
Repairing Tears And Lifts
Tears can happen if the vinyl is overstretched or sharp edges cut it. For small tears, apply a vinyl patch under the damaged area. Press firmly to secure it.
Lifts occur when the edges peel up. Clean the area with rubbing alcohol. Apply heat and press the edges back down with a squeegee. Use extra adhesive if needed.
Reapplying Problem Areas
Sometimes parts of the vinyl do not stick well. Gently peel back the loose section. Clean the surface to remove dust or oil.
Apply heat to the vinyl and the surface. Reposition the vinyl carefully and press it down firmly. Use a squeegee to remove air and ensure good contact.
Credit: www.wideworldofindoorsports.com
Frequently Asked Questions
How Do You Prepare Surfaces For Vinyl Wrap On Curves?
Clean the surface thoroughly to remove dirt and grease. Use isopropyl alcohol for best results. Ensure the surface is dry before application. Smooth surfaces help vinyl adhere better, especially on curves.
What Tools Are Essential For Applying Vinyl Wrap To Curves?
Key tools include a heat gun, squeegee, and a sharp utility knife. Heat softens vinyl for easier stretching around curves. A squeegee removes air bubbles and ensures smooth application.
Can Vinyl Wrap Stretch Without Damaging The Material?
Yes, vinyl wrap is designed to stretch up to 100% without tearing. Use heat to make it more pliable. Avoid overstretching, which can cause distortion or weakening of the vinyl.
How Do You Prevent Bubbles When Wrapping Curved Surfaces?
Use a squeegee to press out air bubbles as you apply vinyl. Heat the vinyl gently to make it more flexible. Work slowly from the center outward to push air out.
Conclusion
Applying vinyl wrap to curves takes patience and careful work. Stretch the vinyl gently and use heat to help it fit. Take your time to smooth out bubbles and wrinkles. Practice on small areas before moving to larger curves. Clean the surface well to make the wrap stick better.
The right tools make the job easier and neater. With steady hands and attention, you can get great results. Keep these tips in mind for a smooth, clean finish every time.