
Thinking about removing your vinyl car wrap but not sure where to start? You’re not alone.
Vinyl wraps can look amazing, but when it’s time to take them off, the process can feel tricky and overwhelming. If you want to avoid damage to your car’s paint and save time and money, you need the right steps and tips.
In this guide, you’ll discover simple, effective ways to remove your vinyl car wrap safely and easily. Keep reading, and you’ll be ready to get your car looking fresh again in no time.
Preparing For Removal
Removing a vinyl car wrap starts with good preparation. This step helps protect your car’s paint and makes the removal easier. Planning ahead saves time and avoids damage. Follow these simple steps before you begin peeling off the wrap.
Gathering Tools And Materials
Collect all tools before starting. You will need a heat gun or hair dryer, a plastic scraper, adhesive remover, and microfiber cloths. Gloves protect your hands from sticky residue. Have a sharp utility knife handy for trimming edges carefully. These items make the process smoother and safer.
Choosing The Right Environment
Pick a shaded, dry place to work. Avoid direct sunlight or very cold weather. Heat helps loosen the vinyl, but too much sun can overheat the wrap. A clean garage or shaded driveway works well. Good lighting helps you see edges clearly. A calm environment reduces dust and debris.
Cleaning The Car Surface
Wash the car to remove dirt and grime. Use mild soap and water. Dry the surface completely with a clean towel. This prevents scratches during removal. Clean surfaces also help the adhesive remover work better. Cleanliness protects your car’s paint underneath the wrap.

Credit: www.youtube.com
Heating The Vinyl Wrap
Heating the vinyl wrap is a key step in removing it without damage. Warmth softens the adhesive, making the wrap easier to peel off. Applying heat evenly helps prevent tears and residue. This section explains how to heat the wrap safely and effectively.
Using A Heat Gun Safely
Hold the heat gun about 6 to 8 inches from the surface. Keep the gun moving to avoid burning one spot. Use a low to medium heat setting for better control. Wear gloves to protect your hands from hot air. Avoid pointing the gun at rubber or plastic parts directly.
Optimal Temperature For Removal
Keep the temperature between 140°F and 160°F (60°C to 70°C). This range softens the adhesive without harming the paint. Use a thermometer if possible for precise control. Overheating can cause the vinyl to stretch or leave residue. Patience helps; heat small sections at a time.
Avoiding Damage To Paint
Test a small hidden area first to check paint reaction. Do not heat the wrap for more than 30 seconds in one spot. Pull the vinyl slowly at a 45-degree angle. Stop heating if the paint feels too hot or sticky. Use plastic scrapers, not metal tools, to lift the edges gently.
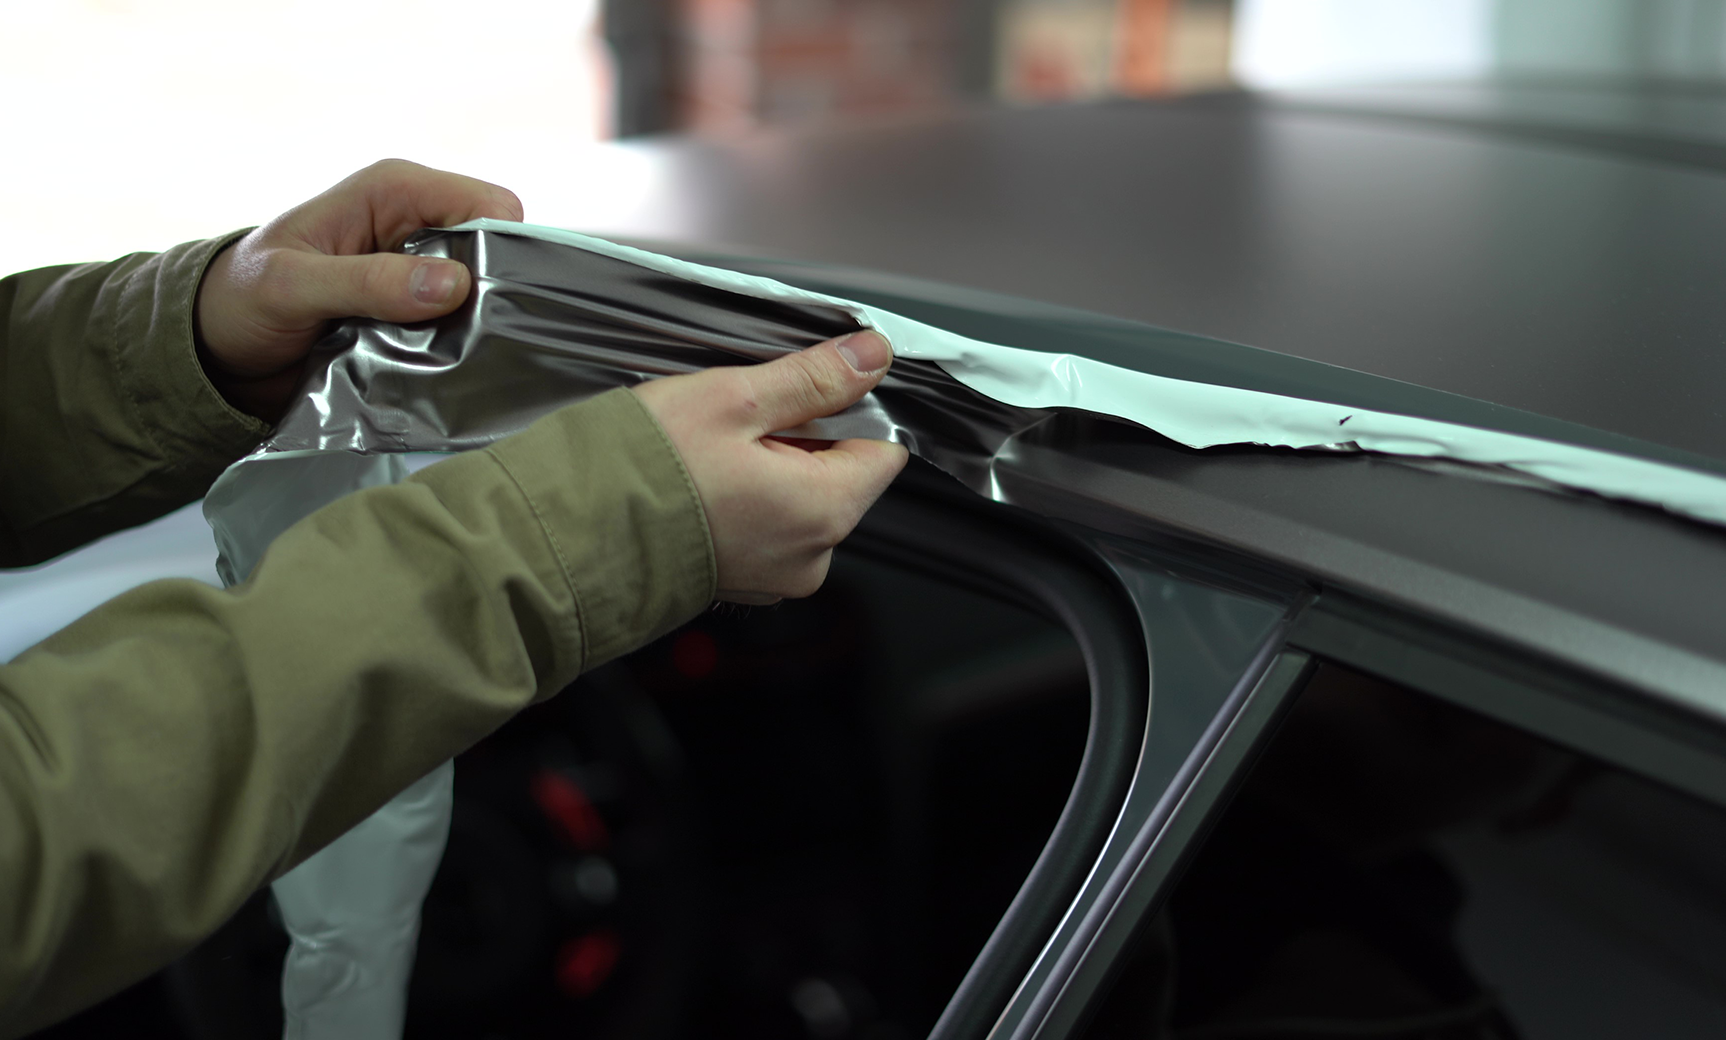
Peeling Off The Vinyl
Peeling off a vinyl car wrap is a careful process. It needs patience and the right method. Doing it slowly helps avoid damage to the car’s paint. This section explains how to peel the vinyl safely and effectively.
Starting At The Edges
Begin peeling at a corner or edge of the wrap. Use your fingers or a plastic tool to lift the vinyl gently. Avoid sharp tools that can scratch the paint. Once you get a good grip, pull the edge slowly. This makes the wrap easier to remove.
Pulling Techniques
Pull the vinyl back at a low angle, close to the car’s surface. This reduces stress on the vinyl and the paint. Use slow and steady movements. Do not yank or pull quickly. Keep the vinyl stretched to avoid tearing.
Handling Stubborn Sections
Some areas may stick tightly to the car. Use a hairdryer or heat gun to warm the vinyl. Warm vinyl becomes soft and easier to peel. Heat small sections, then pull gently. Repeat if the vinyl resists removal.
Removing Adhesive Residue
Removing adhesive residue is an important step after taking off a vinyl car wrap. Sticky glue often stays on the car’s surface. This residue can attract dirt and damage the paint if not cleaned properly. Using the right methods helps keep your car looking neat and smooth.
Choosing Adhesive Removers
Select a remover made for car surfaces. Avoid harsh chemicals that can harm the paint. Products like rubbing alcohol, citrus-based removers, or commercial adhesive removers work well. Test the remover on a small spot first. This prevents damage and ensures safety.
Applying And Scraping Residue
Apply the remover gently on the sticky areas. Let it sit for a few minutes to soften the glue. Use a plastic scraper or credit card to lift the residue carefully. Avoid metal tools that can scratch the paint. Repeat the process until all residue is gone.
Washing The Surface After Removal
Wash the cleaned area with warm, soapy water. Use a soft cloth to remove any leftover remover and dirt. Rinse the surface well with clean water. Dry the area with a microfiber towel to avoid water spots. This step protects the paint and keeps the car shiny.
Post-removal Care
After removing a vinyl car wrap, proper care is important to keep your vehicle’s paint safe and looking great. Post-removal care helps fix small issues and prepares the surface for future treatments. Taking the right steps ensures your car stays in good shape.
Inspecting For Paint Damage
Check the paint closely after removing the wrap. Look for scratches, discoloration, or adhesive residue. Use a soft cloth and mild cleaner to remove leftover glue. Small paint chips or damage need attention to avoid rust or further wear. Early inspection saves costly repairs later.
Polishing And Waxing
Polish the paint gently to restore shine and smoothness. Use a quality polish suited for car paint. This step removes minor scratches and evens out the surface. After polishing, apply a coat of wax. Wax protects the paint from sun, dirt, and moisture. It also makes the car easier to clean.
Preparing For New Wrap Or Paint
Clean the surface thoroughly before adding a new wrap or paint. Remove all wax and polish residues using a cleaner designed for paint. Ensure the surface is dry and free of dust. Proper preparation helps the new wrap or paint stick better and last longer. This step leads to a smooth, professional finish.

Credit: www.youtube.com
Tips For A Smooth Process
Removing a vinyl car wrap can be tricky without the right approach. Following some simple tips helps avoid damage and frustration. The process becomes smoother and safer for your vehicle.
Knowing what to avoid and when to ask for help makes a big difference. Also, caring for your wrap after installation extends its life. Here are key tips for a smooth vinyl wrap removal experience.
Avoiding Common Mistakes
Peeling the wrap too fast can tear it or leave adhesive behind. Pull slowly at a low angle to protect the paint. Using sharp tools risks scratching your car’s surface. Heat the wrap gently with a heat gun or hairdryer. Avoid removing wraps in cold weather. Cold vinyl becomes brittle and breaks easily.
When To Seek Professional Help
Some wraps stick very tightly or cover complex areas. Professionals have tools and skills to remove these safely. If you see paint damage or residue that won’t come off, call an expert. Removing wrap from older cars may need extra care. Experts prevent costly mistakes and save time.
Maintaining Vinyl Wrap Longevity
Clean your wrap regularly with mild soap and water. Avoid harsh chemicals that can weaken the vinyl. Park in shaded areas to reduce sun damage. Wax the wrap occasionally to keep its shine and protect it. Fix small tears or bubbles quickly to stop them from growing.
Credit: vvividshop.com
Frequently Asked Questions
How Do I Safely Remove Vinyl Car Wrap?
To safely remove vinyl car wrap, heat the wrap with a heat gun or hairdryer. Peel slowly from one corner to avoid damage. Use adhesive remover to clean residue. Avoid sharp tools that can scratch the paint.
Can I Remove Vinyl Wrap Without Damaging Paint?
Yes, vinyl wraps can be removed without paint damage by heating the wrap and peeling gently. Use proper tools and adhesive removers. Avoid forceful scraping or pulling, which can harm the paint underneath.
How Long Does Vinyl Car Wrap Removal Take?
Vinyl car wrap removal typically takes 1 to 3 hours depending on car size and wrap condition. Larger vehicles and older wraps may require more time and careful handling.
What Tools Are Needed To Remove Vinyl Car Wrap?
Essential tools include a heat gun or hairdryer, plastic scraper, adhesive remover, microfiber cloth, and gloves. These help soften the vinyl, lift edges, and clean adhesive safely.
Conclusion
Removing a vinyl car wrap takes time and care. Warm the wrap gently to avoid damage. Peel slowly, keeping the surface clean. Use adhesive remover for leftover glue. Patience helps protect your car’s paint. Follow these steps for a smooth removal.
Your car will look fresh and neat again. Simple tools and careful work make a big difference. Try to avoid rushing or pulling hard. Clean the car after removal to finish the job.


