

If you want your brakes to work smoothly and last longer, knowing how to break in rotors and brake pads is essential. Skipping this step can lead to poor performance, noisy brakes, or even costly repairs.
But don’t worry—this guide will walk you through simple, effective steps to make sure your brakes settle in perfectly. By the end, you’ll have the confidence to protect your car and stay safe on the road. Ready to get started?
Let’s dive in.
Why Break-in Matters
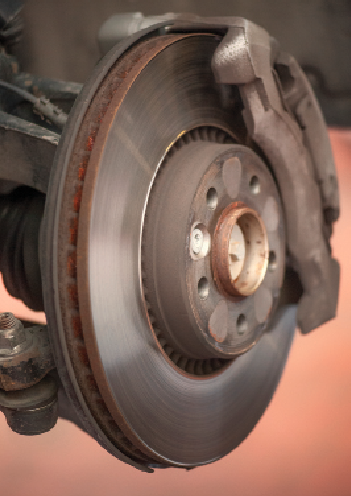
Breaking in rotors and brake pads is a key step after installing new brakes. It helps the brake parts work well together. This process forms a smooth layer on the rotor surface. It also helps the pads grip better and last longer. Skipping this step can cause poor brake performance and early wear.
Effects On Performance
Proper break-in improves stopping power. It creates even contact between pads and rotors. This means the brakes respond quickly and smoothly. You avoid brake noise and vibrations. The car feels safer and more controlled during stops.
Impact On Durability
Breaking in helps prevent uneven pad wear. It reduces hot spots on the rotors. This lowers the chance of warping and cracking. The brake parts last longer and save money. Good break-in means fewer repairs and better safety.
Credit: www.counterman.com
Preparing For Break-in
Preparing for the break-in process is important to get the best from your new rotors and brake pads. Proper preparation helps avoid uneven wear and noise. It also ensures the brakes perform well and last longer.
Before starting, gather all parts and tools. Take time to pick the right components for your vehicle. This step helps prevent problems during and after installation.
Choosing The Right Components
Select rotors and brake pads made for your car model. Use parts from reliable brands to ensure quality. Check the material type; ceramic pads offer less dust, while semi-metallic pads give strong stopping power.
Consider your driving style. For city driving, choose quieter, low-dust pads. For heavy braking or towing, pick high-performance pads that handle heat better.
Gathering Necessary Tools
Prepare all tools before starting the job. You will need a jack, jack stands, lug wrench, and socket set. A C-clamp or brake caliper tool helps compress the caliper piston.
Keep clean rags, brake cleaner, and gloves nearby. These keep your work area clean and protect your hands. Having everything ready saves time and avoids interruptions.
Initial Break-in Procedure
The initial break-in procedure is key for new rotors and brake pads. It helps them wear evenly and last longer. Proper break-in improves braking power and reduces noise. Taking time during this stage ensures safer drives and better performance.
Gradual Speed Increase
Start with slow speeds to let parts settle gently. Avoid sudden stops or fast driving at first. Increase speed little by little over several stops. This prevents overheating and uneven pad deposits on the rotors. Smooth, steady driving helps the brake surfaces align well.
Controlled Braking Actions
Use gentle, steady brake pressure during the first stops. Avoid hard or emergency braking early on. Apply brakes in a way that feels smooth and controlled. This allows the pads to bed in evenly on the rotor surface. Controlled braking reduces the risk of warping or noise later.

Credit: www.youtube.com
Avoiding Common Mistakes
Breaking in new rotors and brake pads requires care. Avoiding common mistakes helps ensure safety and better performance. Proper break-in improves brake life and stops noise problems. Focus on simple steps to avoid damage and extra costs.
Overheating Risks
Overheating brakes cause warping and reduced stopping power. Avoid hard braking during the first 200 miles. Let brakes cool down between stops. Heat damages new pads and rotors fast. Drive gently to keep temperatures low.
Ignoring Manufacturer Guidelines
Each brake set has specific break-in instructions. Follow the manufacturer’s steps exactly. Skipping or changing steps may cause uneven pad wear. Check the manual or packaging before starting. Using the right method protects your investment.
Post Break-in Maintenance
After breaking in your rotors and brake pads, proper maintenance is key. This keeps your brakes working well and safe. Neglecting this step can cause uneven wear or noise.
Post break-in maintenance involves checking parts closely and making small fixes. This extends the life of your brake system. It also helps catch problems early before they get worse.
Inspecting Rotor And Pads
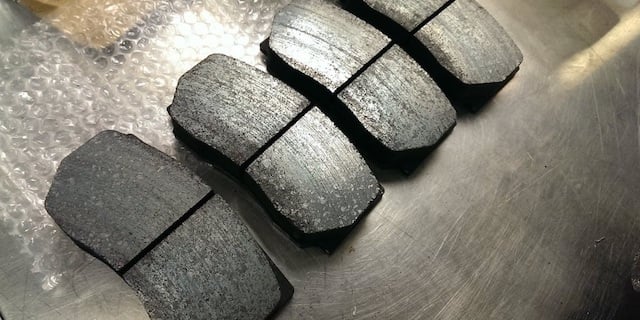
Check your rotors and pads regularly after the break-in. Look for any cracks, grooves, or uneven wear. Pads should have enough material left; thin pads need replacing.
Also watch for discoloration on rotors. Blue or dark spots mean overheating. This can reduce braking power and cause vibrations.
Inspect brake dust buildup too. Excess dust can affect brake performance and cause noise.
Cleaning And Adjustments
Clean the rotors and pads gently with brake cleaner. Avoid using harsh chemicals or water. Dirt and dust reduce brake efficiency.
Adjust brake calipers if needed to ensure even contact. Loose or stuck calipers cause uneven pad wear.
Make sure all bolts and screws are tight. Loose parts can cause rattling and reduce brake function.
Signs Of Successful Break-in
Breaking in rotors and brake pads is key for safe driving. It helps parts work well and last longer. After the break-in, you can see clear signs that it worked. These signs show your brakes are ready for everyday use. Watch for these signs to know your brakes are in good shape.
Improved Brake Response
The first sign of a good break-in is better brake response. Your car should stop smoothly and quickly. No lag or delay in braking. Press the pedal, and the car reacts right away. This means the pads and rotors have matched well. They grip properly, giving you control and confidence.
Reduced Noise And Vibration
Another sign is less noise and vibration during braking. New brakes can sound loud or squeaky at first. You might feel shaking in the pedal or steering wheel. After break-in, these problems fade away. Brakes work quietly and smoothly. This means the surfaces have evened out and fit well.
Credit: www.buybrakes.com
Frequently Asked Questions
What Is The Purpose Of Breaking In Rotors And Brake Pads?
Breaking in rotors and brake pads ensures optimal contact and performance. It helps prevent brake noise, uneven wear, and improves braking efficiency.
How Long Does It Take To Break In Brake Rotors And Pads?
Typically, the break-in process takes about 300 to 500 miles of gentle braking. This period allows proper bedding of the pads onto the rotors.
What Is The Best Method To Break In New Brake Pads?
Use gradual, moderate braking without hard stops. Avoid overheating by allowing brakes to cool between stops for better pad and rotor bonding.
Can Improper Break-in Damage Brake Components?
Yes, improper break-in can cause brake fade, warping, and uneven pad wear. Following the correct procedure extends the lifespan of brake parts.
Conclusion
Breaking in rotors and brake pads helps your brakes work better and last longer. Start with slow stops and avoid hard braking at first. This lets the parts wear evenly and prevents damage. Take your time during the break-in process for best results.
Proper care now saves you costly repairs later. Remember, safe braking keeps you and others protected on the road. Follow these steps to ensure your brakes perform smoothly and reliably. Simple habits make a big difference in brake life.


