
If you want your Air Dog fuel filter to work smoothly and keep your engine running strong, changing it regularly is a must. But maybe you’re not sure how to do it yourself or worried it might be complicated.
Don’t worry—this guide will walk you through every step in a simple and clear way. By the end, you’ll save time, avoid costly repairs, and feel confident maintaining your fuel system on your own. Ready to learn how to change your Air Dog fuel filter quickly and easily?
Let’s get started!
Signs Of A Dirty Air Dog Fuel Filter
A dirty Air Dog fuel filter can cause problems in your vehicle. It blocks fuel flow and affects engine health. Recognizing the signs early helps avoid bigger issues. Watch for these common symptoms to know when to change the filter.
Reduced Engine Performance
The engine may lose power or feel weak. Acceleration slows down and the vehicle struggles on hills. Poor fuel flow limits the engine’s ability to run smoothly. This drop in performance signals a clogged fuel filter.
Fuel Efficiency Drop
Notice your fuel tank empties faster than usual. A dirty filter makes the engine work harder. It uses more fuel to deliver the same power. Lower miles per gallon means the filter might need replacing.
Unusual Engine Noises
The engine may produce strange sounds like sputtering or knocking. These noises come from irregular fuel supply. A blocked Air Dog filter interrupts smooth fuel delivery. Listen closely for any odd engine sounds during driving.

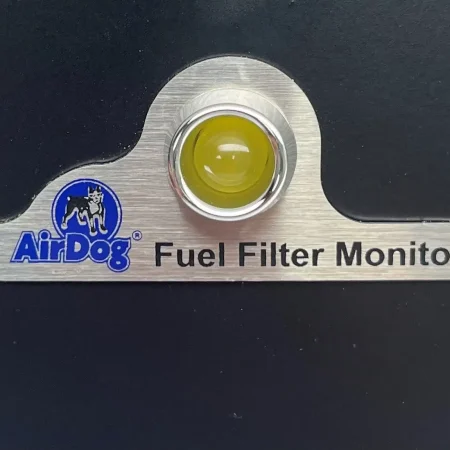
Credit: airdogdiesel.com
Tools And Materials Needed
Before you start changing the Air Dog fuel filter, gather all necessary tools and materials. Having everything ready saves time and avoids frustration. It also helps ensure the job goes smoothly and safely.
Replacement Fuel Filter
Use the exact replacement fuel filter designed for your Air Dog model. The right filter fits perfectly and works well with your system. Avoid using generic filters that may cause leaks or damage.
Basic Hand Tools
Prepare simple hand tools such as wrenches, screwdrivers, and pliers. These tools help remove and install the fuel filter easily. Choose tools in good condition to avoid slipping or stripping bolts.
Safety Gear
Wear gloves to protect your hands from fuel and dirt. Safety glasses keep your eyes safe from splashes. Use old clothes or a protective apron to avoid stains.
Preparing Your Vehicle
Preparing your vehicle is an important first step before changing the Air Dog fuel filter. Taking the right precautions ensures safety and makes the process easier. Follow these simple steps to get your vehicle ready.
Park On A Level Surface
Find a flat and stable area to park your vehicle. This prevents any fuel spills or accidents. A level surface keeps the vehicle steady while you work on it.
Turn Off The Engine
Switch off the engine completely before starting the job. This stops fuel flow and reduces fire risk. Wait a few minutes to let the engine cool down.
Relieve Fuel System Pressure
Fuel systems stay under pressure after the engine stops. Releasing this pressure avoids fuel spray during filter removal. Use the vehicle’s manual for the correct method to relieve pressure safely.
Locating The Air Dog Fuel Filter
Finding the Air Dog fuel filter is the first step in changing it. Knowing its location saves time and avoids frustration. The fuel filter cleans dirt and debris from the fuel. This helps the engine run smoothly.
The filter can be in different spots depending on the vehicle model. Some filters are easy to reach, others are hidden. Knowing where to look makes the job easier.
Consult The Vehicle Manual
Start by checking the vehicle manual. It usually has a section about the fuel system. This section shows the exact location of the Air Dog fuel filter. The manual also gives safety tips for handling fuel parts. Keep the manual handy during the replacement process.
Common Filter Locations
The Air Dog fuel filter is often near the fuel tank or engine. Some vehicles place it inside the engine bay. Others install it under the vehicle along the fuel line. Look around the frame rail or near the fuel pump. The filter looks like a small canister or cartridge. Spotting it is easier with good lighting and a flashlight.
Removing The Old Fuel Filter
Removing the old fuel filter is an important step in changing your Air Dog fuel filter. This process helps ensure your vehicle runs smoothly and safely. Take your time to follow each step carefully. Safety is key when handling fuel components.
Disconnect Fuel Lines Safely
First, relieve pressure in the fuel system to avoid spills. Use gloves to protect your hands. Gently disconnect the fuel lines from the filter. Use a rag to catch any leaking fuel. Avoid forcing the lines to prevent damage.
Loosen Mounting Brackets
Next, locate the mounting brackets holding the filter. Use the correct tool to loosen the screws or bolts. Keep the hardware in a safe place for reinstallation. Do not remove the brackets completely yet. Loosen them just enough to free the filter.
Remove The Filter
Now, carefully slide the old fuel filter out of its place. Keep it upright to prevent fuel from spilling. Dispose of the used filter properly. Check the mounting area for dirt or rust. Clean it before installing the new filter.
Installing The New Fuel Filter
Installing the new Air Dog fuel filter is an important step to keep your engine running smoothly. The new filter helps clean fuel and protect the engine parts from dirt. This part must be installed carefully to avoid leaks and ensure good fuel flow.
Positioning The Filter Correctly
Place the new fuel filter in the holder exactly like the old one. Check the arrow on the filter body. The arrow shows the direction of fuel flow. Make sure it points toward the engine. Incorrect position can block fuel and cause engine trouble.
Reconnecting Fuel Lines
Attach the fuel lines to the filter’s inlet and outlet ports. Push the hoses firmly onto the connectors. Use clamps to hold the fuel lines tight. Loose connections can cause fuel leaks and reduce engine power. Double-check each line for a secure fit.
Securing Mounting Brackets
Use the mounting brackets to hold the filter in place. Tighten the screws or bolts until the filter does not move. The filter must be stable to avoid vibrations during driving. A loose filter can damage the fuel lines or the filter itself.
Testing After Replacement
Testing the Air Dog fuel filter after replacement is important. It ensures your fuel system works correctly. Proper testing helps avoid engine problems and fuel leaks. Follow these simple steps to check your work.
Check For Leaks
Look closely around the fuel filter and connections. Use a flashlight to see better. Fuel leaks can cause damage and are dangerous. If you see any wet spots or smell fuel, tighten connections. Replace any damaged hoses or seals before moving on.
Start The Engine
Turn on your engine and listen carefully. The engine should run smoothly without sputtering. A rough start may mean air is trapped in the fuel line. Let the engine run for a few minutes to clear air. If problems continue, recheck the filter installation.
Monitor Fuel System Performance
Watch how your engine performs during normal driving. Notice if it accelerates well and runs steady. Poor performance can mean the filter is clogged or installed wrong. Keep an eye on fuel pressure and engine response. Replace or adjust the filter if needed.
Credit: airdogdiesel.com
Maintenance Tips
Proper maintenance of your Air Dog fuel filter keeps your engine running smoothly. Regular care helps avoid costly repairs and improves fuel efficiency. Follow these simple tips to maintain your fuel filter effectively.
Regular Filter Checks
Inspect your fuel filter at least once a month. Look for dirt, debris, or damage on the filter. Clean or replace it immediately if you notice any issues. Regular checks prevent fuel flow problems and engine damage.
When To Replace
Replace the fuel filter every 12,000 miles or as recommended by the manufacturer. Change it sooner if you see clogging or reduced engine performance. Timely replacement ensures clean fuel reaches your engine.
Using Quality Filters
Choose high-quality filters designed for your Air Dog system. Cheap filters may not trap all contaminants and can break down quickly. Quality filters protect your engine and extend the filter’s life.

Credit: www.youtube.com
Frequently Asked Questions
How Often Should I Change The Air Dog Fuel Filter?
Change the Air Dog fuel filter every 12,000 to 15,000 miles or as recommended by the manufacturer. Frequent checks ensure optimal engine performance and fuel efficiency. Replace it sooner if you notice reduced fuel flow or engine issues.
What Tools Are Needed To Replace The Air Dog Fuel Filter?
You will need a wrench, screwdrivers, replacement filter, and safety gloves. Ensure the engine is off and cooled before starting. Having a container to catch fuel spills is also helpful.
How Do I Safely Remove The Old Air Dog Fuel Filter?
First, relieve fuel system pressure. Disconnect the battery to avoid sparks. Use a wrench to loosen fittings carefully. Remove the filter slowly to prevent fuel spills. Dispose of the old filter properly according to local regulations.
Can I Clean The Air Dog Fuel Filter Instead Of Replacing It?
No, Air Dog fuel filters are designed for replacement, not cleaning. Cleaning can damage the filter media and reduce efficiency. Always use a new filter to maintain proper fuel filtration and engine protection.
Conclusion
Changing your Air Dog fuel filter keeps your engine clean and running well. Regular filter changes prevent dirt from damaging parts. You save money by avoiding costly repairs later. The process is simple and can be done at home. Just follow the steps carefully and take your time.
Clean fuel means better performance and longer engine life. Stay on top of filter changes to keep your vehicle healthy. Easy maintenance helps you avoid unexpected problems on the road. A small effort now makes a big difference later.


