
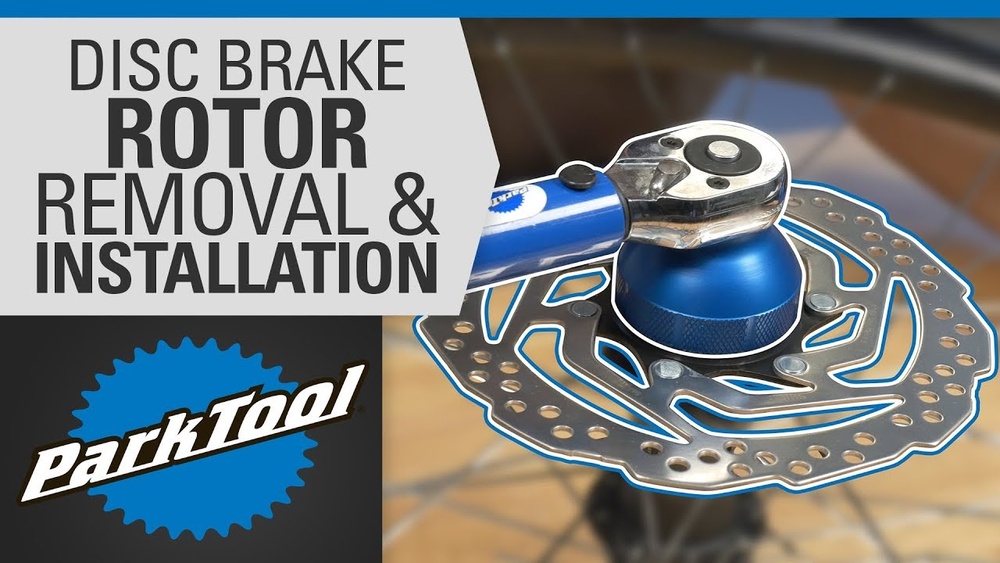
Are your bike’s disc brake rotors worn out or making strange noises? Changing them might seem tricky, but it’s easier than you think—and doing it yourself can save you time and money.
In this guide, you’ll learn simple, step-by-step instructions to replace your bike disc brake rotors quickly and safely. By the end, you’ll feel confident keeping your bike in top shape and ready for the road or trail. Keep reading to discover how to give your brakes the fresh start they need.
Tools Needed
Changing bike disc brake rotors requires the right tools. Using proper tools makes the job easier and safer. Prepare all tools before starting to avoid interruptions. This section lists the essential tools and optional supplies.
Essential Tools
Start with a set of Allen wrenches. Most rotor bolts use a 5mm or 6mm size. A torque wrench helps tighten bolts to the correct strength. Use a T25 Torx wrench for many rotor bolts. A clean rag or paper towel removes dirt and grease. A bike stand or a way to hold the bike steady helps a lot. Basic hand tools like a screwdriver may be needed to remove wheel parts.
Optional Supplies
Isopropyl alcohol cleans the rotor and brake pads. It removes oils that reduce brake power. Threadlocker keeps bolts from loosening over time. Gloves protect your hands from dirt and chemicals. A rotor truing tool fixes small bends in the rotor. Sandpaper can roughen the rotor surface slightly for better braking. Having extra bolts is good in case some get damaged or lost.
Credit: www.liv-cycling.com
Preparing Your Bike
Preparing your bike for changing the disc brake rotors is an important first step. It helps ensure the process goes smoothly and safely. Proper preparation saves time and avoids damage to your bike parts.
Start by creating a clean and organized workspace. Gather all tools needed for the job. This setup helps you stay focused and efficient during the repair.
Safety Measures
Wear gloves to protect your hands from sharp edges and dirt. Use eye protection to shield your eyes from debris. Work in a well-lit area to see all parts clearly. Secure your bike on a stand or flat surface to prevent it from moving. Keep children and pets away from your workspace to avoid distractions and accidents.
Removing The Wheel
Shift your bike to the smallest gear to ease wheel removal. Release the brake caliper or quick-release mechanism carefully. Loosen the axle nuts or quick-release lever. Gently pull the wheel away from the bike frame. Handle the wheel by the rim to avoid touching the rotor surface. Place the wheel on a clean surface to prevent dirt on the rotor.
Removing The Old Rotor
Removing the old rotor is the first step in changing your bike’s disc brake rotors. This step requires care to avoid damage to your wheel or brake system. Follow simple, clear steps to remove the rotor safely and prepare for the new one.
Locating Rotor Bolts
Start by turning your bike upside down or placing it on a stand. Look closely at the center of the rotor. You will see small bolts holding the rotor to the wheel hub. Count them to know how many bolts to remove. These bolts are usually six but can vary by bike model.
Unscrewing Bolts Safely
Use the correct size Allen key or Torx wrench. Insert it firmly into each bolt head. Turn the wrench slowly counterclockwise to loosen the bolts. Remove them one by one. Keep the bolts in a safe place for later use. Avoid forcing the bolts to prevent stripping or damage. If a bolt feels stuck, try applying a little penetrating oil and wait a few minutes before trying again.
Installing The New Rotor
Installing the new rotor is a key step in changing your bike’s disc brake rotors. It ensures smooth braking and safety. This part requires care and attention to detail. Proper installation helps your brakes work well and last longer.
Aligning The Rotor
First, place the rotor on the wheel hub. Make sure the holes in the rotor line up with the holes on the hub. The rotor’s direction matters. Look for the arrow on the rotor. Point it the way the wheel turns. This step prevents noise and improves brake performance.
Tightening Bolts Correctly
Next, insert the bolts by hand to avoid cross-threading. Tighten them in a star pattern. This means tightening opposite bolts in sequence. Use a torque wrench for the right tightness. Check the rotor manufacturer’s recommended torque. Too loose or too tight bolts cause problems. Correct tightening keeps the rotor secure and prevents warping.
Reassembling The Wheel
Reassembling the wheel is a key step after changing bike disc brake rotors. It puts everything back in place and prepares your bike for safe rides. Careful attention during this stage prevents brake issues and ensures smooth wheel rotation.
Mounting The Wheel Back
Start by positioning the wheel correctly in the fork or frame dropouts. Align the axle with the dropouts, making sure the rotor fits inside the brake caliper without touching it. Tighten the axle or quick release securely to keep the wheel stable. Check that the wheel spins freely without wobbling or rubbing the brake pads.
Checking Brake Pad Clearance
Spin the wheel slowly and watch the rotor between the brake pads. The rotor should not rub against the pads. If rubbing occurs, adjust the brake caliper by loosening its mounting bolts slightly. Center the caliper over the rotor and then tighten the bolts firmly. Test the wheel spin again to confirm the rotor moves cleanly between the pads.
Testing The Brakes
Testing the brakes after changing bike disc brake rotors is very important. It ensures your bike stops safely and works well. This step helps find small issues early. You avoid accidents and enjoy a smooth ride. Follow simple steps to check and adjust your brakes.
Brake Function Check
Start by squeezing the brake lever gently. The brake pads should touch the rotor firmly. Listen for any unusual noises like squeaks or rubbing. Spin the wheel slowly to check if it moves freely. The rotor must not drag against the pads. Test both front and rear brakes for balance. Make sure the brake feels firm, not soft or spongy.
Adjusting If Needed
If the brake feels weak, it needs adjustment. Loosen the caliper bolts slightly. Squeeze the brake lever to center the caliper over the rotor. Tighten the bolts while holding the lever. Check the rotor alignment again. Adjust pad clearance if rubbing occurs. Use the barrel adjuster for fine-tuning brake lever tension. Repeat the brake function check until the brake works smoothly.
Maintenance Tips
Maintaining your bike disc brake rotors helps keep your bike safe and working well. Simple care steps extend rotor life and improve brake performance. Follow these easy maintenance tips to avoid problems and enjoy smooth rides.
Cleaning Rotors
Clean rotors regularly to remove dirt and oil. Use a soft cloth and isopropyl alcohol. Avoid touching the rotor surface with bare hands. Dirt and grease reduce braking power. Clean rotors help your brakes grip better and last longer.
Regular Inspection
Check rotors for wear, warping, and cracks. Look at the rotor edges and surface closely. Thin or damaged rotors need replacement. Inspect your rotors every few rides. Early detection prevents brake failure and costly repairs.

Credit: www.youtube.com
Credit: www.liv-cycling.com
Frequently Asked Questions
How Do I Know When To Replace Bike Disc Brake Rotors?
You should replace rotors if they are warped, cracked, or below minimum thickness. Check manufacturer specs for exact measurements. Worn rotors cause poor braking and noise. Regular inspection ensures safe and effective braking performance.
What Tools Are Needed To Change Bike Disc Brake Rotors?
You typically need a Torx or Allen wrench, a bike stand, and possibly a rotor truing tool. Clean gloves and isopropyl alcohol help prevent contamination. Having the right tools makes the process smooth and safe.
Can I Reuse Old Bolts When Changing Rotors?
It’s best to use new bolts to ensure proper torque and safety. Old bolts may be stripped or weakened, risking rotor failure. Always follow manufacturer recommendations for bolt replacement during rotor changes.
How Do I Prevent Brake Noise After Rotor Replacement?
Clean the rotor with isopropyl alcohol before installation. Bed in new pads by performing gradual stops from moderate speed. Avoid touching rotor surfaces with oily hands. Proper installation and bedding reduce noise and improve braking.
Conclusion
Changing bike disc brake rotors is simple with the right steps. Take your time and follow each part carefully. Clean and check your brakes after replacing the rotors. This keeps your bike safe and working well. Regular maintenance helps avoid bigger problems later.
Now, you can enjoy smoother rides with better stopping power. Keep practicing these skills to build confidence and save money. A well-maintained bike means more fun on every trip.


