If you want your boat to run smoothly and avoid unexpected engine trouble, changing the fuel filter is one of the most important tasks you can do. Dirty or clogged fuel filters can cause your engine to stall or lose power just when you need it most.
But don’t worry—changing the fuel filter on your boat is easier than you might think. You’ll find simple, step-by-step instructions that anyone can follow, even if you’re not a mechanic. Keep reading to learn how to protect your engine and enjoy worry-free time on the water.
Tools And Materials Needed
Changing the fuel filter on a boat requires the right tools and materials. Preparing these items before starting will make the job easier and safer. Having everything on hand avoids delays and helps complete the task smoothly.
Each tool and material plays a key role in replacing the fuel filter correctly. Using the proper tools prevents damage and ensures a tight fit. Quality materials help keep the engine running clean and healthy.
Basic Tools Needed
Start with a set of wrenches. An adjustable wrench fits most fuel filter fittings. A screwdriver may be necessary to remove clamps or covers. A pair of pliers helps grip and remove hoses. A small container is useful to catch fuel spills.
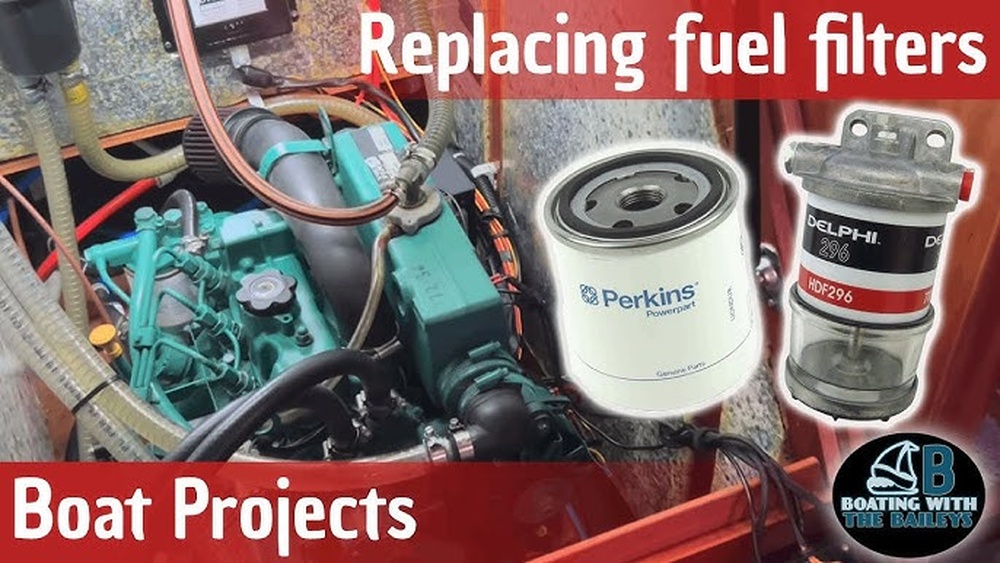
Replacement Fuel Filter
Choose the correct fuel filter for your boat’s engine model. Check the size and type before buying. A new filter keeps dirt and water out of the fuel system. Using the right filter extends engine life.
Safety Gear
Wear gloves to protect your hands from fuel and dirt. Safety glasses shield your eyes from splashes. Work in a well-ventilated area to avoid inhaling fumes. Keep a fire extinguisher nearby as a precaution.
Additional Supplies
Have clean rags ready for wiping spills and cleaning parts. Use fresh fuel to prime the new filter. Some boat owners keep a fuel line clamp to stop fuel flow temporarily. A small brush helps remove debris from the filter housing.
Locate The Fuel Filter
Finding the fuel filter is the first step to change it on a boat. The fuel filter cleans dirt and water from the fuel. It protects the engine from damage. Knowing its location saves time and effort during maintenance.
Fuel filters can be in different places, based on the boat type and engine model. Most filters are near the engine or fuel tank. Some are easy to spot, while others need a closer look.
Check Near The Engine
Look around the engine for a small, round or cylindrical part. It usually has fuel lines connected to it. The filter often has a clear bowl or metal casing.
Inspect Along The Fuel Line
Follow the fuel line from the tank to the engine. The filter will be along this line. It is placed where fuel flows before reaching the engine.
Consult The Owner’s Manual
The manual shows the exact location of the fuel filter. It provides diagrams and detailed instructions. This helps avoid confusion and mistakes.
Look For A Clear Bowl
Many fuel filters have a transparent bowl at the bottom. It lets you see water or dirt inside the filter. This helps decide if the filter needs changing.
Prepare The Boat For Maintenance
Preparing your boat for maintenance is the first step to safely change the fuel filter. Proper preparation keeps you safe and makes the job easier. It also helps prevent damage to the boat’s engine or fuel system.
Before starting, gather all necessary tools and materials. This saves time and avoids interruptions during the task. Clear the workspace around the engine and fuel filter area for better access.
Turn Off The Engine And Fuel Supply
Switch off the boat’s engine completely. Close the fuel valve to stop fuel flow. This prevents fuel leaks and reduces fire risk during the filter change.
Ventilate The Work Area
Open hatches or doors near the engine compartment. Fresh air lowers the chance of fuel vapors building up. Good ventilation keeps the environment safe for working.
Gather Safety Equipment
Wear gloves to protect your hands from fuel and dirt. Use safety glasses to shield your eyes from splashes. Keep a fire extinguisher nearby for emergencies.
Prepare Tools And Replacement Parts
Have the new fuel filter ready. Collect wrenches or screwdrivers needed for the job. Place a container or rag nearby to catch any fuel spills.

Credit: www.youtube.com
Drain Fuel From The Filter
Start by placing a container under the fuel filter to catch drained fuel. Open the drain valve carefully and let the fuel flow out completely. This step helps remove old fuel and dirt before installing a new filter.
Prepare Your Workspace And Tools
Start by finding a clean, well-lit area near your boat’s fuel filter. Gather tools like a drain pan, gloves, and rags. Wear gloves to protect your hands from fuel. Keep a fire extinguisher nearby for safety. Make sure the boat engine is off and cool.
Locate The Fuel Filter Drain Valve
Look for the small valve or petcock at the bottom of the fuel filter. This valve allows fuel to drain out safely. Some filters have a screw-type drain plug instead. Check your boat’s manual if you cannot find it. Position the drain pan below the valve to catch fuel.
Open The Drain Valve Carefully
Turn the drain valve slowly to release fuel. Fuel will flow into the pan, so open it just enough to drain. Avoid spills by keeping the pan steady. Let all the fuel inside the filter drain out. Close the valve tightly once empty to prevent leaks.
Dispose Of The Drained Fuel Properly
Use a sealed container for the drained fuel. Old fuel can harm the environment and your engine. Take the fuel to a local recycling center or hazardous waste disposal site. Do not pour fuel down drains or on the ground. Clean any spills immediately with rags.
Remove The Old Fuel Filter
Removing the old fuel filter is an important step in maintaining your boat’s engine. This part traps dirt and rust from the fuel. Over time, it gets clogged and needs replacement to keep the engine running smoothly.
Take your time and work carefully. This process prevents fuel leaks and protects your engine from damage. Use the right tools and follow these steps to remove the old filter safely.
First, find the fuel filter on your boat. It is usually near the engine or fuel tank. Look for a small canister or a clear bowl with fuel lines attached. Make sure the engine is off before you start.
Prepare For Fuel Spillage
Place a container or rag under the filter. Fuel may spill when you remove it. Wear gloves to protect your skin. Work in a well-ventilated area to avoid inhaling fumes.
Disconnect Fuel Lines
Loosen the clamps holding the fuel lines to the filter. Use pliers or a screwdriver, depending on the clamp type. Carefully pull the fuel lines off the filter. Avoid bending or damaging the lines.
Remove The Old Filter
Unscrew the filter from its mount or housing. Turn it counterclockwise by hand or with a wrench. Keep the filter upright to stop fuel from spilling. Dispose of the old filter properly.
Install The New Fuel Filter
Installing the new fuel filter on your boat is a key step. It ensures clean fuel flows to the engine. This helps the engine run smoothly and last longer. Follow these simple steps to install the new filter correctly.
Prepare The New Fuel Filter
Take the new fuel filter out of its packaging. Check it for any damage or defects. Confirm it matches the old filter in size and type. Some filters have an arrow showing fuel flow direction. Note this before installation.
Attach The New Filter To The Fuel Line
Connect the fuel line to the inlet side of the filter. Push the hose firmly onto the filter’s nipple. Secure it with a clamp. Tighten the clamp to prevent leaks but avoid over-tightening. Repeat the process for the outlet side.
Check For Proper Alignment
Make sure the fuel filter is aligned properly. The flow arrow should point towards the engine. Position the filter in a place with enough space around it. This makes future replacements easier. Avoid sharp bends in the fuel lines.
Secure The Fuel Filter In Place
Use the mounting bracket or clips to hold the filter firmly. Tighten any screws or bolts to secure it. A stable filter reduces vibration and wear. Double-check that the filter does not move or wobble.
Prime The Fuel System
Before starting the engine, prime the fuel system. Use the manual pump or follow your boat’s instructions. This pushes fuel through the new filter. Look for any signs of leaks around the filter connections. Fix leaks immediately to avoid engine problems.
Check For Leaks And Secure Connections
Checking for leaks and securing connections after changing a boat’s fuel filter is vital. It keeps your engine safe and working well. Even a small leak can cause big problems on the water.
Take your time to inspect all connections carefully. Tighten clamps and fittings as needed. This step helps avoid fuel spills and keeps the system sealed.
Inspect All Fuel Lines Thoroughly
Look closely at all fuel lines near the filter. Check for cracks, wear, or loose fittings. Replace any damaged parts before you finish the job.
Tighten Hose Clamps Properly
Use a screwdriver to tighten hose clamps snugly. Avoid over-tightening, which can damage hoses. The clamps must hold fuel lines firmly in place.
Test For Leaks With Engine Running
Start the engine and watch around the filter area. Look for any signs of fuel dripping or smelling fuel. Stop the engine immediately if you see a leak.
Secure The Fuel Filter Mount
Ensure the filter is firmly mounted to the bracket. A loose filter can move and cause leaks. Tighten mounting screws or bolts as needed.

Credit: www.mby.com
Test The Engine
Testing the engine after changing the fuel filter is crucial. It checks if the filter works well and the engine runs smoothly. This step helps avoid engine problems on the water. Follow these simple steps to test your boat engine safely and effectively.
Start The Engine
Turn on the boat’s ignition. Listen closely to the engine sound. It should start easily and run without sputtering. Any rough noise may mean air trapped in the fuel line.
Check For Fuel Leaks
Look around the new fuel filter. Watch for any wet spots or fuel drips. Leaks can cause engine failure or fire hazards. Tighten connections if you see leaks.
Observe Engine Performance
Let the engine run for a few minutes. Notice if it runs smoothly and steadily. Watch for any stalling or hesitation. These signs can mean the filter is not installed correctly.
Test Engine Under Load
Shift the throttle gently to increase engine speed. The engine should respond without hesitation. Check for steady acceleration and no strange noises. This confirms the fuel supply is stable.
Shut Down And Inspect Again
Turn off the engine after testing. Inspect the fuel filter and connections once more. Make sure everything is tight and dry. This final check keeps your boat safe on the water.
Maintenance Tips To Extend Filter Life
Maintaining your boat’s fuel filter is key to keeping the engine running smoothly. Proper care can extend the life of the filter and save money. Regular checks and simple habits help avoid clogs and damage. Follow these tips to keep your fuel filter in good shape.
Keep Fuel Clean And Dry
Use fresh fuel for your boat. Old fuel can cause dirt and water buildup. Store fuel in clean, sealed containers. Avoid contamination by checking the fuel for water or debris. Dry fuel prevents rust and clogs in the filter.
Inspect The Filter Regularly
Look at the fuel filter every month. Check for cracks, dirt, or damage. Replace the filter if you see dark spots or water inside it. Early inspection helps catch problems before they harm the engine.
Drain Water From The Filter
Many fuel filters have a water drain. Empty water regularly to keep the filter clear. Water in the fuel can cause engine trouble. Draining helps the filter work better and last longer.
Use A Pre-filter For Extra Protection
A pre-filter catches large dirt particles before they reach the main filter. This reduces the load on the fuel filter. It helps prevent quick clogging and extends filter life. Install a pre-filter for boats used in dirty or sandy water.
Replace The Filter On Schedule
Follow the manufacturer’s advice on when to change the filter. Even with good care, filters wear out over time. Changing the filter on time keeps your engine safe and running well.

Credit: www.mby.com
Frequently Asked Questions
How Often Should I Change My Boat’s Fuel Filter?
Change your boat’s fuel filter every 100 hours or once per season. Regular replacement prevents clogs and engine damage. Always check the manufacturer’s recommendations for specific intervals.
What Tools Do I Need To Change A Boat Fuel Filter?
You need a wrench, screwdrivers, a new fuel filter, and a container for fuel spillage. Gloves and safety glasses are also recommended for protection during replacement.
How Do I Safely Remove The Old Fuel Filter On A Boat?
Turn off the engine and fuel supply first. Then loosen the clamps or fittings holding the filter. Drain any residual fuel carefully to avoid spills or hazards.
Can I Change The Fuel Filter Without Draining The Tank?
Yes, you can change the fuel filter without draining the tank by clamping the fuel line. This prevents fuel leakage during the filter replacement process.
Conclusion
Changing your boat’s fuel filter keeps the engine running smooth. Clean filters stop dirt from harming the motor. Regular checks help avoid costly repairs later. Follow each step carefully for best results. Take your time and work safely on your boat.
A well-maintained fuel system means better trips on the water. Keep this guide handy for future filter changes. Safe boating starts with simple care like this.


