
If your John Deere riding mower is not running as smoothly as it should, the fuel filter might be the reason. Changing the fuel filter is a simple task that can save you time and money by keeping your mower in top shape.
In this guide, you’ll learn exactly how to change the fuel filter step-by-step, even if you’ve never done it before. By the end, you’ll feel confident maintaining your mower yourself, avoiding costly repairs and keeping your lawn looking perfect. Let’s get started and make sure your mower runs like new again!

Credit: www.youtube.com
Signs Of A Clogged Fuel Filter
A clogged fuel filter can cause many problems for your John Deere riding mower. It stops fuel from flowing freely to the engine. This can lead to poor mower performance and frequent breakdowns. Recognizing the signs early helps avoid costly repairs and downtime.
Knowing these signs keeps your mower running smoothly and extends its life. Watch for these common symptoms that point to a clogged fuel filter.
Reduced Engine Performance
Your mower may lose power during use. It might struggle on hills or thick grass. The engine can run unevenly or feel weak. This happens because less fuel reaches the engine. A clogged fuel filter blocks proper fuel flow.
Hard Starting Issues
The mower takes longer to start or needs several tries. You might hear the engine crank but not start right away. This happens when fuel cannot pass easily through the filter. The engine does not get enough fuel to ignite quickly.
Engine Stalling
The engine may start but then suddenly stop running. Stalling happens when fuel supply is interrupted. A dirty fuel filter causes this by blocking fuel flow. This issue can occur more often when the mower is under load.
Tools And Materials Needed
Changing the fuel filter on your John Deere riding mower requires some basic tools and materials. Having the right items ready makes the job easier and safer. Each tool plays a specific role in the process. Prepare everything before you start to avoid delays.
Replacement Fuel Filter
Choose a fuel filter made for your John Deere mower model. Using the correct filter ensures proper fit and function. Check the owner’s manual or parts guide. New filters help keep the engine clean and running smoothly.
Wrenches And Screwdrivers
You need wrenches to loosen bolts and fittings. A set of screwdrivers helps remove clamps or covers. Use the right size tools to avoid damage. Keep them handy for quick adjustments during the filter change.
Fuel Container And Rags
A fuel container catches any spilled gas safely. It prevents fuel from leaking onto the ground. Use clean rags to wipe up spills and keep the area tidy. Safety first to protect yourself and the environment.
Preparing The Mower
Preparing your John Deere riding mower before changing the fuel filter is important. Proper preparation ensures safety and makes the job easier. Take time to get the mower ready. Follow these simple steps carefully.
Safety Precautions
Turn off the mower and remove the key. Let the engine cool for at least 30 minutes. Wear gloves and safety glasses to protect yourself. Work in a well-ventilated area away from open flames. Keep a fire extinguisher nearby just in case.
Locating The Fuel Filter
The fuel filter is usually near the fuel tank or along the fuel line. Check the mower’s manual for the exact location. Look for a small, cylindrical part connected to the fuel hose. Make sure you can access it easily before starting.
Draining Excess Fuel
Place a container under the fuel filter to catch any fuel. Carefully disconnect the fuel lines from the filter. Let the fuel drain into the container slowly to avoid spills. Clean up any fuel that drops on the mower or ground.
Removing The Old Fuel Filter
Removing the old fuel filter is an important step in changing the fuel filter on your John Deere riding mower. This step ensures that the new filter works properly and keeps your engine clean. Follow these easy steps to remove the old filter safely and without mess.
Disconnecting Fuel Lines
First, locate the fuel lines connected to the fuel filter. Use pliers to gently squeeze the clamps. Pull the fuel lines off the filter carefully. Keep a cloth nearby to catch any fuel drops. Avoid pulling the lines too hard to prevent damage.
Removing Mounting Hardware
Next, find the screws or clips holding the fuel filter in place. Use a screwdriver or wrench to remove them. Keep the hardware in a safe spot for later use. Take out the old fuel filter from its mount. Handle it gently to avoid spilling fuel.
Handling Fuel Spillage
Some fuel may spill during removal. Use rags or paper towels to soak up any spilled fuel. Dispose of the soaked materials safely. Work in a well-ventilated area to avoid fumes. Clean the area around the filter mount before installing the new filter.
Installing The New Fuel Filter
Installing the new fuel filter on your John Deere riding mower is a key step. It ensures clean fuel reaches the engine. This helps the mower run smoothly and last longer. Follow each step carefully for the best results. Take your time to avoid mistakes.
Positioning The Filter Correctly
Start by checking the new filter for the flow direction. Most filters have an arrow showing the fuel flow. Align this arrow with the fuel flow on your mower. Place the filter so the arrow points toward the engine. Wrong positioning can cause engine problems. Make sure the filter fits snugly in its holder.
Reconnecting Fuel Lines
Next, attach the fuel lines to the filter. Slide the fuel lines onto the filter’s inlet and outlet. Push them firmly to avoid leaks. Check for any dirt or damage on the lines before connecting. Clean or replace damaged lines. Secure the connections with clamps if needed. Loose lines can cause fuel leaks and mower failure.
Securing The Filter
Finally, secure the fuel filter in place. Use the mounting bracket or clip to hold it tightly. Make sure the filter does not move or wiggle. A loose filter can cause fuel spills or damage. Double-check all connections and the filter’s position. Clean up any spilled fuel before starting the mower.

Credit: www.reddit.com
Testing After Replacement
After changing the fuel filter on your John Deere riding mower, testing is essential. It ensures the mower runs smoothly and safely. Follow these steps carefully to check the system.
Checking For Leaks
First, inspect the fuel filter area for leaks. Look closely around the filter and fuel lines. Any wet spots or fuel smell means a leak. Tighten connections if needed. Leaks can cause engine problems or fire hazards.
Starting The Engine
Next, start the mower’s engine. It may take a few tries to get fuel flowing through the new filter. Listen for unusual sounds like sputtering or stalling. The engine should start easily and run steadily. If it struggles, recheck the filter installation.
Monitoring Performance
Finally, watch how the mower performs. Drive it around and note any hesitation or power loss. The mower should respond well and run without interruptions. A good fuel filter improves engine efficiency and lifespan. Keep testing until the mower runs smoothly.
Maintenance Tips
Proper maintenance keeps your John Deere riding mower running smoothly. Paying attention to the fuel filter is key. A clean fuel filter protects your engine and improves performance. Follow these simple tips to maintain your fuel filter and extend your mower’s life.
Regular Fuel Filter Inspection
Check the fuel filter often for dirt or damage. Look for cracks or leaks around the filter. A dirty filter can block fuel flow. Inspecting regularly helps spot problems early. Use a flashlight to see inside the filter if needed. Replace the filter if it looks dirty or worn.
Recommended Replacement Intervals
Change the fuel filter every 100 hours of use. If you mow often, replace it at least once a year. Follow the schedule in your mower’s manual. Replacing the filter on time prevents engine issues. Do not wait for problems to start. A fresh filter keeps fuel clean and engine safe.
Using Quality Fuel
Use clean, fresh fuel to protect the filter. Old or dirty fuel clogs the filter quickly. Fill your mower with fuel from trusted sources only. Avoid letting fuel sit in the tank for long periods. Good fuel helps the filter last longer and your mower run better.
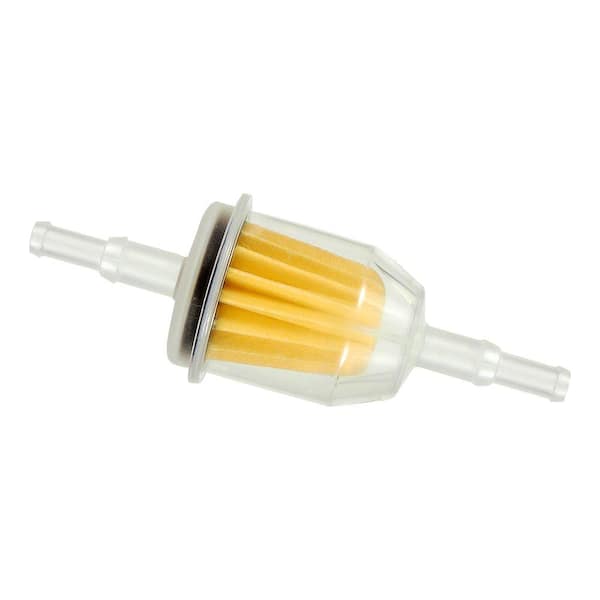
Credit: www.homedepot.com
Frequently Asked Questions
How Often Should I Change The Fuel Filter On A John Deere Mower?
Change the fuel filter every 100 hours or annually. Frequent changes ensure optimal engine performance and prevent clogs. Check your mower’s manual for specific intervals based on model and usage.
What Tools Are Needed To Replace The Fuel Filter?
You typically need a wrench, screwdrivers, and a container for fuel. Some models require pliers to remove clamps. Always wear gloves and follow safety precautions when handling fuel.
Can I Change The Fuel Filter Myself Safely?
Yes, changing the fuel filter is a simple DIY task. Ensure the engine is off and cooled down. Work in a well-ventilated area and avoid open flames for safety.
What Signs Indicate A Clogged Fuel Filter?
Symptoms include engine sputtering, reduced power, and difficulty starting. Poor fuel flow causes these issues. Replacing the filter usually resolves performance problems.
Conclusion
Changing the fuel filter on your John Deere riding mower keeps it running smooth. Clean filters stop dirt from clogging the engine. Regular changes help avoid costly repairs and save time. Use the right tools and follow safety steps carefully.
This simple task improves mower life and performance. Keep your mower ready for every job. Easy to do, worth the effort. Your mower will thank you with better power and longer use.


