
Have you ever wished your car vacuum cleaner could do more or work better without spending extra money? What if you could transform your current device into something more powerful and efficient right at home?
You’ll discover simple, step-by-step ways to convert your car vacuum cleaner easily. By the end, you’ll have a cleaner car and a sense of satisfaction from making it happen yourself. Ready to upgrade your cleaning game? Keep reading to find out how!

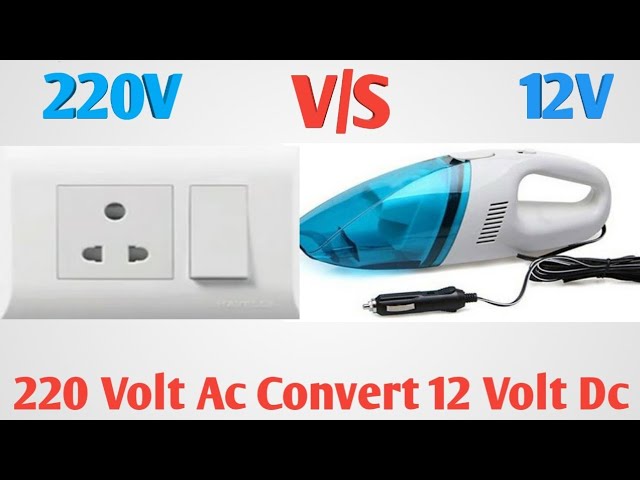
Credit: www.thetopdrive.com
Tools And Materials Needed
Gathering the right tools and materials is the first step in converting a car vacuum cleaner at home. Having everything ready makes the process smooth and fast.
Each item plays a specific role in the conversion. Using proper tools ensures safety and better results.
Basic Tools
You need simple hand tools like screwdrivers, pliers, and wire cutters. These help in opening the vacuum and handling small parts.
Electrical Components
Get a DC power adapter or a car charger plug. These parts connect the vacuum to your car’s power supply.
Replacement Parts
Sometimes, filters or hoses need replacing. Have spare filters and flexible hoses on hand for better cleaning.
Safety Equipment
Wear gloves and safety glasses to protect your hands and eyes. Safety is important when working with tools and electricity.
Cleaning Supplies
Use cloths and small brushes to clean inside the vacuum. This removes dust and dirt before reassembly.
Choosing The Right Vacuum Motor
Choosing the right vacuum motor is the first step in converting a car vacuum cleaner at home. The motor powers the suction, which cleans dirt and dust from your car. Picking a motor with the right power and size makes the vacuum effective and easy to use.
Some motors use more electricity but give stronger suction. Others save battery but work slower. You want a balance that fits your needs. Size matters too. A small motor fits better in a compact vacuum.
Understanding Motor Power And Suction
Motor power is measured in watts or volts. Higher power means stronger suction. Strong suction cleans deep dirt and small particles. A motor with 12 to 18 volts usually works well for car vacuums.
Too much power can drain your car battery quickly. Too little power may not clean well. Choose a motor that fits your cleaning habits.
Checking Motor Size And Weight
Size affects how you build the vacuum. A large motor needs more space and a bigger case. A small motor makes the vacuum light and easy to carry.
Weight is important for comfort. Heavy motors make the vacuum hard to hold. Pick a motor that feels good in your hand.
Considering Noise Levels
Vacuum motors make noise when running. Some motors are loud and annoying. Others run quietly and make cleaning pleasant.
Look for motors with noise ratings under 70 decibels. Quiet motors help avoid disturbing others around you.
Power Source Compatibility
Car vacuums usually run on 12V car batteries or 110V home outlets. Choose a motor that matches your power source. A 12V motor is best for use inside your car.
Check if the motor needs special adapters or connectors. Easy setup saves time and effort during your project.
Preparing The Vacuum Housing
Preparing the vacuum housing is the first key step in converting a car vacuum cleaner at home. This part holds all the vacuum parts together. A clean, well-prepared housing ensures your vacuum works well. It also helps the device last longer.
Start by checking the housing for any damage or cracks. Fix small cracks with glue or tape to prevent air leaks. A tight seal improves suction power. Next, remove any dirt or dust inside the housing using a soft cloth or brush.
Cleaning The Vacuum Housing
Use warm water and mild soap to clean the housing. Avoid harsh chemicals that can damage the plastic. Rinse thoroughly and let it dry completely. Drying prevents mold and bad smells inside the vacuum.
Inspecting For Damage
Look closely for cracks or holes in the housing. Damaged areas reduce suction and can let dust escape. Seal small cracks with strong adhesive or tape. Replace the housing if damage is too big to fix.
Ensuring Proper Fit Of Components
Check that all vacuum parts fit well inside the housing. Loose parts can cause noise and reduce suction. Adjust or trim parts if needed. Secure everything firmly before moving to the next step.
Wiring And Power Source Setup
Setting up the wiring and power source is a key step in converting a car vacuum cleaner at home. Proper wiring ensures the vacuum runs smoothly without any electrical issues. Choosing the right power source keeps the device safe and efficient.
Understanding how to connect wires and select power options helps avoid damage. It also makes sure the vacuum cleaner works as expected. This section explains the basics of wiring and power setup in simple terms.
Choosing The Right Power Source
Most car vacuum cleaners use a 12V power supply from the car battery. Using the correct voltage is important to prevent damage. You can also use a power adapter with the same voltage for home use. Check the vacuum’s label to find the required voltage. Avoid using power sources with higher voltage than recommended.
Preparing The Wiring Connections
Use insulated wires for safety and better conductivity. Cut wires to the needed length to avoid clutter. Strip the wire ends carefully to expose the metal core. Connect positive and negative wires according to the vacuum’s terminals. Secure connections with electrical tape or wire connectors. Loose wires can cause shorts or poor performance.
Adding A Fuse For Safety
A fuse protects the vacuum from electrical overload. Choose a fuse rated slightly above the vacuum’s current draw. Install the fuse on the positive wire near the power source. This step prevents damage to the vacuum and wiring. It also reduces fire risk during electrical faults.
Attaching The Hose And Nozzle
Attaching the hose and nozzle is a key step in converting a car vacuum cleaner at home. This process ensures your vacuum works efficiently and reaches tight spots. Proper attachment helps maintain strong suction and easy handling.
Choose The Right Hose
Select a hose that fits your vacuum’s inlet snugly. A loose hose reduces suction power. Check if the hose is flexible enough to reach all car areas. The length should be enough to clean without strain.
Secure The Hose To The Vacuum
Push the hose firmly into the vacuum’s inlet. Twist it slightly if needed to lock it in place. Avoid forcing the hose to prevent damage. A secure fit stops air leaks and keeps suction strong.
Pick The Correct Nozzle
Choose a nozzle designed for car interiors. Narrow nozzles work well for tight spaces. Brush nozzles help remove dust from fabric seats. Match the nozzle size to the hose end for a tight fit.
Attach The Nozzle To The Hose
Slide the nozzle onto the hose tip carefully. Ensure it fits tightly to avoid air leaks. Test the connection by gently pulling the nozzle. It should stay firmly attached during cleaning.
Credit: www.youtube.com
Testing The Vacuum Cleaner
Testing the vacuum cleaner after conversion is an important step. It ensures the device works well and is safe to use. This part of the process helps you find any issues early. You can fix problems before using the vacuum on your car. Follow these simple steps to test your homemade car vacuum cleaner properly.
Checking The Power Source
First, connect the vacuum to the power source. Make sure the connection is secure. Turn on the vacuum and listen for any strange sounds. The motor should run smoothly without unusual noise. If the vacuum does not start, check the wiring and battery. Confirm the power supply matches the vacuum’s needs.
Testing Suction Strength
Next, test the suction power. Hold the vacuum nozzle close to light debris like dust or small crumbs. See if the vacuum pulls in the debris quickly. Weak suction means the filter or hose may be clogged. Clean or adjust parts to improve airflow. Good suction means your vacuum is ready to clean your car.
Inspecting For Heat Or Smell
Run the vacuum for a few minutes. Check if it heats up too much during use. Excess heat can damage the motor or battery. Also, notice any strange smells like burning plastic. Stop using the vacuum immediately if you detect heat or odor. These signs suggest electrical problems or poor assembly.
Verifying Portability And Comfort
Hold the vacuum and move it around. Check its weight and balance for ease of use. Make sure the handle feels comfortable in your hand. A portable vacuum should be easy to carry and maneuver. This step ensures you can clean your car without strain or discomfort.
Troubleshooting Common Issues
Car vacuum cleaners can face common issues during use or conversion. Troubleshooting these problems helps save time and money. Simple checks often fix most issues quickly. Knowing what to inspect makes the process easier and less stressful.
Checking Power Supply Problems
Start by confirming the vacuum receives power. Verify the car’s cigarette lighter or power outlet works. Test with another device or use a multimeter. Loose connections or blown fuses can stop power flow. Replace fuses if needed and secure all plugs firmly.
Inspecting The Vacuum Motor
The motor may stop running due to dirt or damage. Clean the motor area carefully with a dry cloth. Avoid wet cleaning to prevent electrical damage. Listen for unusual sounds like grinding or buzzing. Replace the motor if it shows signs of burning or failure.
Clearing Blocked Air Filters
Blocked filters reduce suction power. Remove and wash the filter with warm water and mild soap. Let it dry completely before reinstalling. Check for tears or holes that need replacement. Clean filters improve airflow and vacuum efficiency.
Fixing Hose And Nozzle Clogs
Clogged hoses or nozzles cause weak suction. Detach the hose and check inside using a flashlight. Remove debris or hair stuck inside. Use a flexible brush or pipe cleaner to clear hard-to-reach spots. Reassemble parts tightly to prevent air leaks.
Safety Tips For Diy Vacuum Projects
Working on a DIY car vacuum cleaner project can be fun and useful. Safety must come first to avoid accidents and damage. Following simple safety tips helps protect you and your tools.
Electrical parts and small tools need careful handling. Wear protective gear like gloves and goggles. Keep your workspace clean and organized. These steps reduce risks and make the process smoother.
Use Proper Tools And Equipment
Choose the right tools for each task. Using wrong tools can cause injury or damage parts. Check tools before starting to ensure they work well. Keep sharp objects away from your body.
Work In A Well-ventilated Area
Some parts may release dust or fumes. A well-ventilated space prevents inhaling harmful particles. Open windows or use a fan to keep air flowing. Avoid closed spaces during soldering or gluing.
Disconnect Power Sources
Always unplug batteries or power cords before working on the vacuum. This prevents electric shocks and short circuits. Double-check that all power is off before touching wires or motors.
Handle Small Parts Carefully
Small screws and components can easily fall or get lost. Use containers to hold tiny parts. Avoid forcing pieces into place to prevent breaks. Keep parts away from children and pets.
Follow Instructions Step-by-step
Read all instructions before starting your project. Follow each step slowly and carefully. Skipping steps can cause mistakes or unsafe conditions. Take breaks if you feel tired or distracted.
Maintenance And Care
Proper maintenance and care keep your car vacuum cleaner working well. Regular cleaning and simple checks help the device last longer. This saves money and time on repairs or replacements.
Cleaning the vacuum after each use prevents dirt buildup. Checking parts often ensures everything works smoothly. Small efforts make a big difference in performance.
Cleaning The Filter Regularly
The filter traps dust and dirt inside the vacuum. Remove the filter and tap it gently to clear dust. Wash the filter with water if it is very dirty. Let it dry completely before putting it back.
Emptying The Dust Container
Empty the dust container after every cleaning session. A full container lowers the vacuum’s suction power. Use a soft cloth to wipe the container clean. This avoids bad smells and blockages.
Checking The Vacuum Hose
Look inside the hose for any clogs or damage. Remove any stuck debris carefully. Replace the hose if it has holes or cracks. A clear hose improves suction and cleaning efficiency.
Inspecting The Power Cord
Check the power cord for cuts or exposed wires. Avoid using the vacuum if the cord is damaged. Keep the cord untangled and stored properly. This prevents electrical hazards and extends the cord’s life.

Credit: www.amazon.com
Frequently Asked Questions
How Can I Convert A Car Vacuum Cleaner At Home?
You can convert a car vacuum cleaner by modifying its power source or adding attachments. Use a compatible adapter to switch between 12V car power and household electricity. Ensure proper insulation and secure connections to avoid damage or safety risks.
What Tools Are Needed To Convert A Car Vacuum Cleaner?
Basic tools include screwdrivers, wire strippers, electrical tape, and a multimeter. You might also need a power adapter or converter. These tools help you safely modify the vacuum’s wiring and power source for home use.
Is It Safe To Use A Car Vacuum Cleaner At Home?
Yes, if properly converted with the right adapter and insulation. Ensure all electrical connections are secure and insulated. Avoid using the vacuum cleaner near water or wet surfaces to prevent electric shock.
Can I Use A Car Vacuum Cleaner With A Regular Power Outlet?
Yes, by using a 12V to 110V/220V power inverter or a compatible adapter. This allows the vacuum cleaner to run on household electricity. Always check the vacuum’s voltage requirements before connecting.
Conclusion
Converting a car vacuum cleaner at home saves money and time. The steps are simple and easy to follow. You only need basic tools and materials. This project helps keep your car clean without extra cost. Try it yourself and enjoy a tidy car interior.
Small changes can make a big difference. Start your DIY car vacuum today and see the results.


