
Want to give your car a fresh, eye-catching look without spending a fortune? Vinyl wrapping is the perfect solution, and you can do it yourself!
Imagine transforming your ride with a sleek matte finish, bold colors, or even unique designs that turn heads wherever you go. But how do you start? How do you avoid common mistakes that waste time and money? In this guide, you’ll discover simple, step-by-step instructions to wrap your car like a pro.
By the end, you’ll feel confident and ready to make your car stand out on the road. Keep reading to unlock the secrets of vinyl wrapping and take control of your car’s style today.

Credit: wrapguys.com
Choosing The Right Vinyl Wrap
Choosing the right vinyl wrap is key to a great car transformation. The right wrap protects your car and looks amazing. It also makes the installation easier and lasts longer. Understanding types, colors, and tools helps you pick the best wrap for your project.
Types Of Vinyl Wraps
Vinyl wraps come in different types. Cast vinyl is flexible and strong. It fits curves and lasts longer. Calendered vinyl is thicker and cheaper. It works well on flat surfaces but can shrink over time. Choose cast vinyl for cars that need a smooth, durable finish.
Selecting Colors And Finishes
Colors affect your car’s style. Glossy wraps shine bright and look new. Matte finishes give a modern, sleek look without shine. Satin wrap sits between gloss and matte. Some wraps have textures like carbon fiber or brushed metal. Pick a color and finish that match your style and car model.
Tools And Materials Needed
Good tools make wrapping easier. You need a squeegee to smooth the vinyl. A heat gun helps shape the wrap around curves. A sharp knife cuts excess material. Cleaning supplies remove dirt before wrapping. Use gloves to keep the wrap clean. Prepare everything before you start for best results.
Preparing The Car Surface
Preparing the car surface is the first step in applying a vinyl wrap. It ensures the wrap sticks well and looks smooth. A clean, smooth surface helps the vinyl last longer and prevents bubbles or wrinkles. Follow these steps to get your car ready for wrapping.
Cleaning And Degreasing
Start by washing the car thoroughly. Use soap and water to remove dirt and dust. Dry the car with a clean cloth. Next, use a degreaser to remove oils and wax. These can stop the vinyl from sticking properly. Wipe the surface with a microfiber cloth after degreasing.
Removing Obstacles And Accessories
Remove parts like mirrors, badges, and antennae. These can get in the way during wrapping. Take off door handles if possible. This helps to wrap edges cleanly. Keep screws and clips safe for reassembly later. A smooth surface makes the wrapping easier.
Fixing Surface Imperfections
Check the car for dents, scratches, or rust spots. Fill dents with body filler and sand smooth. Use touch-up paint for scratches to prevent rust. Rust must be removed or treated before wrapping. A flat surface ensures the vinyl lays down perfectly.
Measuring And Cutting Vinyl
Measuring and cutting vinyl correctly is key to a clean car wrap. Poor measurements cause waste and wrinkles. Taking time to measure and cut carefully saves effort later. This section covers simple steps for precise measuring and cutting.
Taking Accurate Measurements
Start by cleaning the car surface. Use a tape measure to find the length and width of each panel. Write down measurements clearly. Measure twice to avoid mistakes. Add extra inches for wrapping edges and curves. Use a flexible ruler for curved areas. Accurate measurements prevent gaps and bubbles.
Cutting Techniques For Precision
Place the vinyl on a flat surface. Use a sharp utility knife or vinyl cutter. Cut slowly along the measured lines. Use a straight edge or ruler for straight cuts. Avoid jagged edges by not rushing. Keep the vinyl flat to prevent stretching. Trim excess vinyl after applying for a perfect fit.
Planning For Overlaps And Seams
Allow extra vinyl for overlaps between panels. Overlaps help hide seams and improve adhesion. Plan seams where they are less visible, like door edges. Cut vinyl pieces slightly larger for stretching and alignment. Overlaps should be about 1 to 2 inches. Proper seams avoid peeling and bubbles later.
Credit: theartworks.com
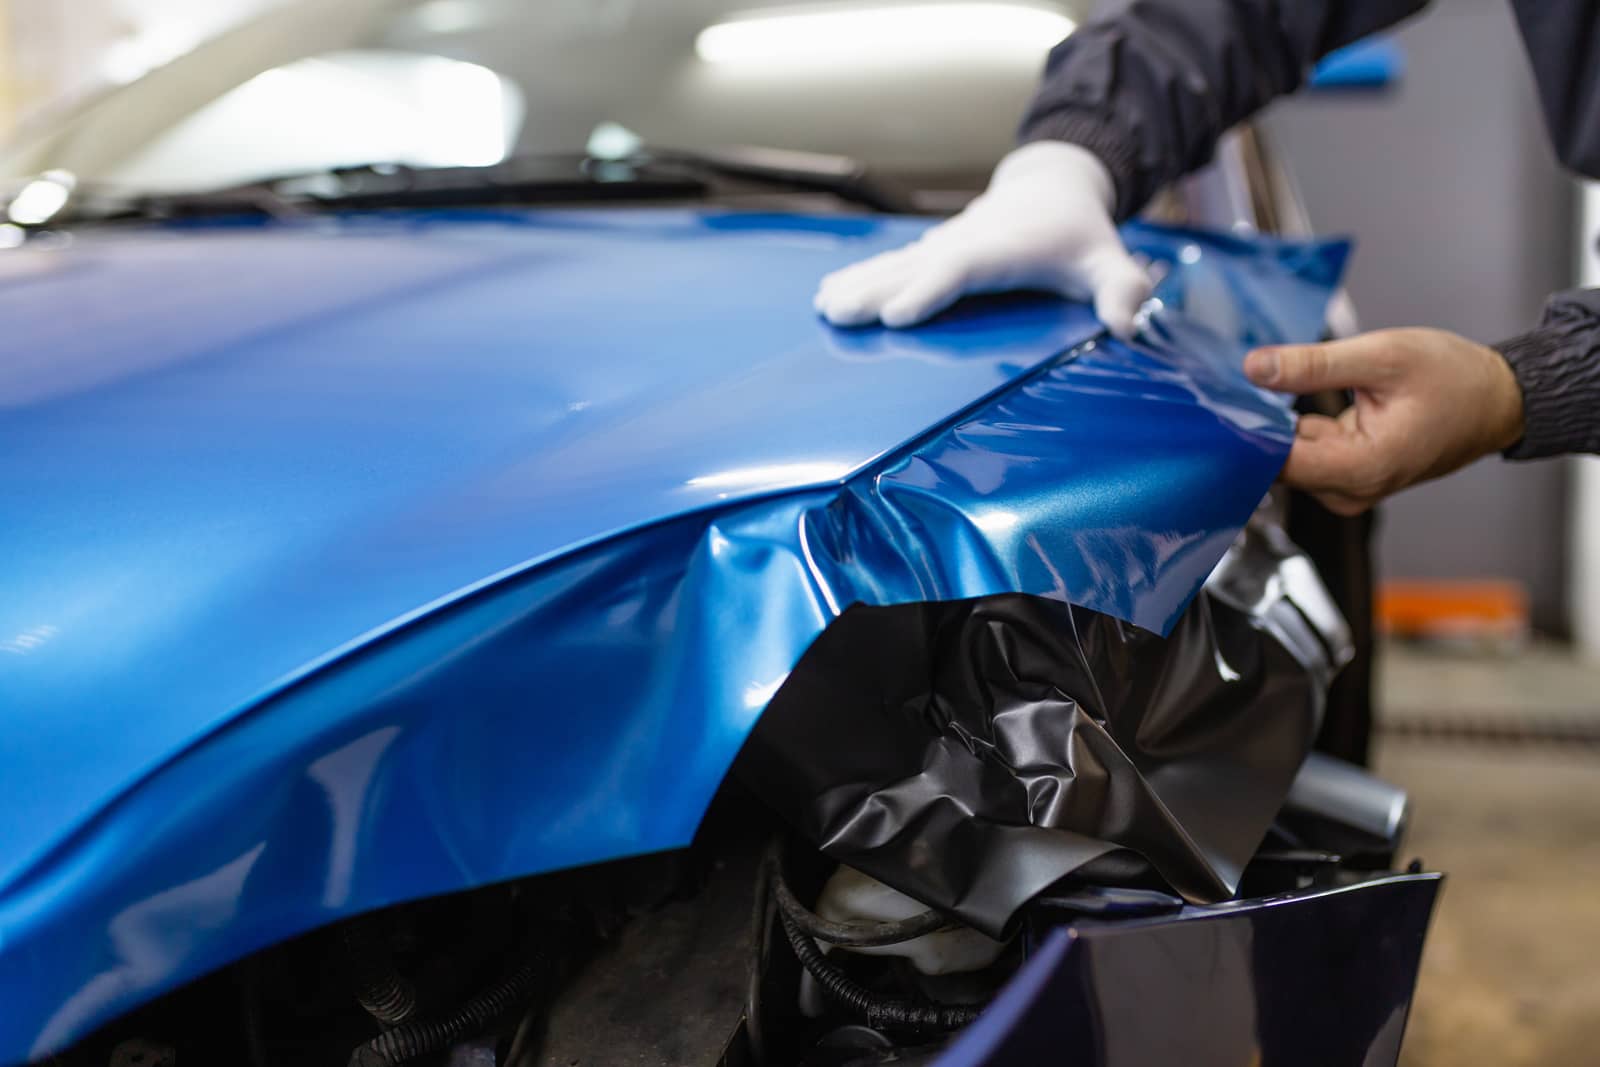
Applying The Vinyl Wrap
Applying the vinyl wrap on a car is a careful step. It needs patience and steady hands. Proper application ensures the wrap lasts long and looks smooth. This section explains how to place the vinyl correctly and avoid common problems.
Positioning The Vinyl
Start by cleaning the car surface well. Dirt or dust can cause bubbles. Peel the backing paper slowly. Align the vinyl on the car part. Use magnets or tape to hold it in place. Check the fit before sticking it down. Make small adjustments to avoid wrinkles.
Using Heat For Flexibility
Heat softens the vinyl, making it easier to stretch. Use a heat gun or a hairdryer on low heat. Warm the vinyl gently, not too hot. This helps the vinyl wrap fit curves and edges. Avoid overheating as it can damage the vinyl. Move the heat source evenly over the surface.
Smoothing Out Bubbles And Wrinkles
Use a squeegee to press the vinyl flat. Start from the center and move outward. Push out air bubbles toward the edges. For stubborn wrinkles, apply more heat. Stretch the vinyl slightly and smooth it again. Take time to check every inch carefully. Clean edges look neat and professional.
Trimming And Finishing Touches
Trimming and finishing touches are key to a clean vinyl wrap job. They give your car a neat, professional look. This step stops the vinyl from peeling or lifting over time. Proper trimming and finishing help the wrap last longer and look better.
Cutting Excess Vinyl
Start by carefully cutting off extra vinyl around edges and corners. Use a sharp utility knife for precise cuts. Cut slowly to avoid damaging the car’s paint. Leave a small margin for tucking under edges later. This step cleans up the wrap and shapes it to your car.
Tucking Edges For Durability
Tuck the vinyl edges into seams, gaps, or trim spaces. Use a plastic squeegee or your fingers to press the vinyl firmly. This secures the wrap and prevents dirt or water from getting underneath. Proper tucking also stops the wrap from lifting or peeling. Take your time to make the edges smooth and tight.
Sealing And Protecting The Wrap
Apply edge sealer to all tucked areas for extra protection. This liquid prevents moisture and dust from damaging the wrap. Use a brush or applicator to spread the sealer evenly. Let it dry fully before using the car. Sealing keeps the vinyl strong and looking fresh for years.
Maintenance Tips For Longevity
Proper care keeps your vinyl wrap looking fresh and lasting longer. Small steps can protect the wrap from fading, peeling, and damage. Follow these tips to maintain your car’s vinyl wrap in great shape.
Cleaning Wrapped Surfaces
Clean the wrap regularly with mild soap and water. Use a soft cloth or sponge to avoid scratches. Avoid harsh chemicals or abrasive cleaners. Rinse thoroughly and dry with a clean microfiber towel. Do not use a high-pressure washer close to edges; it can lift the wrap.
Avoiding Damage And Wear
Park in shaded areas to reduce sun damage and fading. Avoid parking under trees to prevent sap or bird droppings. Do not use abrasive brushes or scrapers on the wrap. Drive carefully to avoid scratches from road debris. Keep the wrap away from gasoline or oil spills.
Repairing Minor Issues
Fix small tears or bubbles quickly to stop worsening. Use a heat gun to soften the vinyl and smooth out bubbles. For minor scratches, use a vinyl wrap repair kit. Replace damaged sections if needed to keep the wrap looking new. Seek professional help for major repairs to avoid further damage.

Credit: www.youtube.com
Frequently Asked Questions
What Tools Do I Need For Vinyl Car Wrapping?
You need a squeegee, heat gun, utility knife, microfiber cloth, and gloves. These tools help apply vinyl smoothly and avoid bubbles or wrinkles.
How Long Does A Vinyl Wrap Last On A Car?
A quality vinyl wrap typically lasts 5 to 7 years. Proper care, cleaning, and avoiding harsh chemicals extend its lifespan.
Can I Wrap My Car Vinyl Myself?
Yes, with patience and practice, you can DIY vinyl wrap your car. Watch tutorials and prepare surfaces thoroughly for best results.
How Do I Prepare My Car Before Vinyl Wrapping?
Clean the car thoroughly to remove dirt and wax. Dry it completely to ensure vinyl adheres properly and lasts longer.
Conclusion
Vinyl wrapping your car can change its look quickly and affordably. The process takes time but is simple with patience and care. Clean the surface well before starting to avoid bubbles and wrinkles. Use the right tools to stretch and smooth the vinyl properly.
Take your time to get neat edges and a smooth finish. A well-done wrap protects your car’s paint and stands out on the road. Try it yourself to give your car a fresh, new style. Practice helps improve your skill and results each time.


