
Are your brakes not performing like they used to? Drilling your brake rotors could be the simple upgrade your car needs to boost stopping power and reduce heat build-up.
But if you’ve never done it before, the idea might seem a bit intimidating. Don’t worry—you’re about to discover an easy, step-by-step way to drill your brake rotors safely and effectively. By the end of this guide, you’ll have the confidence and know-how to improve your braking system and keep your drives safer.
Ready to get started? Let’s dive in.
Choosing The Right Rotors
Choosing the right brake rotors is key for safe and smooth driving. The right rotors improve braking power and last longer. Picking rotors that match your car and driving style helps avoid problems. Learn about types, materials, and compatibility before you drill brake rotors.
Types Of Brake Rotors
Brake rotors come in several types. Solid rotors are simple and best for everyday driving. Vented rotors have channels to cool faster. Drilled rotors have holes that help heat escape. Slotted rotors have grooves to clear dust and water. Choose a type that fits your driving needs.
Material Considerations
Rotors are made from different materials. Cast iron is common and affordable. It handles heat well but can be heavy. Steel rotors are stronger but cost more. Carbon composite rotors are light and cool fast. They suit high-performance cars but are expensive. Pick material based on budget and use.
Rotor Compatibility
Not all rotors fit every car. Check your vehicle’s make and model before buying. Look at rotor size, thickness, and bolt pattern. Ensure new rotors match your brake pads. Using wrong rotors can cause poor braking or damage. Always choose rotors designed for your vehicle.
Tools And Equipment Needed
Drilling brake rotors requires specific tools and equipment for safe and accurate work. Choosing the right items helps you avoid damage and ensures a smooth process. Prepare all tools before starting to keep your workflow steady and efficient.
Drill And Drill Bits
A power drill is essential for making holes in the brake rotor. Use a drill with adjustable speed for better control. Select drill bits designed for metal drilling, preferably cobalt or titanium-coated. Sharp bits reduce heat and make cleaner holes. Replace dull bits to prevent slipping and damage.
Measuring Tools
Accurate measurements are key to drilling brake rotors properly. Use a caliper to measure rotor thickness and hole placement. A center punch helps mark exact drilling spots. Measuring tape or ruler can assist in spacing holes evenly. Double-check all marks before drilling to avoid mistakes.
Safety Gear
Safety gear protects you from metal shards and dust. Wear safety goggles to shield your eyes. Use gloves for hand protection against sharp edges. A dust mask prevents inhaling harmful particles. Keep ear protection handy to reduce noise from the drill.
Preparing The Rotors
Preparing the rotors is a key step before drilling. This process ensures accuracy and safety. Proper preparation helps avoid mistakes and damage. Take your time to get this right.
Cleaning The Surface
Start by cleaning the rotor surface well. Remove all dirt, grease, and rust. Use a brake cleaner or rubbing alcohol. A clean surface helps the drill bit stay steady. Wipe the rotor dry with a clean cloth. This prevents slippage during drilling.
Marking Drill Points
Mark the exact spots where you want to drill. Use a ruler or measuring tape for precision. Mark with a center punch or a sharp marker. Make small indentations to guide the drill bit. Accurate marks keep holes in the right place. Avoid guessing to prevent uneven holes.
Securing The Rotor
Secure the rotor firmly before drilling. Use a clamp or a vise to hold it still. Make sure the rotor cannot move or spin. A stable rotor reduces the risk of injury. It also ensures clean, straight holes. Check the tightness before starting to drill.
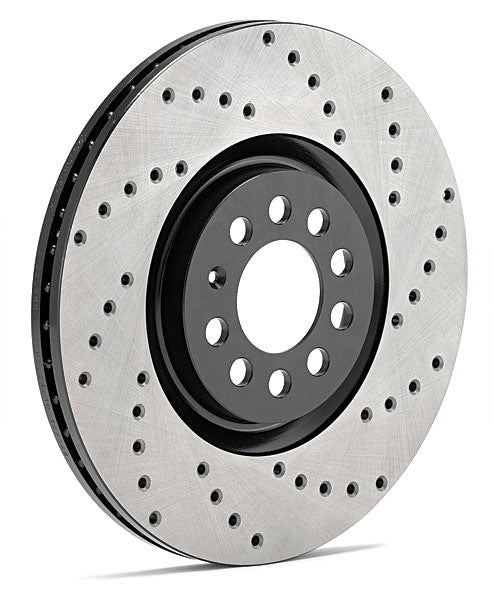
Credit: flat6motorsports.com
Drilling Process
Drilling brake rotors improves brake performance and heat dissipation. The drilling process requires care and precision. Proper technique ensures safety and extends rotor life.
Follow each step carefully to avoid damage. Use the right tools and techniques for best results.
Choosing Drill Speed
Select a drill speed between 1500 and 2000 RPM. Too fast heats the rotor and causes cracks. Too slow makes drilling difficult and uneven. Maintain steady speed for clean holes.
Applying Proper Pressure
Use moderate pressure while drilling the rotor. Pressing too hard can warp or crack the metal. Too light pressure wastes time and wears the drill bit. Let the drill do the work with steady force.
Cooling Techniques
Keep the rotor cool during drilling to avoid damage. Spray water or cutting fluid on the drill area. Pause occasionally to let heat dissipate. Cooling protects the rotor and drill bit from overheating.
Finishing Touches
After drilling brake rotors, the final steps are crucial for safety and performance. These finishing touches ensure the rotors work smoothly and last longer. Taking time here prevents problems later.
Deburring The Holes
Drilling leaves sharp edges around the holes. These edges can cause damage or noise. Use a deburring tool or fine file to smooth the edges. Move the tool gently around each hole until smooth.
Deburring stops cracks from starting and helps brake pads wear evenly. A clean edge means better rotor life and safer brakes.
Cleaning Residue
Drilling creates metal dust and small particles on the rotor. Clean the rotor well using brake cleaner or rubbing alcohol. Wipe with a clean cloth to remove all residue.
Residue can cause brake noise or reduce friction between rotor and pads. Clean rotors perform better and keep your brakes quiet.
Inspecting The Work
Look carefully at each drilled hole and the rotor surface. Check for cracks, uneven holes, or leftover debris. Make sure the holes are the right size and spacing.
Inspecting avoids brake failure and ensures the rotor fits properly. Take your time to confirm everything is perfect before reinstalling the rotor.
Common Mistakes To Avoid
Drilling brake rotors is a task that requires care and precision. Avoiding common mistakes helps ensure safety and effectiveness. Mistakes can cause damage or reduce braking performance. Pay attention to these key errors.
Misalignment Issues
Drill holes must be perfectly aligned. Misalignment weakens the rotor and causes vibrations. Use a guide or template for accuracy. Check the rotor surface before drilling. Misaligned holes can lead to costly repairs.
Overheating The Rotor
Drilling creates heat, which can damage the rotor. Overheating may cause warping or cracks. Use a slow drill speed and light pressure. Cool the rotor with water or coolant during drilling. Avoid holding the drill in one spot too long.
Using Incorrect Drill Bits
Select drill bits designed for metal, not wood or plastic. Wrong bits can break or produce poor holes. Use high-speed steel or cobalt bits for durability. Keep bits sharp and replace dull ones quickly. Correct bits make drilling smoother and safer.
Maintaining Drilled Rotors
Maintaining drilled rotors is key to keeping your brakes working well and lasting longer. These rotors have holes that help cool them down and reduce brake fade. Dirt, dust, and wear can affect their performance. Regular care keeps them safe and effective.
Regular Inspections
Check drilled rotors often for cracks or deep grooves. Look for any uneven wear or rust buildup. Small cracks can grow and cause rotor failure. Use a flashlight to see inside the holes. Inspect both sides of the rotor carefully.
Cleaning Tips
Clean rotors with a soft brush and brake cleaner spray. Avoid harsh chemicals that can damage the metal. Remove dust and dirt from the holes and surface. Dry the rotors completely before use. Keeping rotors clean helps prevent noise and improves braking.
When To Replace
Replace rotors if cracks become large or holes get damaged. Also change them if they are warped or very thin. Thin rotors can cause poor braking and heat issues. Follow your vehicle’s manual for thickness limits. Timely replacement ensures safe driving and better brake response.
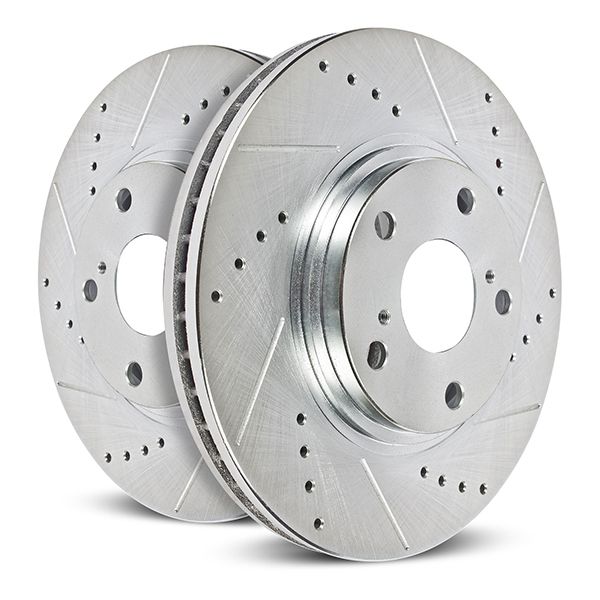
Credit: www.powerstop.com

Credit: www.youtube.com
Frequently Asked Questions
How Do You Drill Brake Rotors Safely?
Use a drill press or steady hand with proper clamps. Wear safety glasses and gloves. Mark hole positions precisely before drilling to avoid mistakes.
What Drill Bit Size Is Best For Brake Rotors?
Typically, a 3/16-inch or 1/4-inch titanium-coated drill bit works well. Ensure the bit suits your rotor material for clean holes.
Can Drilling Brake Rotors Improve Braking Performance?
Drilled rotors help dissipate heat and reduce brake fade. They also improve wet weather braking by channeling water away.
How To Prevent Rotor Cracking When Drilling?
Use a lubricant like cutting oil to reduce heat. Drill at a slow speed and avoid excessive pressure for clean holes.
Conclusion
Drilling brake rotors takes care and focus. Follow steps carefully to avoid mistakes. Use the right tools for safety and success. Keep your workspace clean and organized. Take your time; rushing can cause problems. Properly drilled rotors help improve brake performance.
Check your work often to ensure accuracy. Practice makes this task easier and safer. Stay patient and confident throughout the process. You can handle this with care and attention.


