Is your car making strange noises when you brake? Or maybe your brake pedal feels soft and unresponsive?
These are clear signs that your brake pads and rotors might need fixing. You might think repairing them is complicated or expensive, but it doesn’t have to be. You’ll discover simple, step-by-step ways to fix your brake pads and rotors yourself.
By the end, you’ll save money, boost your confidence, and keep your car safe on the road. Ready to take control of your vehicle’s brakes? Let’s get started.
Signs Of Worn Brake Pads And Rotors
Worn brake pads and rotors can make driving unsafe. Recognizing the signs early helps prevent accidents and costly repairs. Brake issues often start small but grow quickly. Pay attention to noises, feelings, and visual clues from your brakes. These signs show your brakes need attention.
Squeaking And Grinding Noises
Squeaking sounds often mean brake pads are thin. The noise comes from a small metal indicator on the pad. Grinding noises mean the pads are gone, and metal touches metal. This can damage the rotors badly. Never ignore these sounds. They warn you about brake wear.
Reduced Braking Performance
Your car takes longer to stop than before. The brake pedal feels soft or sinks down more than usual. The car might pull to one side during braking. These signs show brake pads or rotors have worn out. Reduced braking is dangerous and needs quick action.
Vibrations During Braking
Feeling vibrations or shaking when braking means rotor problems. Rotors may be warped or damaged. Warped rotors cause uneven contact with brake pads. This creates a pulsing feeling in the pedal or steering wheel. Vibrations should never be ignored.
Visual Inspection Tips
Look at the brake pads through the wheel spokes. Pads should be at least 1/4 inch thick. If thinner, they need replacing. Check rotors for grooves or cracks. Deep grooves or rust spots mean the rotors are worn. Clean brakes look smooth and shiny. Regular checks help catch wear early.

Credit: www.youtube.com
Tools And Materials Needed
Fixing brake pads and rotors requires the right tools and materials. Having everything prepared makes the job easier and safer. Using proper tools ensures the parts fit well and work correctly.
Essential Tools List
Start with a jack to lift your car safely. You will need jack stands to hold the car in place. A lug wrench helps remove the wheel nuts. Use a socket set for bolts on the brake caliper and rotor. A C-clamp or brake caliper tool compresses the brake piston. A wire brush cleans rust from the rotor and hub. Brake cleaner spray removes dirt and grease. Finally, a torque wrench tightens bolts to the right strength.
Choosing The Right Brake Pads And Rotors
Select brake pads and rotors designed for your car model. Check the owner’s manual or ask at an auto parts store. Choose pads with good reviews and correct size. Rotors should match the thickness and diameter recommended. Quality parts last longer and improve braking performance. Avoid cheap parts that wear out quickly or cause noise.
Safety Equipment
Wear safety glasses to protect your eyes from dust and debris. Use gloves to keep your hands clean and safe from sharp edges. Wear a dust mask to avoid inhaling brake dust. Work in a well-ventilated area to reduce exposure to fumes. Keep a fire extinguisher nearby, just in case. Safety keeps the repair process smooth and risk-free.
Preparing Your Vehicle
Preparing your vehicle correctly is the first step to fixing brake pads and rotors. Safety comes first. Taking time to set up your car properly helps avoid accidents. It also makes the repair process easier and faster.
Parking And Securing The Car
Park your car on a flat, solid surface. Avoid slopes or soft ground. Apply the parking brake firmly. Place wheel chocks behind the wheels that stay on the ground. This stops the car from rolling. Double-check that the car is fully stopped before moving on.
Loosening Lug Nuts
Before lifting the car, loosen the lug nuts on the wheel. Use a lug wrench or breaker bar. Turn the nuts counterclockwise just enough to break them loose. Do not remove them completely yet. Loosening them now is easier while the tire is still on the ground.
Lifting The Vehicle Safely
Use a reliable car jack to lift the vehicle. Check your owner’s manual for the correct jacking points. Place jack stands under the car for extra support. Never rely on the jack alone. Lift the car until the tire is off the ground. Make sure the car is steady before starting work.
.jpg)
Credit: www.cbac.com
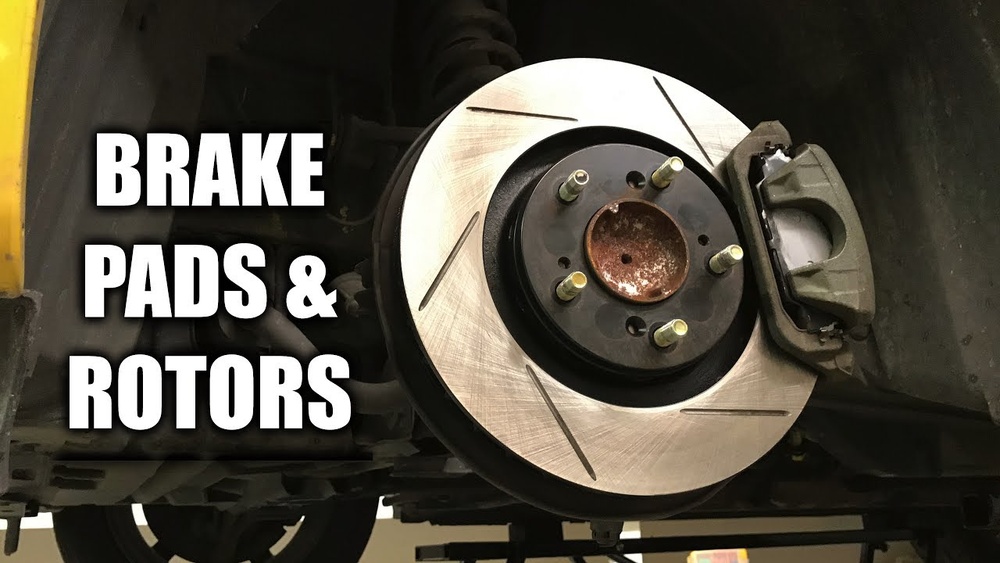
Removing Old Brake Pads And Rotors
Removing old brake pads and rotors is the first step in a brake repair job. This process needs care and the right tools. Old parts can be stuck due to rust or dirt. Taking them off safely helps prepare the car for new parts. Follow each step carefully to avoid damage.
Wearing gloves and eye protection is important before starting. Make sure the car is on a flat surface and the parking brake is on. Use jack stands for safety. Keep all bolts and parts organized for easy reassembly.
Removing The Wheel
Loosen the lug nuts while the car is on the ground. Use a wrench or impact driver for this. Then, lift the car with a jack and place it on stands. Remove the lug nuts completely and pull the wheel off. Set the wheel aside in a safe place.
Detaching The Caliper
Locate the brake caliper over the rotor. Find the bolts holding the caliper in place. Use the correct size socket or wrench to remove these bolts. Carefully slide the caliper off the rotor. Do not let the caliper hang by the brake hose; use a hook or place it on a support.
Taking Out Brake Pads
Look inside the caliper bracket for the brake pads. They fit snugly on each side of the rotor. Pull the old brake pads out by hand or with a flat tool. Note how the pads sit for easy replacement. Check the pads for wear to confirm the need for replacement.
Removing The Rotor
Some rotors have screws holding them to the hub. Remove these screws if present. If the rotor is stuck, tap it gently with a rubber mallet. Avoid hitting hard to prevent damage. Slide the rotor off the wheel hub carefully. Clean the hub surface before installing a new rotor.
Installing New Brake Pads And Rotors
Installing new brake pads and rotors is a key step to keep your vehicle safe. This process improves braking power and reduces noise. Follow clear steps to ensure a proper fit and smooth brake function. Take your time and work carefully.
Cleaning The Hub And Caliper
Start by cleaning the hub surface. Remove rust and dirt using a wire brush. This helps the rotor sit flat. Clean the caliper too, wiping off dust and debris. A clean area prevents uneven wear and noise.
Positioning The New Rotor
Place the new rotor on the hub carefully. Align it with the bolt holes. Push it firmly to sit flush against the hub. This ensures the rotor spins evenly without wobbling.
Inserting New Brake Pads
Open the caliper to insert the new brake pads. Place the pads in the caliper bracket correctly. Check that the pad surface faces the rotor. Secure them so they do not move during braking.
Reattaching The Caliper
Slide the caliper back over the new pads and rotor. Align it with the mounting bolts. Tighten the bolts to the correct torque using a wrench. Double-check everything is secure before finishing.
Final Steps And Testing
After replacing brake pads and rotors, the final steps ensure your car is safe to drive. Each step helps confirm the repair is secure and working well. Take your time to follow these steps carefully.
Reinstalling The Wheel
Place the wheel back onto the hub carefully. Align the holes in the wheel with the lug bolts. Push the wheel until it sits flush against the rotor. This step prevents wobbling and keeps the wheel steady.
Lowering The Vehicle
Use the jack to slowly lower your vehicle to the ground. Do this gently to avoid any sudden movements. Once the vehicle rests on all wheels, remove the jack safely. The car must be stable before tightening the lug nuts.
Tightening Lug Nuts
Tighten the lug nuts in a star pattern. This pattern keeps the wheel balanced and secure. Use a torque wrench if possible to get the right tightness. Tight lug nuts prevent the wheel from loosening while driving.
Performing A Brake Test
Start your car and press the brake pedal gently. The pedal should feel firm and not sink to the floor. Test brakes at low speed in a safe area. Listen for noises and check if the car stops smoothly. Proper brake function means your repair is successful.
Maintenance Tips For Longer Brake Life
Proper maintenance keeps brake pads and rotors working well for a longer time. It helps avoid costly repairs and keeps driving safe. Simple habits and checks can extend the life of your brakes.
Regular Inspections
Check brake pads and rotors often. Look for signs of wear like thin pads or grooves on rotors. Listen for squeaking sounds when braking. These signs mean your brakes need attention. Early detection prevents bigger problems.
Avoiding Hard Braking
Brake gently to reduce wear. Hard braking heats up pads and rotors fast. Heat causes damage and shortens brake life. Keep a safe distance from cars ahead. This helps you stop smoothly and avoid sudden braking.
When To Replace Brake Components
Replace pads if thickness is below 3mm. Rotors need replacement if warped or deeply scored. Also change parts if you feel vibration when braking. Timely replacement keeps brakes effective and safe.

Credit: vatire.com
Frequently Asked Questions
How Do I Know When To Replace Brake Pads?
Brake pads need replacement when you hear squealing or grinding noises. Also, check if braking feels less responsive or the pads look thin. Regular inspection every 12,000 miles helps ensure safety and optimal braking performance.
Can I Fix Brake Rotors Without Professional Help?
Yes, you can fix brake rotors by resurfacing or replacing them. Ensure the rotor thickness meets manufacturer specifications. Use proper tools and follow safety precautions. If unsure, consult a professional to avoid braking issues or accidents.
What Tools Are Needed To Fix Brake Pads And Rotors?
Essential tools include a jack, lug wrench, C-clamp, socket set, and brake cleaner. You may also need a rotor resurfacing tool or new rotors. Having the right tools ensures a safe and efficient brake repair process.
How Long Does It Take To Replace Brake Pads And Rotors?
Replacing brake pads and rotors typically takes 1 to 2 hours for both axles. Time varies based on experience and vehicle type. Proper preparation and following instructions can speed up the process while ensuring safety.
Conclusion
Fixing brake pads and rotors can save time and money. Start by gathering the right tools and safety gear. Follow each step carefully to avoid mistakes. Check your work before driving to ensure safety. Regular brake maintenance keeps your car running smoothly.
Stay patient and take your time during the process. This simple skill helps you feel more confident with car care. Keep learning to handle small repairs on your own. Safe driving begins with well-maintained brakes.