

If you want to give your Toyota Highlander a sleek, finished look while protecting it from door dings and scratches, installing body side molding is a smart move. But you might be wondering how to do it yourself without any hassle or damage.
Don’t worry—this guide will walk you through each simple step so you can add that extra layer of style and protection with confidence. By the end, you’ll know exactly how to install body side molding on your Highlander quickly and easily, saving you time and money.
Ready to upgrade your ride? Let’s get started!

Credit: autoparts.northparktoyota.com
Tools And Materials Needed
Installing body side molding on your Toyota Highlander requires specific tools and materials. Having the right items makes the job easier and ensures a clean finish. Prepare everything before starting for smooth work.
List Of Required Tools
- Measuring tape or ruler
- Masking tape
- Plastic trim removal tool
- Cleaning cloths
- Isopropyl alcohol or surface cleaner
- Heat gun or hair dryer
- Adhesive promoter (if needed)
- Body side molding clips or double-sided automotive tape
- Screwdriver set (if clips require screws)
Choosing The Right Molding
Select molding designed for the Toyota Highlander model year. This ensures proper fit and style matching. Choose between paintable or pre-painted molding. Consider color matching your vehicle’s paint for a seamless look.
Check if the molding comes with adhesive backing or clips. Decide based on your preference for installation method. Quality materials resist weather and last longer.
Preparing The Vehicle
Preparing your Toyota Highlander before installing body side molding is key. Proper preparation ensures the molding sticks well and lasts long. It also helps avoid damage to your vehicle’s paint.
Start by focusing on two main tasks: cleaning the surface and removing old molding. These steps create a smooth base for the new molding.
Cleaning The Surface
Clean the side of your Highlander where the molding will go. Use soap and water to remove dirt and grease. Dry the area fully with a soft cloth. Any dust or oil can stop the adhesive from sticking properly.
For better results, wipe the area with rubbing alcohol. This removes leftover oils and helps the surface stay clean. Avoid touching the cleaned spot with your fingers after wiping it down.
Removing Old Molding
Remove any old or damaged molding before adding new strips. Use a plastic scraper to lift the edges gently. Pull slowly to avoid scratching the paint.
Clean off leftover adhesive with adhesive remover or rubbing alcohol. Take your time. A smooth surface helps the new molding fit perfectly and stay secure.
Measuring And Aligning
Measuring and aligning the body side molding on your Toyota Highlander is a key step. This process ensures the molding fits perfectly and looks great. Taking accurate measurements saves time and avoids mistakes. Proper alignment keeps the molding straight and secure on the vehicle’s side.
Marking The Placement
Start by cleaning the area where the molding will go. Use a soft cloth and mild cleaner. This removes dirt and helps the molding stick better. Next, use a measuring tape to find the exact spot. Measure from the front and back edges of the door. Mark small points with a pencil or masking tape. These marks guide the molding placement. Double-check the marks to ensure they are even on both sides.
Checking Fit And Alignment
Before removing any adhesive backing, hold the molding up to the marked area. See if it fits well along the door’s contour. Check that the molding lines up with the marks. Adjust if needed. Look closely to avoid gaps or uneven edges. Confirm the molding sits flush against the door surface. Once satisfied, proceed to attach it. Taking time here prevents future issues and improves appearance.

Credit: parts.longotoyota.com
Installing The Body Side Molding
Installing the body side molding on your Toyota Highlander improves its look and protects the doors. This process needs care and the right steps to ensure the molding fits well and stays secure. Follow these steps to install the molding properly.
Applying Adhesive Or Clips
Start by cleaning the area where the molding will go. Use rubbing alcohol to remove dirt and oil. This helps the adhesive stick better. Some moldings come with tape or glue already on the back. Peel off the protective layer carefully.
If your molding uses clips, check each clip before attaching. Make sure clips are not broken or bent. Attach the clips evenly along the molding strip. This keeps the molding straight and tight against the car.
Securing The Molding In Place
Press the molding firmly against the car’s side. Hold it for a few seconds to help the adhesive bond. Use gentle but steady pressure from one end to the other. Avoid pushing too hard to prevent damage.
If clips are used, push the molding until you hear a click. This means the clips locked into the car’s body. Check the molding by lightly pulling on it. It should feel tight and not move.
Final Checks And Maintenance
After installing the body side molding on your Toyota Highlander, it is important to perform final checks and regular maintenance. This helps keep the molding secure and looking new for a long time. Proper care prevents damage and ensures the molding stays attached firmly to your vehicle.
Ensuring Proper Attachment
Check the molding edges for any gaps or loose spots. Press gently along the entire molding to confirm it sticks well. Make sure all clips and adhesive strips are fully engaged. If you find any part lifting, press it down firmly or reapply adhesive if needed. A well-attached molding protects your car from scratches and dirt.
Caring For The Molding
Clean the molding regularly with mild soap and water. Avoid harsh chemicals that can weaken the adhesive or fade the color. Dry the area carefully to prevent water spots. Inspect the molding often for cracks or peeling. Early repair can save you from costly replacements. Proper care helps maintain your Highlander’s stylish look and value.
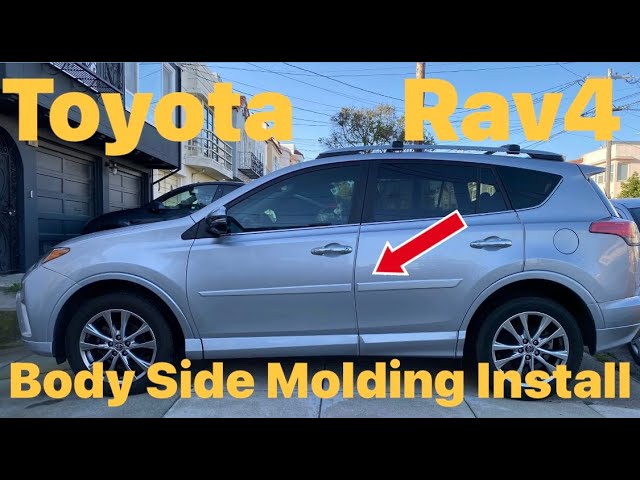
Credit: www.youtube.com
Frequently Asked Questions
How Do I Prepare My Toyota Highlander For Molding Installation?
Clean the side surface thoroughly. Remove dirt, wax, and grease. Use rubbing alcohol for best results. Ensure the area is dry before applying the molding.
What Tools Do I Need For Installing Side Molding?
You need a plastic trim tool, adhesive promoter, and masking tape. A measuring tape and a clean cloth are also helpful for alignment and cleaning.
How Long Does Body Side Molding Installation Take?
Installation usually takes about 30 to 45 minutes. Time depends on your experience and surface preparation. Proper alignment and adhesion are key for durability.
Can I Install Body Side Molding Without Professional Help?
Yes, you can install it yourself with basic tools. Follow the instructions carefully for proper alignment. DIY installation saves cost and adds a personal touch.
Conclusion
Installing body side molding on your Toyota Highlander protects its sides and adds style. Follow each step carefully to ensure a strong fit. Take your time to clean the surface well before attaching the molding. Use the right tools for a smooth, easy process.
With patience, your Highlander will look better and stay safer from door dings. Enjoy the fresh look and added protection without needing professional help. Simple tasks like this can save money and boost your car’s appeal. Ready for a quick upgrade?
Just follow these easy steps.


