
Are your Chevy Cruze wheel covers looking worn out or missing? Installing new wheel covers can instantly boost your car’s appearance and protect your wheels from dirt and damage.
But if you’ve never done it before, the process might seem tricky. Don’t worry—you’re about to learn a simple, step-by-step method to install your Chevy Cruze wheel covers quickly and securely. Keep reading, and you’ll save time and money by doing it yourself like a pro!
Tools Needed
Installing wheel covers on a Chevy Cruze is a simple task. Having the right tools makes the job faster and safer. This section lists all the tools needed for a smooth installation.
Flathead Screwdriver
A flathead screwdriver helps pry off old wheel covers. It also assists in aligning the new covers properly. Use it carefully to avoid scratching the wheels.
Rubber Mallet
A rubber mallet gently taps the wheel covers into place. It avoids damage to the covers and wheels. A soft tap ensures a secure fit without cracks.
Gloves
Wearing gloves protects your hands during installation. It also helps maintain a clean grip on tools and covers. Choose gloves that fit well and offer good grip.
Clean Cloth
Use a clean cloth to wipe dirt from the wheel. Clean wheels help covers fit better and last longer. A dry cloth or a slightly damp one works fine.
Preparing The Wheel
Preparing the wheel is a key step before installing Chevy Cruze wheel covers. This step ensures the wheel cover fits well and stays in place. Taking time to prepare the wheel prevents damage and keeps your wheels looking good. Proper preparation also helps the wheel cover last longer.
Cleaning The Surface
Start by cleaning the wheel surface. Dirt and grime can stop the cover from fitting properly. Use soap and water to wash the wheel. A soft brush helps remove stubborn dirt. Dry the wheel fully with a clean cloth. A clean surface ensures better grip for the wheel cover.
Inspecting For Damage
Check the wheel for any damage before installing the cover. Look for cracks, dents, or rust spots. Damage can affect how the cover fits. Small issues should be fixed to avoid bigger problems. A smooth, undamaged wheel makes installation easier and safer.
Removing Old Wheel Covers
Removing old wheel covers is the first step in installing new ones on your Chevy Cruze. This task is simple but needs care to avoid damage. Old covers can be tight or stuck. Using the right tools helps make the job easier and faster.
Take your time. Rushing can cause scratches or dents to your wheels. Follow clear steps to remove the covers safely and prepare your car for new ones.
Gather The Right Tools
Start by collecting tools you need. Most often, a flathead screwdriver or a tire iron works well. Using a cloth or rag helps protect the wheel surface from scratches. Having gloves can keep your hands safe and clean.
Loosen The Wheel Cover
Place the tool between the wheel cover and the rim gently. Use slow, steady pressure to pry the cover away. Move around the wheel cover, loosening it bit by bit. Avoid forcing the cover off in one try.
Remove The Wheel Cover
Once loosened, carefully pull the cover off by hand. Set it down safely to prevent damage. Check the wheel for any dirt or debris. Clean the area before putting on the new cover.
Credit: neurocin.com.br
Aligning The New Wheel Covers
Aligning new wheel covers on your Chevy Cruze is a key step in the installation process. Proper alignment ensures the covers fit securely and look great. It also helps avoid damage to the wheel or cover. Take your time to position the covers correctly before snapping them on.
Matching Clip Positions
Each wheel cover has clips that hold it in place. These clips must line up with the holes on the wheel rim. Look closely at the wheel and cover to find the clip spots. Match each clip to its place on the rim. This makes the cover easier to attach and keeps it tight.
Ensuring Proper Fit
After matching clips, check the cover’s fit against the wheel. It should sit flush without gaps or loose edges. Press gently around the cover’s edge to snap it firmly into place. A well-fitted cover stays secure during driving and protects the wheel well.
Securing Wheel Covers
Securing the wheel covers on your Chevy Cruze is a key step in the installation process. Proper attachment keeps the covers safe during driving. It also protects your wheels and improves the car’s look. Follow these simple steps to ensure your wheel covers stay firmly in place.
Pressing Clips Into Place
Start by aligning the clips on the wheel cover with the wheel rim slots. Press each clip gently but firmly into its place. Use even pressure around the cover to avoid bending the clips. You should hear a soft snap or click sound. This means the clips have locked securely.
Do not force the clips too hard. This can break or damage them. If a clip does not fit easily, adjust the cover slightly. Make sure all clips are seated evenly for a tight hold.
Checking Stability
After pressing the clips, check the cover’s stability. Try to wiggle the wheel cover with your hand. It should stay firmly attached without moving. If it feels loose, remove the cover and try pressing the clips again.
Drive a short distance and check the covers again. Recheck after a few days to confirm they remain tight. Properly secured wheel covers prevent loss and keep your wheels looking good.

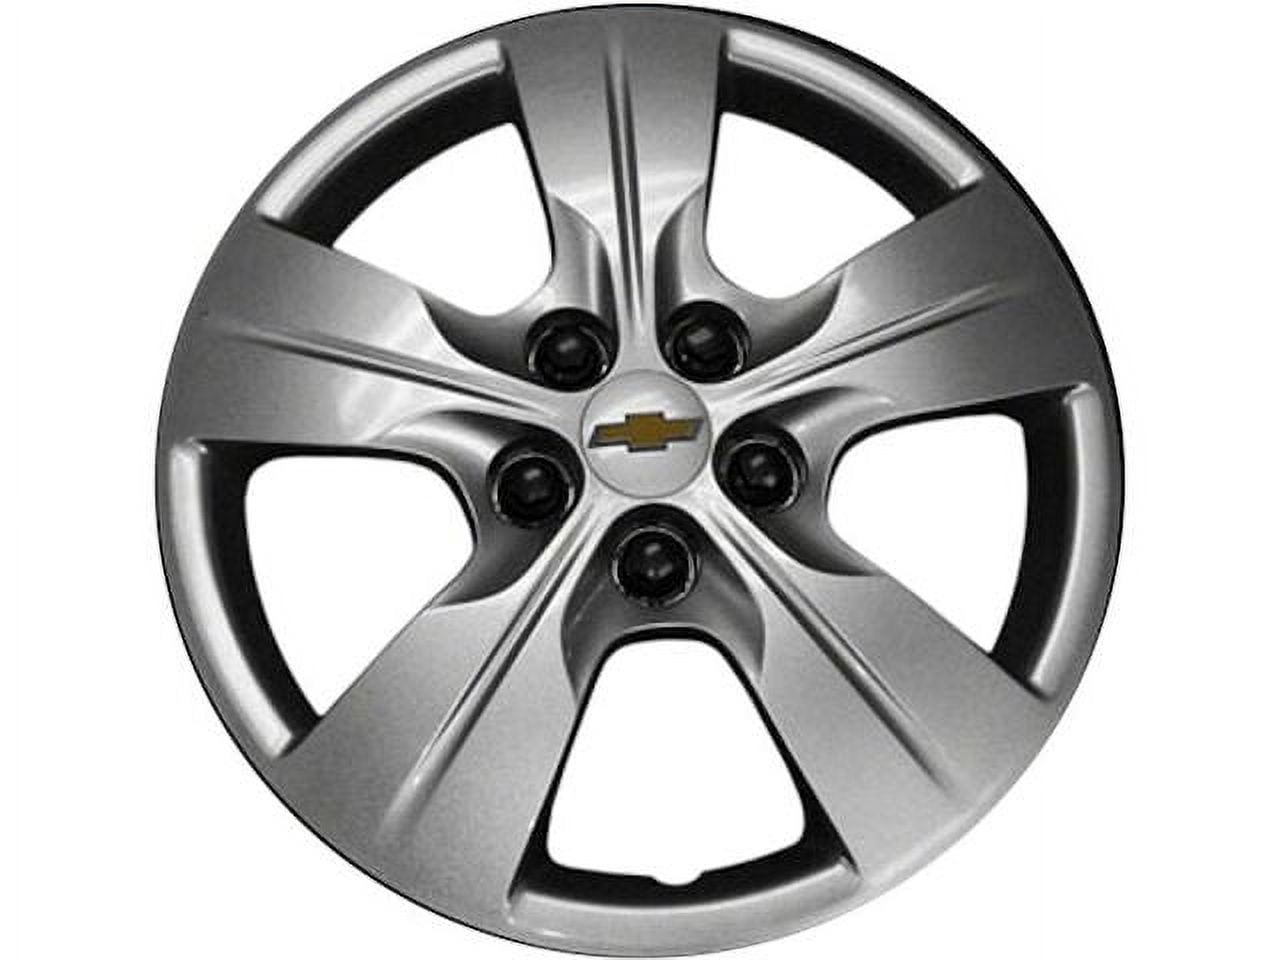
Credit: www.amazon.com
Troubleshooting Common Issues
Troubleshooting common issues during Chevy Cruze wheel cover installation helps save time and effort. Some problems can stop the process or cause damage. Quick fixes keep your covers secure and looking good. This guide covers two frequent problems and how to solve them.
Loose Covers
Loose wheel covers can fall off while driving. Check the clips or fasteners first. They might be broken or bent. Replace damaged clips to hold covers tight. Clean the wheel surface to remove dirt and grease. Dirt stops the cover from fitting well. Press the cover firmly into place. You should hear clicks as clips lock.
Difficulty Removing Old Covers
Old wheel covers might stick to the wheel. Use a flat tool like a plastic pry bar or screwdriver. Slide it gently under the cover edge. Pry slowly to avoid bending or breaking the cover. Spray some lubricant around the edges. It loosens rust or dirt holding the cover. Wiggle the cover back and forth to free it. Patience helps prevent damage during removal.

Credit: meyer-sansboeuf.com
Frequently Asked Questions
How Do I Remove Old Wheel Covers On A Chevy Cruze?
Use a flathead screwdriver or pry tool to gently lift the wheel cover edges. Work slowly around the cover to avoid damage. Once loose, pull the cover off carefully without scratching the rim.
What Tools Are Needed To Install Chevy Cruze Wheel Covers?
You only need basic tools like a rubber mallet or your hands. No special tools are required to snap the covers onto the wheels securely.
How Do I Align Wheel Covers Correctly On A Chevy Cruze?
Match the valve stem hole on the cover with the tire’s valve stem. Align the cover evenly, then press firmly until it snaps into place for a secure fit.
Can I Install Chevy Cruze Wheel Covers Without Professional Help?
Yes, installation is simple and can be done at home. Follow the steps carefully to avoid damage. No professional help is necessary for this task.
Conclusion
Installing Chevy Cruze wheel covers is simple and quick. Start by cleaning the wheels well. Align the cover carefully and press it firmly. Avoid forcing it to prevent damage. Check all covers after installation for a secure fit. Regularly inspect them to keep your car looking neat.
A well-installed cover can protect wheels and improve style. Follow these steps to save time and effort. Enjoy the refreshed look of your Chevy Cruze easily.


