Are you tired of seeing scratches and dents ruin the look of your car? Adding or replacing body side molding can protect your vehicle and give it a sleek, polished appearance.
But buying new molding can be expensive, and installing it wrong can cause more damage. What if you could make your own car body side molding—custom-fit, affordable, and built by you? In this guide, you’ll discover simple steps to create durable, stylish molding that enhances your car’s look and keeps it safe.
Ready to take control and give your car the upgrade it deserves? Let’s get started.

Credit: www.hondaacuraonline.com
Materials And Tools Needed
Making a car body side molding needs specific materials and tools. Gathering the right supplies helps the process go smoothly. Knowing what to use saves time and effort. Below is a list of essential items and tools for this task.
Essential Supplies
- Flexible plastic or rubber molding strip
- Measuring tape for accurate length
- Automotive adhesive or double-sided tape
- Cleaning solution to prep the car surface
- Masking tape to hold molding in place
- Primer or paint (optional) for color matching
Recommended Tools
- Utility knife or scissors for cutting molding
- Heat gun to shape the molding
- Sanding block for smoothing edges
- Plastic scraper to remove old adhesive
- Clamps or clips to secure molding while drying
- Rubber gloves to protect your hands
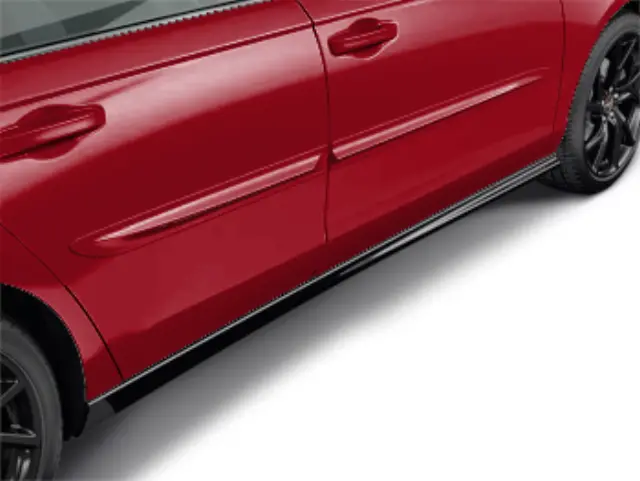
Choosing The Right Molding Style
Choosing the right molding style is key for your car’s side molding project. The style impacts your car’s look and its protection. Picking the right design brings balance to your car’s shape. It also matches your taste and the car’s character. Understanding popular styles and matching them to your car helps you decide well.
Popular Design Options
Side moldings come in many shapes and sizes. Some are slim and sleek, adding a modern touch. Others are bold and wide, giving a strong look. You can find moldings with smooth curves or sharp edges. Some have a chrome finish for shine. Others use matte or painted styles for a subtle look. Choose a style that fits your car’s age and use.
Matching Your Car’s Aesthetic
Think about your car’s color and style before picking moldings. Classic cars often look best with simple, clean moldings. Sporty cars suit sharp, dynamic moldings. Luxury cars may need moldings with shiny chrome or smooth finishes. Pick colors that blend or stand out nicely. The molding should enhance your car’s overall look, not clash with it.
Preparing The Car Surface
Preparing the car surface is the first important step before adding side molding. A clean and smooth surface helps the molding stick well and last longer. Take your time to prepare the area carefully. This avoids problems like peeling or poor fit later.
Cleaning And Sanding
Start by washing the car surface with soap and water. Remove all dirt, grease, and dust. Use a clean cloth to dry the area completely.
Next, lightly sand the surface using fine-grit sandpaper. This creates a rough texture for better adhesion. Sand only the area where the molding will go. Wipe away sanding dust with a dry cloth. The surface should feel smooth but not shiny.
Masking Off Areas
Use painter’s tape to cover edges near the molding area. This protects the paint from scratches or excess adhesive. Carefully press the tape down to avoid paint damage. Masking helps keep your work neat and professional.
Check the tape edges for gaps. Secure any loose parts before applying the molding. Masking saves time and prevents costly mistakes.
Measuring And Cutting The Molding
Measuring and cutting the car body side molding is a key step. This task needs care and precision. Proper measurement ensures the molding fits perfectly. Cutting the molding correctly avoids damage and waste. Both steps help achieve a clean, professional look on your car.
Taking Accurate Measurements
Start by cleaning the car surface where the molding will go. Use a tape measure to find the exact length needed. Measure twice to be sure. Mark the length clearly on the molding with a pencil. Check the shape of the car side for curves or angles. Note these details to adjust the molding shape later.
Cutting Techniques
Use a sharp utility knife or fine-toothed saw for cutting the molding. Cut slowly and follow the marked line. Keep your hand steady to avoid jagged edges. Sand the cut ends lightly to smooth them. Test the molding fit on the car before final installation. Small adjustments can improve the final fit and finish.
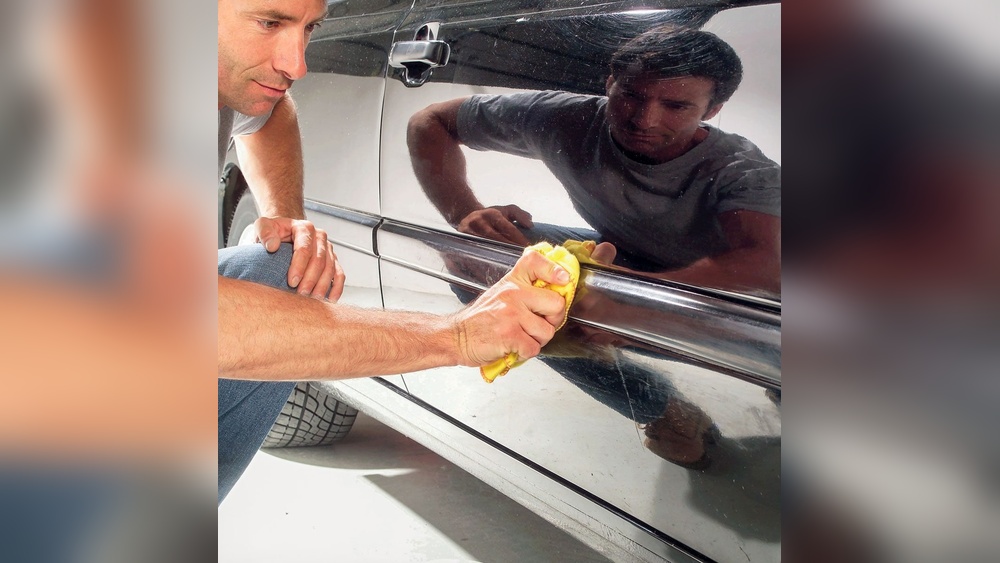
Attaching The Molding
Attaching the car body side molding is a key step for a clean, lasting look. Proper attachment keeps the molding secure and protects the car’s side from scratches and dents. This section covers how to apply adhesive and position the molding correctly.
Applying Adhesive
Start by cleaning the car surface where the molding will go. Use a mild cleaner to remove dirt and grease. Let the area dry completely.
Choose an adhesive made for automotive use. Apply a thin, even layer on the back of the molding. Avoid too much glue to prevent overflow.
Press the adhesive firmly onto the molding. Let it set for a few minutes before attaching it to the car.
Positioning And Securing
Align the molding carefully along the car’s side. Use a tape measure or ruler for accuracy.
Press the molding firmly against the car’s surface. Start from one end and work to the other.
Hold the molding in place using painter’s tape or clamps. Let the adhesive cure according to the product instructions.
Remove the tape or clamps once the molding is secure. Avoid touching or moving the molding during this time.

Credit: www.subarupartspros.com
Finishing Touches
Finishing touches make your car body side molding look neat and last longer. These final steps protect the molding and improve its appearance. Focus on sealing the edges and then painting and polishing for a smooth finish.
Sealing Edges
Seal the edges of the molding to stop water and dirt from getting inside. Use a strong automotive sealant around all sides. Press the sealant firmly to fill any gaps. This step helps prevent rust and damage over time. Let the sealant dry fully before moving on.
Painting And Polishing
Paint the molding to match your car’s color perfectly. Use spray paint made for car surfaces for an even coat. Apply thin layers and let each dry before the next. After painting, polish the molding gently with a soft cloth. Polishing adds shine and smooths out any rough spots. This makes the molding look like new and protects the paint.
Maintenance Tips
Proper care keeps your car body side molding looking new and lasting longer. Regular maintenance stops dirt buildup and prevents damage. Simple steps can protect your molding from wear and tear.
Cleaning Your Molding
Use mild soap and water to clean the molding. Avoid harsh chemicals that can damage the surface. Soft cloths or sponges work best for wiping. Clean regularly to remove dirt and grime. Dry the molding with a soft towel to prevent water spots.
Repairing Minor Damages
Small scratches or dents can be fixed easily. Use plastic or rubber repair kits made for molding. Gently sand the damaged area before applying repair material. Follow the product instructions carefully for best results. Touch up paint can restore color if needed. Repair damage quickly to stop it from getting worse.
Credit: www.hondaacuraonline.com
Frequently Asked Questions
What Materials Are Needed To Make Car Body Side Molding?
To make car body side molding, you need flexible rubber or plastic strips, adhesive tape, cleaning supplies, and cutting tools. These materials ensure durability, proper fitting, and strong adhesion to the car’s body surface.
How Do You Prepare A Car Surface For Molding Installation?
Clean the car surface thoroughly using soap and water, then dry it completely. Remove any grease or wax with rubbing alcohol to ensure the molding adheres properly without lifting or peeling.
Can I Make Custom Car Side Molding At Home?
Yes, you can create custom side molding at home using flexible molding strips and precise measurements. Custom molding improves your car’s look and protects it from minor dings and scratches.
How Long Does It Take To Install Car Side Molding?
Installing car side molding typically takes 30 to 60 minutes, depending on preparation and fit. Proper cleaning and careful alignment ensure a smooth, professional finish without bubbles or gaps.
Conclusion
Making car body side molding is simple with the right steps. Choose the correct materials and tools first. Clean the car surface well before applying molding. Take your time to align and stick the molding carefully. This helps protect your car and improve its look.
Practice patience and work slowly for best results. Small efforts bring good changes to your car’s style. Keep these tips in mind for a smooth process. Enjoy your car’s fresh, neat appearance after the job.