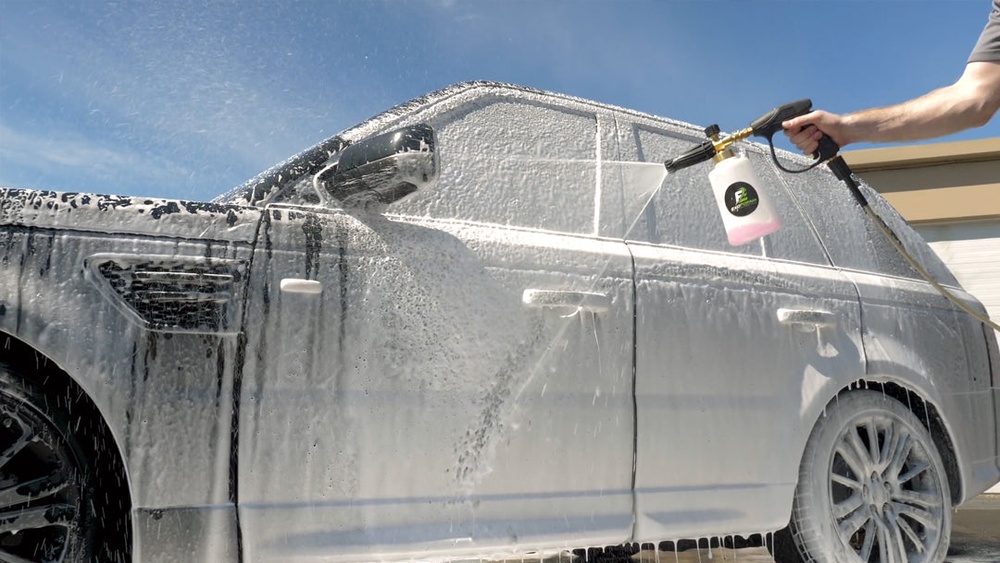
If you want to take your car cleaning to the next level, making a foam cannon for your pressure washer is a game-changer. Imagine covering your vehicle in thick, rich foam that clings to every surface, loosening dirt and grime effortlessly.
Not only does this save you time and water, but it also helps protect your paint from scratches. In this guide, you’ll learn exactly how to create your own foam cannon without spending a fortune. Ready to make washing your car easier and more effective?
Keep reading, and you’ll have your foam cannon up and running in no time.

Credit: www.amazon.com
Materials Needed
Gathering the right materials is the first step to build an effective foam cannon. The quality of each part affects the foam output and ease of use. Choose items that fit well with your pressure washer and offer durability.
Three main parts form the core of a foam cannon: the bottle, the foam nozzle, and the connectors with tubing. Each plays a special role in creating thick, even foam for cleaning.
Choosing The Right Bottle
Select a bottle that holds enough soap solution for your cleaning needs. Look for bottles made from strong plastic to avoid cracks or leaks. A wide mouth helps in easy filling and cleaning. Ensure the bottle threads match the foam nozzle for a tight fit.
Selecting The Foam Nozzle
The foam nozzle controls the mix of soap and water, creating thick foam. Choose a nozzle designed for foam cannons, not a regular spray tip. Check for adjustable settings to control foam thickness and spray pattern. Materials like brass or reinforced plastic offer durability.
Essential Connectors And Tubing
Connectors link the foam nozzle to your pressure washer hose. Use quick-connect fittings for fast and secure attachment. Tubing carries the soap solution from the bottle to the nozzle. Flexible, clear tubing helps monitor soap flow and is easy to replace if needed.
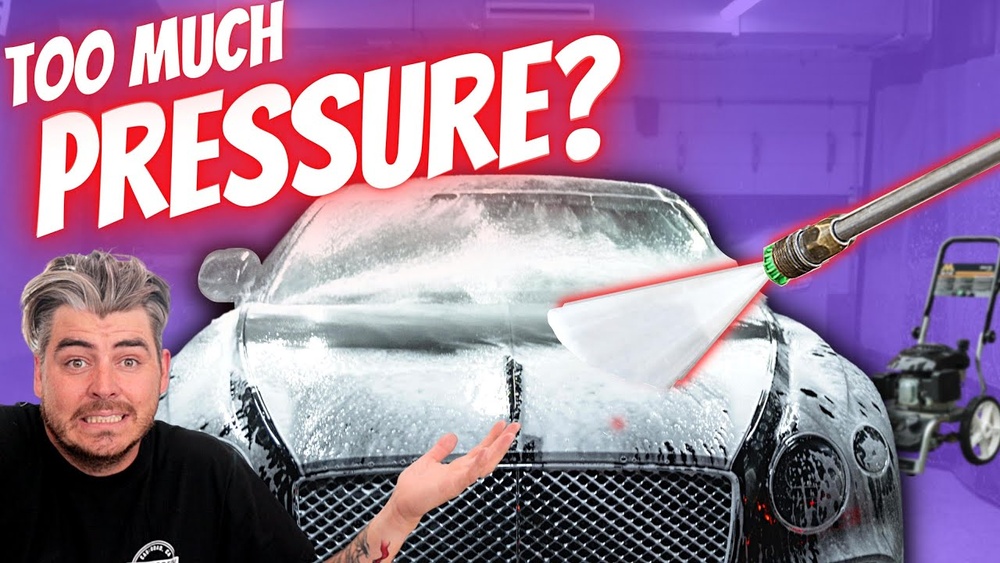
Credit: www.prolinewatertown.com
Tools Required
Gathering the right tools is the first step to making a foam cannon for your pressure washer. Tools help you shape and assemble parts accurately. Using the right tools makes the process easier and the final product stronger.
Cutting And Drilling Tools
You need cutting tools to trim plastic or metal parts to size. A hacksaw or a utility knife works well for cutting small pipes. Drills with the right drill bits create holes for screws or connectors. Clean cuts and precise holes help parts fit tightly and prevent leaks.
Measuring And Marking Tools
Accurate measurements ensure all parts fit together perfectly. Use a ruler or tape measure to check lengths and distances. A pencil or marker helps mark where to cut or drill. Clear, exact marks guide your cuts and holes, avoiding mistakes.
Preparing The Bottle
Preparing the bottle is an important step in making a foam cannon for your pressure washer. A clean and properly modified bottle helps create thick foam and ensures the device works well. Take your time to get the bottle ready before moving to other steps.
Cleaning And Drying
Start by washing the bottle thoroughly. Use warm water and soap to remove any dirt or leftover liquids inside. Rinse it well to clear all soap residues. A clean bottle prevents clogging and keeps foam quality high.
After washing, dry the bottle completely. Use a clean cloth or let it air dry. Moisture inside the bottle can weaken foam or cause problems during use.
Drilling The Connector Hole
Mark the spot where you will attach the connector. Usually, this is on the bottle’s cap or near the top. Use a drill with a small bit to make a hole just big enough for the connector to fit tightly.
Drill slowly and carefully to avoid cracking the plastic. A well-fitted hole keeps water from leaking and ensures good pressure inside the bottle. Check the fit by inserting the connector before moving on.

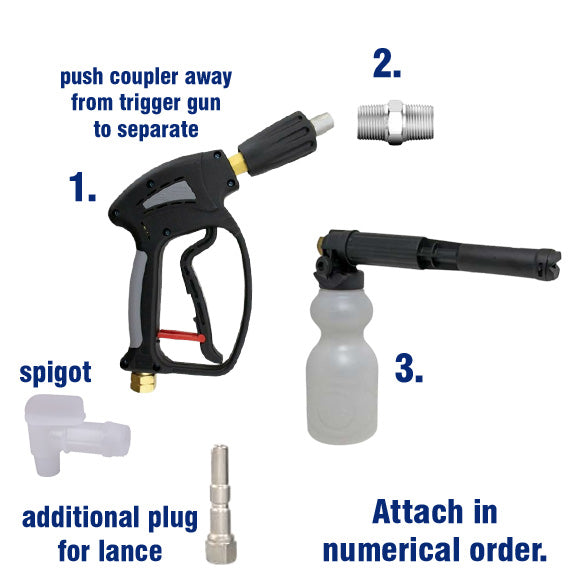
Credit: stonercarcare.com
Assembling The Foam Cannon
Assembling the foam cannon is an important step to get it ready for use. This process does not take much time but needs attention. You will connect the main parts carefully. Correct assembly ensures good foam output and safe operation.
Follow simple steps to attach the nozzle and connect tubing. Each part must fit well. Loose connections can cause leaks or poor foam spray. Take your time for a solid setup.
Attaching The Nozzle
Start by locating the foam cannon’s nozzle. This part controls how the foam sprays out. Align the nozzle with the main body of the foam cannon. Push or screw it on, depending on the design. Make sure it fits tightly. Avoid forcing it to prevent damage. A proper fit helps create thick foam.
Connecting Tubing And Fittings
Next, connect the tubing to the foam cannon. This tubing carries soap and water to the nozzle. Check the size of the tubing and fittings. Use the right connectors for a secure join. Slide the tubing over the fitting firmly. Use clamps if included to hold the tubing in place. A tight connection stops leaks and keeps water pressure steady.
Mixing Soap Solution
Mixing the soap solution is a key step in making a foam cannon for your pressure washer. The right mix creates thick foam that sticks to surfaces. Too strong or too weak soap can ruin the foam quality. Understanding the soap type and ratio helps you get the best foam every time.
Choosing The Soap
Choose a soap designed for foam cannons or car washing. Avoid regular dish soap. It can damage the foam cannon and paint. Look for pH-balanced and biodegradable soaps. These clean well and protect surfaces. Some soaps create denser foam than others. Test different brands to see what works best.
Proper Soap-to-water Ratio
Mix soap and water carefully. A common ratio is 1 part soap to 10 parts water. Too much soap makes foam thick but hard to rinse. Too little soap creates weak foam. Use clean water for best results. Stir gently to avoid bubbles before spraying. Adjust the ratio slightly based on foam quality and surface type.
Using The Foam Cannon
Using the foam cannon is simple and effective. It helps you cover surfaces with thick foam quickly. This foam loosens dirt and grime for easier cleaning. Proper use improves your washing results and saves time. Follow these steps to get the best from your foam cannon.
Attaching To Pressure Washer
First, connect the foam cannon to your pressure washer lance. Check that the connection is tight and secure. Most foam cannons use a quick-connect fitting. Push the cannon onto the lance until it clicks. Make sure the water supply is off before attaching.
Once attached, turn on the water supply and the pressure washer. The foam cannon will mix soap and water automatically. Ready to spray foam onto your vehicle or surface.
Adjusting Foam Thickness
Adjust the foam thickness using the knob on the cannon. Turn it clockwise for thicker foam. Turn it counterclockwise for thinner foam. Thicker foam sticks better and cleans more gently. Thinner foam rinses off faster but may clean less well.
Also, check the soap concentration in the cannon’s bottle. More soap creates more foam. Less soap means lighter foam. Experiment with settings to find what works best for your cleaning task.
Safety Tips
Safety is very important when making and using a foam cannon for a pressure washer. You must take steps to protect yourself and others. This keeps the task safe and smooth. Follow these tips to avoid accidents and injuries.
Handling Pressure Washer Safely
Always wear protective gear like gloves and goggles. Keep a firm grip on the pressure washer. Never point the spray at people, animals, or fragile items. Check hoses and connections for leaks before use. Use the pressure washer on a stable surface. Turn off the machine before making adjustments or cleaning the foam cannon.
Avoiding Chemical Hazards
Use only chemicals made for foam cannons and pressure washers. Read all labels and follow instructions carefully. Never mix different chemicals together. Store cleaning solutions in a safe place, away from children and pets. Rinse the foam cannon and pressure washer after each use to remove leftover chemicals. Avoid skin contact with soaps and detergents. If contact happens, wash the area with water immediately.
Troubleshooting
Troubleshooting helps you fix problems with your foam cannon fast. It saves time and keeps your cleaning smooth.
Some issues may seem tricky but are easy to solve. Knowing common problems and quick fixes makes your work easier.
Common Issues
No foam or very little foam from the cannon.
Foam is too thin and runs off the surface quickly.
Pressure washer water flow is weak or inconsistent.
Foam cannon bottle leaks or drips during use.
Soap mixture clogs the foam cannon nozzle or tube.
Quick Fixes
Check soap concentration and add more if needed.
Adjust foam cannon nozzle to control foam thickness.
Inspect pressure washer hose for leaks or damage.
Tighten all connections and replace worn seals.
Clean foam cannon nozzle and tube with warm water.
Frequently Asked Questions
What Materials Do I Need To Make A Foam Cannon?
To make a foam cannon, you need a pressure washer, a foam lance or bottle, a detergent solution, and connecting adapters. These parts work together to create thick foam for cleaning. Using compatible materials ensures effective foam production and easy attachment to your pressure washer.
How Do I Assemble A Foam Cannon For A Pressure Washer?
Attach the foam lance or bottle to the pressure washer’s spray gun. Fill the bottle with a soap and water mixture. Ensure all connections are tight to prevent leaks. Adjust the nozzle to control foam thickness and spray pattern for optimal cleaning.
Can I Use Homemade Soap In A Foam Cannon?
Yes, homemade soap works if it produces thick suds and is safe for pressure washers. Use a mixture of water, dish soap, and a small amount of glycerin. Avoid harsh chemicals that might damage surfaces or your equipment.
How Do I Adjust Foam Thickness On A Foam Cannon?
Foam thickness adjusts by changing the soap concentration and nozzle setting. Increase soap ratio for thicker foam. Use the foam cannon’s adjustment knob to control air and soap mixture. Test spray on a small area to find the best setting.
Conclusion
Making a foam cannon for your pressure washer is simple and useful. It helps clean surfaces faster and better. You only need a few basic parts and some careful steps. Using the foam cannon saves water and soap by spreading foam evenly.
Try it on your car, driveway, or patio for great results. Enjoy cleaner spaces with less effort. Keep your foam cannon clean and store it well after use. This small tool can make a big difference in your cleaning routine.
Give it a try and see how easy it is.