

If you want to keep your car safe and running smoothly, knowing how to measure brake rotor thickness is essential. Your brake rotors wear down over time, and if they get too thin, it can affect your stopping power and put you at risk.
But don’t worry—measuring them is easier than you might think. In this guide, you’ll learn simple steps to check your brake rotors yourself, saving you time and money. Keep reading to make sure your brakes are in top shape before it’s too late.
Brake Rotor Basics
Brake rotors are a key part of your vehicle’s braking system. They work with brake pads to stop the car safely. Knowing the basics helps you understand how to measure rotor thickness correctly.
Rotors are metal discs attached to the wheels. When you press the brake pedal, brake pads squeeze the rotors. This action slows down or stops the wheel’s rotation. The rotors must be thick enough to handle this pressure.
What Brake Rotors Do
Rotors help convert your car’s moving energy into heat. This heat comes from the friction between the brake pads and rotors. The process slows down the car smoothly. Thin or damaged rotors cannot absorb heat well. This can cause poor braking and longer stopping distances.
Signs Of Worn Rotors
Look for vibrations or shaking when braking. This often means the rotors are uneven or warped. You might hear squealing or grinding sounds during braking. These noises can indicate worn or damaged rotors. Also, check for visible grooves or cracks on the rotor surface.
Thin rotors can cause brake fade, reducing braking power. Regularly measuring rotor thickness helps catch problems early. It keeps your brakes safe and effective on the road.
Credit: www.import-car.com
Tools Needed
Measuring brake rotor thickness requires specific tools to get accurate results. Using the right tools helps check the safety and performance of your brakes. This section covers the essential tools needed for this task.
Measuring Instruments
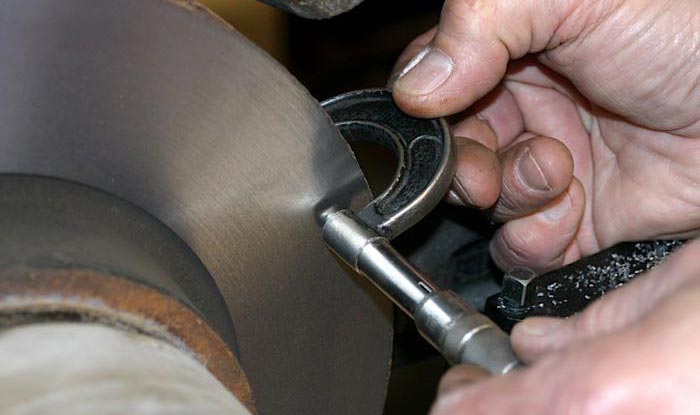
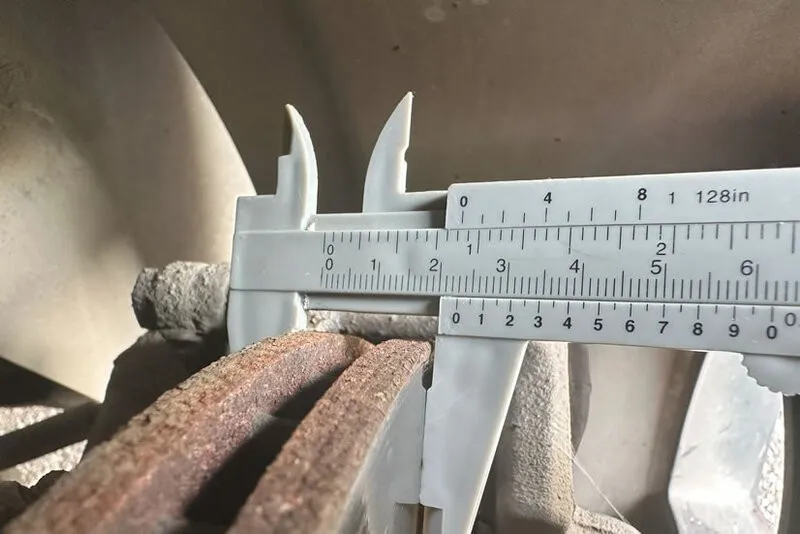
A micrometer is the best tool to measure brake rotor thickness. It provides precise readings in millimeters or inches. A caliper can also work but may not be as accurate. Make sure the measuring instrument has a clean and sharp edge for the best results. Avoid using rulers or tape measures, as they are not precise enough.
Safety Gear
Wear safety gloves to protect your hands from sharp rotor edges. Safety glasses shield your eyes from dust and debris. Use a dust mask if the brake parts are dirty or rusty. Proper safety gear prevents injuries during the measurement process.
Preparing For Measurement
Preparing to measure brake rotor thickness requires careful steps. Proper preparation ensures accurate results and safe handling. Follow these simple steps to get ready.
Car Positioning
Park your car on a flat, stable surface. Use the parking brake to keep the car still. Place wheel chocks behind the wheels for extra safety. Make sure the car is turned off and the keys are out.
Wheel And Caliper Removal
Loosen the lug nuts before lifting the car. Use a jack to raise the car and secure it with jack stands. Remove the wheel carefully to expose the brake rotor. Next, remove the brake caliper by unscrewing its bolts. Hang the caliper with a wire to avoid stress on the brake line.
Credit: brakeperformance.com
Measuring Rotor Thickness
Measuring rotor thickness is key to keeping brakes safe and effective. Rotors wear down with use, and thin rotors can cause brake failure or damage. Checking thickness helps know when to replace or resurface the rotors. This process needs simple tools and careful steps to get accurate results.
Locating Measurement Points
Find the rotor on the wheel hub. Look for the flat, round metal disc. Measure at several points around the rotor’s surface. Usually, measure near the center and edges. Avoid the outer edge where the rotor meets the wheel. Choose spots without rust or dirt for clear reading.
Using A Micrometer
Use a micrometer for precise thickness measurement. Place the rotor between the micrometer’s jaws. Gently close the jaws until they touch the rotor surface. Do not squeeze too hard to avoid false readings. Read the measurement on the micrometer scale carefully. Repeat for each measurement point.
Recording Measurements
Write down each measurement clearly. Compare readings to the rotor’s minimum thickness specification. Note any points that are too thin. Keep the record safe for future reference. Use these numbers to decide if the rotor needs replacement or maintenance.
Interpreting Results
After measuring the brake rotor thickness, understanding the results is key. Knowing what the numbers mean helps keep your vehicle safe. It also tells you when to act and replace parts. This section explains how to read your brake rotor thickness results clearly.
Minimum Thickness Specs
Each vehicle has a minimum rotor thickness limit. This limit is set by the manufacturer. It ensures the rotor can handle heat and stress safely. Check your vehicle’s manual or rotor for this number. If your measurement is below this limit, the rotor is too thin.
Thin rotors can cause poor braking and vibration. Driving with thin rotors is risky. It can lead to brake failure or damage other parts.
When To Replace Rotors
Replace rotors if thickness is at or below the minimum limit. Also, replace if you see deep grooves or cracks. Warped rotors cause shaking when braking. If you notice these signs, do not delay replacing them.
Regular checks help catch rotor wear early. Timely replacement keeps your brakes working well. It also protects your safety on the road.
Tips For Accurate Measurement
Measuring brake rotor thickness needs care and attention. Accurate results help keep your vehicle safe. Small errors can cause wrong decisions about rotor replacement. Follow these tips to get the best measurement every time.
Avoiding Common Mistakes
Clean the rotor surface before measuring. Dirt or rust can cause false readings. Use a proper micrometer or caliper for precise results. Measure at several points around the rotor. Avoid measuring near the edge or vent holes. Always check the tool calibration before use. Do not guess or estimate thickness by eye. Take your time for careful and steady measurement.
Regular Inspection Schedule
Check rotor thickness every 10,000 miles or during brake service. Consistent checks catch wear early and prevent brake failure. Keep a log of measurements to track rotor condition over time. Replace rotors if thickness is below manufacturer’s minimum limit. Regular inspections save money and improve driving safety.
Credit: www.allrotors.com
Frequently Asked Questions
What Tools Do I Need To Measure Brake Rotor Thickness?
You need a micrometer or a brake rotor gauge to measure thickness accurately. These tools provide precise readings essential for safety checks.
How Often Should Brake Rotor Thickness Be Checked?
Check brake rotor thickness during every brake pad replacement or at least every 12,000 miles to ensure optimal performance.
What Is The Minimum Brake Rotor Thickness Limit?
The minimum thickness is usually stamped on the rotor. Typically, it ranges from 20 to 25 millimeters depending on the vehicle.
Can Worn Rotors Affect Braking Performance?
Yes, thin or warped rotors reduce braking efficiency, cause vibrations, and increase stopping distance, compromising safety.
Conclusion
Measuring brake rotor thickness keeps your car safe on the road. Use a micrometer or caliper for accurate results. Compare your measurements to the minimum thickness specified by the manufacturer. Worn rotors can cause brake problems and reduce stopping power.
Check the thickness regularly, especially if you hear noises or feel vibrations. Taking these steps helps prevent costly repairs and keeps your brakes working well. Stay safe by maintaining your brake system properly. Simple checks make a big difference in driving safety.

