Are you ready to take your car washing to the next level? Learning how to properly load a foam cannon can make a huge difference in how clean and shiny your vehicle looks.
If you’ve ever struggled with weak foam or messy spray, this guide is for you. By mastering a few simple steps, you’ll get thick, rich foam that clings to your car and lifts away dirt effortlessly. Keep reading, and you’ll discover the secrets to using your foam cannon like a pro—making your next wash easier, faster, and more satisfying.
Choosing The Right Foam Cannon
Choosing the right foam cannon makes a big difference in car washing. The right tool saves time and cleans better. Not all foam cannons work the same. Some suit small jobs, others are for heavy cleaning. Understanding options helps pick the best one for your needs.
Types Of Foam Cannons
Foam cannons come in different types. Some use plastic bottles, which are light and easy to handle. Metal cannons last longer and handle pressure well. There are also adjustable foam cannons that let you control foam thickness. Choose based on how often and how much cleaning you plan.
Key Features To Consider
Look for a foam cannon with a strong nozzle for thick foam. Easy-to-use controls help adjust foam flow. A wide bottle opening makes filling and cleaning simple. Durable materials resist rust and damage. Check if the cannon is easy to assemble and clean after use.
Compatibility With Pressure Washers
Not all foam cannons fit every pressure washer. Check the connection type before buying. Most use quick-connect fittings or threaded connectors. Make sure your pressure washer’s PSI and GPM match the foam cannon’s needs. Proper fit ensures good foam and prevents leaks.

Credit: www.youtube.com
Selecting The Best Soap
Selecting the best soap for your foam cannon is key to a great car wash. The right soap creates thick foam that lifts dirt gently. It also protects your car’s paint. Choosing the wrong soap can leave streaks or cause damage. Let’s explore how to pick the best soap for your foam cannon.
Foam Cannon Soap Vs. Regular Car Wash Soap
Foam cannon soaps are made to produce lots of foam. They have special ingredients that create thick bubbles. Regular car wash soaps do not foam as much. They clean well but may not work well with foam cannons. Using foam cannon soap helps remove dirt faster and safer.
Concentration And Dilution Ratios
Each soap has a recommended dilution ratio. This means mixing a certain amount of soap with water. Too much soap can leave residue on your car. Too little soap reduces foam and cleaning power. Follow the label instructions carefully for the best results. Adjust the mix to get thick foam without waste.
Eco-friendly Soap Options
Eco-friendly soaps are gentle on the environment. They use natural ingredients that break down easily. These soaps avoid harsh chemicals that harm plants and animals. Many eco-friendly soaps still create good foam and clean well. Choosing green soap helps protect nature while washing your car.
Preparing The Foam Cannon
Preparing the foam cannon is a key step before starting to wash your car. This process ensures the equipment works well and creates thick foam. Proper preparation saves time and avoids messes. Follow these simple steps to get ready.
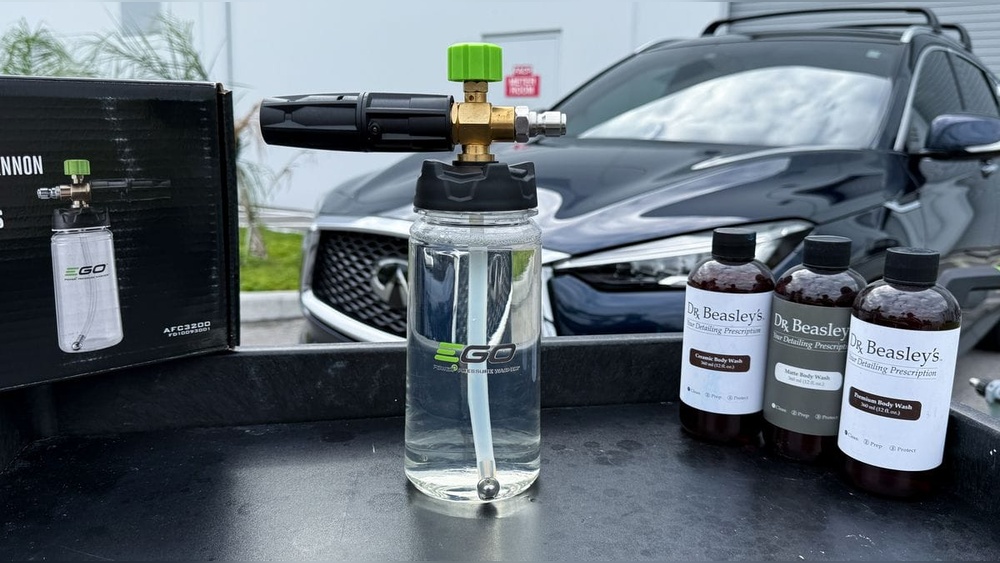
Assembling The Components
Begin by connecting the foam cannon parts carefully. Attach the soap reservoir to the spray gun. Make sure the nozzle is tightly fixed to the gun. Check all connections for a secure fit. Loose parts can cause leaks and reduce foam quality.
Filling The Soap Reservoir
Use a clean container to mix soap and water. Follow the soap maker’s instructions for the right ratio. Pour the mixture slowly into the reservoir. Avoid overfilling to prevent spills. Always use car wash soap, not dish detergent, for best results.
Adjusting The Nozzle Settings
Turn the nozzle to control foam thickness and spray pattern. Start with a medium setting for balance. Test the spray on a small area to see foam output. Adjust the nozzle until you get thick, even foam. Proper adjustment improves cleaning and saves soap.
Mixing Soap And Water Correctly
Mixing soap and water correctly is key to getting the best foam from your foam cannon. The right mix creates thick, rich foam that clings well to your car. Too much soap or water can weaken the foam or cause clogs. Understanding the proper ratios and water quality helps you avoid common problems and get smooth, easy cleaning every time.
Recommended Soap-to-water Ratios
Start with the soap label’s recommended ratio. Most soaps work well with 1 part soap to 10 parts water. For stronger foam, try 1 to 8. For lighter foam, use 1 to 15. Adjust the mix based on your soap type and foam cannon model. Testing small batches first helps find your perfect ratio.
Using Soft Vs. Hard Water
Soft water improves foam quality. It mixes better with soap and creates thicker bubbles. Hard water contains minerals that reduce foam and leave residue. If you have hard water, consider using distilled water or a water softener. This step saves your foam cannon and improves cleaning results.
Avoiding Common Mixing Mistakes
Never pour soap directly into the foam cannon without diluting. This can clog the nozzle and damage the pump. Always mix soap and water in a separate container first. Stir gently to avoid creating too many bubbles before spraying. Use clean water to prevent dirt from entering the system.
Attaching And Using The Foam Cannon
Attaching and using a foam cannon correctly is key for effective cleaning. Proper setup ensures the foam spreads evenly and cleans well. It also saves soap and water, making your wash efficient and safe for surfaces.
Connecting To The Pressure Washer
First, check that your pressure washer is off. Attach the foam cannon’s quick-connect fitting to the washer’s spray wand. Push firmly until it clicks in place. Tight connections prevent leaks and keep pressure steady. Check the soap bottle is tightly screwed on the foam cannon.
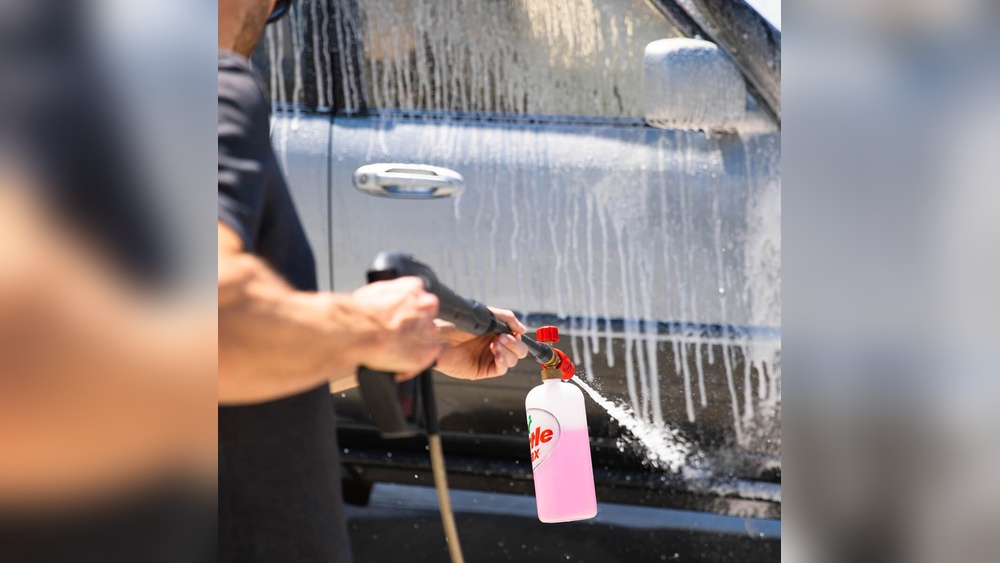
Proper Spray Techniques
Hold the foam cannon a few feet from the surface. Spray in slow, steady motions. Overlap each pass slightly to cover all areas. Avoid spraying too close to prevent damage. Use wide, horizontal sweeps for even foam distribution.
Adjusting Foam Thickness
Turn the foam cannon’s dial or knob to change foam thickness. A higher setting creates thicker foam that clings longer. A lower setting produces thinner foam for light cleaning. Test settings on a small area to find the best foam amount.
Credit: www.youtube.com
Maintaining Your Foam Cannon
Maintaining your foam cannon is key to keeping it in good shape. A well-maintained foam cannon lasts longer and works better. Simple care steps after each use protect it from damage. Proper upkeep saves money and time.
Cleaning After Use
Rinse the foam cannon with clean water right after use. This removes soap and dirt inside the nozzle and bottle. Fill the bottle with water and run the foam cannon for a few seconds. It helps clear out leftover soap. Wipe the outside with a soft cloth to keep it clean.
Preventing Clogs And Damage
Use the right soap designed for foam cannons only. Thick or poor-quality soap can block the nozzle. Check the nozzle for dirt or buildup regularly. If clogged, soak it in warm water to loosen debris. Avoid dropping or hitting the foam cannon to prevent cracks and leaks.
Storage Tips
Store the foam cannon in a dry, cool place away from sunlight. Keep it upright to stop water from settling in parts. Empty the bottle after each use to avoid mold growth. Cover the nozzle to protect it from dust and insects. Proper storage keeps your foam cannon ready for next use.
Troubleshooting Common Issues
Troubleshooting common issues with your foam cannon helps you get the best results. Problems can stop your foam cannon from working well. You can fix most issues with a few simple steps. This section covers weak foam, leaks, and uneven spray patterns.
Weak Foam Production
Weak foam often comes from wrong soap mix. Use soap made for foam cannons. Check the water-to-soap ratio. Too much water thins the foam. Clean the foam cannon’s nozzle. Dirt can block soap flow and reduce foam. Make sure your pressure washer has enough power. Low pressure can cause weak foam.
Leaking Or Dripping Problems
Leaks happen when parts are loose or damaged. Tighten all connections carefully. Look for cracks in the bottle or hose. Replace damaged parts quickly. Check the O-rings and seals. Old or worn seals cause drips. Do not overfill the soap bottle. Overfilling can cause leaks from the top.
Uneven Spray Patterns
Uneven spray means the nozzle is clogged or dirty. Remove the nozzle and clean it with water. Check for soap buildup inside the nozzle. Adjust the spray tip to the correct setting. Test the spray before use. Make sure the foam cannon is held steady during spraying. Shaky hands cause uneven foam coverage.

Credit: 3dproducts.com
Frequently Asked Questions
How Do I Mix Soap For A Foam Cannon?
Mix one part car wash soap with 10 parts water. Use distilled water for better foam quality. Adjust ratio for thicker foam.
What Pressure Washer Settings Are Best For Foam Cannon?
Use low pressure, around 1000-1500 PSI. Set water flow to medium for optimal foam coverage and safety.
How To Attach Foam Cannon To Pressure Washer?
Connect the foam cannon’s quick-connect fitting to the pressure washer lance. Ensure a secure fit before use.
Can I Use Regular Car Soap In A Foam Cannon?
No, use specifically designed foam cannon soap. Regular soap may clog the nozzle and reduce foam.
Conclusion
Properly loading a foam cannon makes washing easier and more effective. Use the right soap and water mix for best foam. Avoid overfilling to prevent spills and mess. Attach the cannon securely to avoid leaks. Clean the foam cannon after every use to keep it working well.
Following these simple steps saves time and protects your car’s paint. Enjoy a cleaner car with less effort every time. Simple, smart care leads to better results.