Are you looking to remove the body side molding on your car but don’t know where to start? You’re not alone.
Removing these moldings might seem tricky, but with the right steps, you can do it yourself without damaging your vehicle. Imagine a smooth, clean car surface that looks fresh and ready for a new look. In this guide, you’ll learn simple, effective techniques to safely take off your body side molding.
Keep reading—you’re just moments away from mastering a skill that can save you time and money.
Tools Needed
Removing body side molding requires specific tools to do the job safely and cleanly. Using the right equipment prevents damage to your car’s paint and molding. Preparing your workspace with these tools makes the process smoother and faster.
Essential Supplies
- Plastic trim removal tools: Protect the paint while prying off molding.
- Heat gun or hair dryer: Softens adhesive for easier removal.
- Adhesive remover: Cleans leftover glue without harming the surface.
- Microfiber cloths: For wiping and cleaning the area gently.
- Isopropyl alcohol: Helps remove grease and residue before reinstallation.
Optional Accessories
- Fishing line or dental floss: Cuts through adhesive under molding quietly.
- Masking tape: Protects paint edges during removal.
- Rubber gloves: Keeps hands clean and improves grip.
- Plastic scraper: Helps remove stubborn glue spots without scratching.
- Spray bottle with water: Moistens adhesive for easier loosening.
Preparing The Vehicle
Preparing the vehicle is the first step to remove body side molding safely. It helps avoid damage to the car’s paint and makes the process easier. Taking time to get the car ready saves effort later.
Cleaning The Area
Start by washing the area around the molding. Dirt and dust can scratch the paint during removal. Use soap and water to clean the surface well. Dry the area with a soft cloth to avoid water spots. A clean surface helps you see any damage and makes removal smoother.
Protecting The Paint
Protect the paint near the molding to prevent scratches. Use painter’s tape to cover the edges around the molding. Press the tape firmly to stick well. This barrier stops tools from touching the paint. Taking this step keeps your car’s finish safe during the process.
Removing The Molding
Removing body side molding needs care and the right steps. The molding is usually held by strong adhesive. Removing it without damage takes patience and the right tools. Follow these steps to remove the molding safely.
Heating The Adhesive
Heat softens the glue holding the molding to the car. Use a heat gun or a hair dryer on low heat. Keep the heat moving to avoid damage to the paint. Warm the adhesive for about one to two minutes. Check if the molding feels softer before moving to the next step.
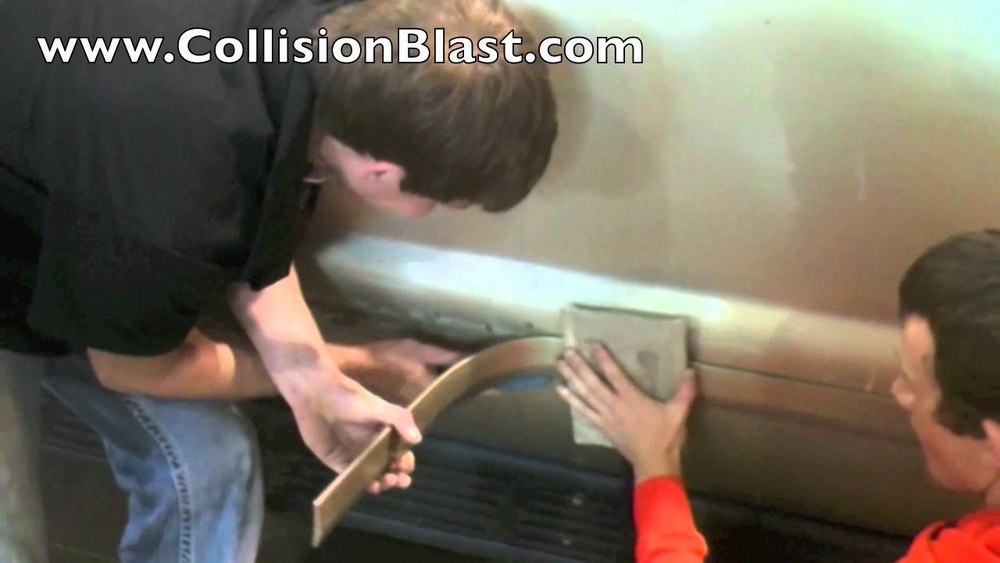
Gently Lifting The Molding
Start lifting the molding at one end using a plastic trim tool. Avoid metal tools that can scratch the paint. Work slowly and gently pull the molding away from the body. If you feel resistance, stop and apply more heat. Continue pulling until the molding is fully removed. Clean any leftover adhesive with an adhesive remover.

Credit: www.youtube.com
Cleaning Adhesive Residue
Removing body side molding often leaves sticky adhesive residue on the car’s surface. This residue can attract dirt and make the car look untidy. Cleaning it properly is important for a smooth, clean finish. Use the right methods and materials to avoid damage to the paint or surface.
Using Adhesive Remover
Adhesive removers are designed to dissolve sticky glue safely. Choose a remover that is safe for car paint. Apply a small amount on a soft cloth. Gently rub the adhesive spots in circular motions. Let the remover sit for a few minutes to break down the glue. Wipe the area with a clean cloth to remove loosened residue. Repeat the process if some adhesive remains. Avoid harsh scrubbing to protect the paint.
Safe Cleaning Techniques
Always test cleaning products on a small hidden area first. Use soft microfiber cloths to avoid scratches. Avoid using metal tools or abrasive pads on the paint. Work in a shaded, cool area to prevent quick drying of cleaning agents. After removing adhesive, wash the area with mild soap and water. Dry the surface with a soft towel to prevent water spots. These steps help keep the car’s finish smooth and shiny.
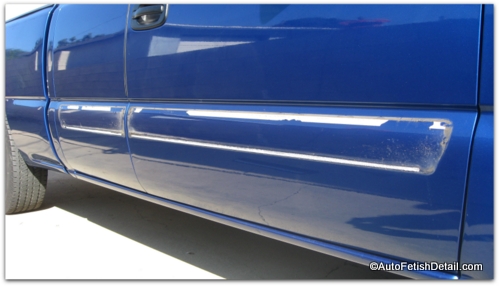
Repairing The Surface
Removing body side molding can leave marks or small damages on your car’s surface. Repairing these spots is key to keeping your vehicle looking smooth and new. This process helps to restore the paint and protect the metal underneath.
Start by preparing the surface. Cleaning away dust and dirt is important before you begin any repairs. A clean area lets you see all the rough spots clearly and ensures the repair materials stick well.
Sanding Rough Spots
Use fine-grit sandpaper to smooth out rough spots or leftover adhesive. Sand gently to avoid scratching the paint around the area. Move the sandpaper in small circles for even smoothing.
Focus on edges where the molding was attached. Sand enough to remove bumps but not too much to expose bare metal. This step creates a flat and clean surface for painting.
Touching Up Paint
Apply a small amount of matching touch-up paint to the sanded areas. Use a fine brush to spread the paint evenly. Thin layers work better and dry faster.
Let the paint dry completely before adding more layers if needed. This helps to build up color and covers any scratches or marks. A smooth paint finish protects the car and improves its look after removing the molding.

Credit: www.reddit.com
Final Inspection
After removing the body side molding, the final inspection is very important. It helps ensure your car looks perfect and no damage happened during the process. Take your time to check every detail carefully.
Checking For Damage
Look closely at the area where the molding was. Check for scratches, dents, or leftover adhesive. Use a bright light to see small marks. If you find damage, it is easier to fix it now than later. Clean the surface gently to avoid more scratches.
Ensuring Smooth Finish
Feel the surface with your hand to check smoothness. The paint should be even and clean. Remove any sticky glue with a soft cloth and mild cleaner. If the surface feels rough, use fine sandpaper very gently. This step makes your car look neat and fresh after molding removal.
Credit: www.expert-mobile-car-detailing.com
Frequently Asked Questions
How Do You Safely Remove Body Side Molding?
To remove body side molding safely, use a heat gun or hairdryer to soften the adhesive. Gently pry the molding off with a plastic trim tool to avoid paint damage. Clean residual adhesive with an automotive adhesive remover.
What Tools Are Needed For Body Side Molding Removal?
You need a heat gun or hairdryer, plastic trim tools, fishing line or dental floss, adhesive remover, and microfiber cloths. These tools help remove molding without damaging the vehicle’s paint or body surface.
Can I Remove Side Molding Without Damaging Paint?
Yes, by heating the molding to soften the adhesive and using plastic tools carefully, you can prevent paint damage. Avoid metal tools and excessive force to keep the paint intact.
How Long Does It Take To Remove Side Molding?
Removing body side molding typically takes 20 to 40 minutes, depending on the vehicle and adhesive strength. Proper preparation and patience ensure a clean removal without damaging the paint.
Conclusion
Removing body side molding can be simple with the right steps. Take your time and work carefully to avoid damage. Use the correct tools to make the job easier. Clean the area well after removing the molding. This helps the surface stay smooth and ready for new parts.
Practice patience and stay safe during the process. Now, you can enjoy a clean and fresh look on your vehicle. Try this method next time you need to remove molding.


