Are your brakes making strange noises or your car isn’t stopping as smoothly as before? It might be time to remove and replace your brake rotors.
Knowing how to remove brake rotors yourself can save you time and money, and give you confidence in maintaining your vehicle. This guide will walk you through each step in a clear and simple way, so you can tackle the job without stress.
Ready to take control of your car’s safety and performance? Let’s dive in and get those brake rotors off with ease.
Credit: www.buybrakes.com
Tools Needed
Removing a brake rotor requires the right tools. Using proper tools makes the job easier and safer. Gather everything before starting. This saves time and avoids frustration.
Essential Hand Tools
First, a socket set is a must. It helps remove wheel and rotor bolts. A breaker bar adds extra power for tight bolts. A rubber mallet can tap the rotor loose without damage. A flathead screwdriver helps pry off clips or covers. A wire brush cleans rust and debris from the hub. A C-clamp or brake caliper tool compresses the brake caliper piston. These tools make removing the rotor smoother and faster.
Safety Gear
Wear safety glasses to protect your eyes from dust and debris. Gloves protect your hands from sharp edges and dirt. A dust mask stops you from breathing brake dust. Closed-toe shoes keep your feet safe from falling tools. Use wheel chocks to stop the car from rolling. Safety gear keeps you safe during the brake rotor removal process.
Preparing Your Vehicle
Preparing your vehicle is the first step to safely remove a brake rotor. This process ensures the car is stable and ready for work. Taking time to prepare reduces risks and makes the job easier.
Securing The Car
Park the car on a flat, level surface. Apply the parking brake firmly. Place wheel chocks behind the wheels that stay on the ground. This prevents any movement while working. Double-check stability before lifting the car.
Removing The Wheel
Loosen the lug nuts slightly before lifting the car. Use a jack to raise the car at the recommended lift point. Secure the car with jack stands for safety. Remove the lug nuts completely and take off the wheel. Set the wheel aside carefully.
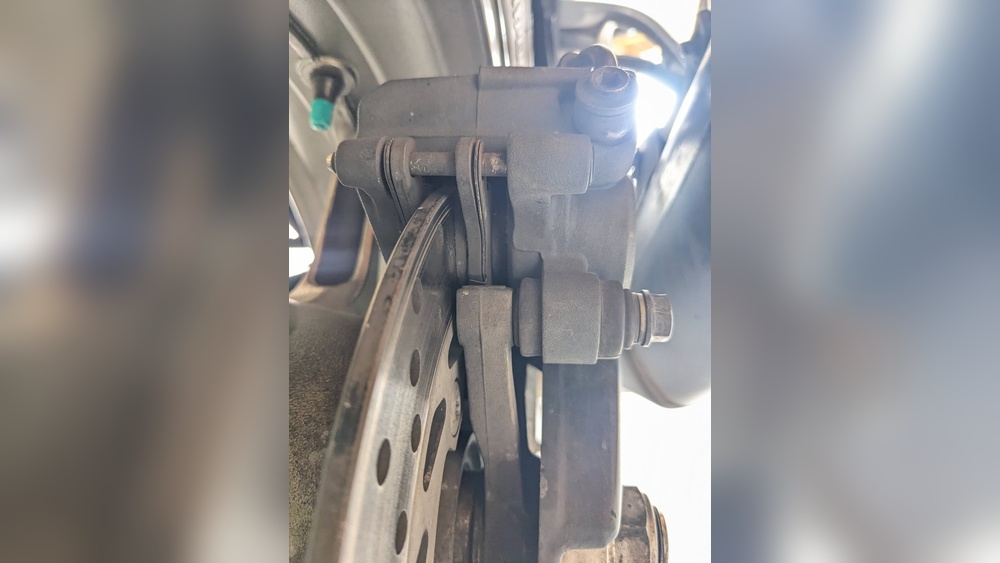
Accessing The Brake Rotor
Accessing the brake rotor is the first step in replacing or servicing it. You must remove parts that cover the rotor. This process lets you work safely and clearly on the rotor. Proper access helps prevent damage to other brake parts and ensures a smooth job.
Removing The Brake Caliper
Start by loosening the bolts holding the brake caliper. Use the right size wrench or socket. Carefully slide the caliper off the rotor. Do not let the caliper hang by the brake hose. Support it with a hook or rest it on a solid surface. This prevents damage to the brake line.
Handling The Brake Pads
After removing the caliper, take out the brake pads. Note their position and how they fit. This helps during reassembly. Check the pads for wear or damage. Set them aside if you plan to reuse them. Handle the pads gently to avoid damage or contamination.

Credit: www.youtube.com
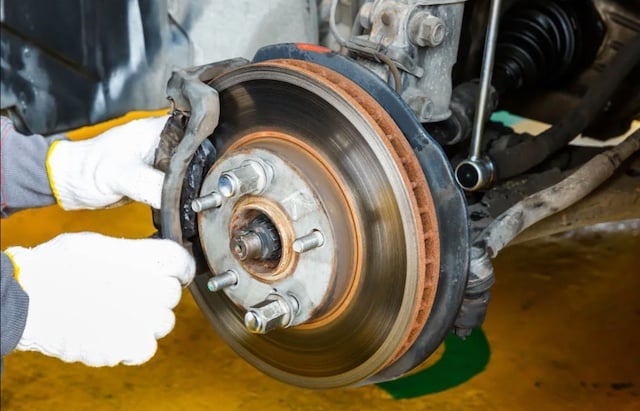
Removing The Rotor
Removing the brake rotor is a key step in brake maintenance. It allows access to worn parts and helps keep your vehicle safe. Sometimes, rotors stick due to rust or dirt. Careful removal prevents damage to other components.
This guide explains easy ways to remove the rotor safely and quickly.
Loosening Rust And Debris
Rust can hold the rotor tightly in place. Use a wire brush to clean the rotor hub area. This removes rust and dirt that block removal. Spray a rust remover or penetrating oil on the rotor hub. Let it sit for 10-15 minutes. Tap gently around the rotor edge with a rubber mallet. This breaks loose stuck debris. Avoid hitting too hard to prevent damage.
Using Pullers Or Hammer Techniques
If the rotor still won’t move, try a puller tool. Attach it to the rotor and tighten slowly. The puller applies even pressure to separate the rotor. No puller? Tap the rotor edge with a hammer. Use steady, controlled strikes. Rotate the rotor slightly after each tap. This helps loosen the rotor evenly. Do not hit the rotor face directly. Protect the rotor and wheel hub from dents.
Cleaning And Inspecting
Cleaning and inspecting the brake rotor is a key step after removal. It helps spot issues early. A clean rotor surface allows better brake performance. Inspecting the rotor ensures safety on the road.
Taking time to check and clean the parts helps avoid costly repairs. It also makes installation easier. A careful inspection reveals hidden damage and dirt that affect braking.
Checking For Damage
Look closely at the rotor for cracks or deep grooves. Small cracks can grow and cause brake failure. Deep grooves reduce braking power and increase wear.
Also, check for rust buildup on the rotor surface. Rust weakens the metal and causes noise. Measure rotor thickness and compare it to manufacturer limits.
Cleaning The Hub Surface
Use a wire brush or sandpaper to clean the hub surface. Remove all dirt, rust, and old grease. A clean hub helps the rotor sit flush and prevent vibrations.
Wipe the surface with a clean cloth after brushing. Avoid leaving debris that may affect rotor alignment. Proper cleaning extends the life of brake components.

Credit: www.wikihow.com
Reinstalling The Rotor
Reinstalling the rotor is a key step in brake maintenance. Proper installation ensures safe and smooth braking. Take your time and follow each step carefully.
Aligning The Rotor
Start by placing the rotor on the wheel hub. Make sure the holes line up with the hub bolts. The rotor should sit flat and not wobble. If it does, clean the hub surface to remove rust or dirt. Proper alignment prevents brake noise and uneven wear.
Securing The Caliper And Pads
Next, position the brake pads inside the caliper. Slide the caliper over the rotor gently. Check the pads fit snugly against the rotor. Use the correct bolts to fasten the caliper to the mounting bracket. Tighten bolts firmly but do not over-tighten. This step keeps the brake system stable and ready to work.
Final Checks
Final checks are crucial after removing and replacing the brake rotor. They ensure your brakes work safely and correctly. Skipping these checks can cause brake failure or uneven wear. Take your time to complete each step carefully. Safety depends on it.
Tightening Bolts
Start by tightening all bolts that hold the rotor. Use a torque wrench to get the right tightness. Follow the manufacturer’s torque settings exactly. Tighten bolts in a star pattern to avoid warping the rotor. Loose bolts can cause noise and reduce brake performance.
Testing Brake Function
After tightening, test the brake function before driving. Press the brake pedal several times to build pressure. Make sure the pedal feels firm and does not sink. Check for unusual noises or vibrations while braking. Perform a slow test drive to confirm everything works well.
Frequently Asked Questions
How Do You Safely Remove A Brake Rotor?
First, lift the vehicle and remove the wheel. Then, take off the brake caliper and bracket. Remove any retaining screws. Finally, pull the rotor off the hub carefully to avoid damage.
What Tools Are Needed To Remove Brake Rotors?
You need a jack, lug wrench, socket set, breaker bar, and screwdriver. A hammer or mallet may help loosen stuck rotors. Safety gloves and eye protection are also essential.
Why Is The Brake Rotor Hard To Remove?
Brake rotors can rust or corrode, causing them to stick. Tight retaining screws or debris can also block removal. Applying penetrating oil and gentle tapping helps loosen the rotor.
Can I Reuse Brake Rotors After Removal?
Reusing rotors depends on their condition. Inspect for cracks, warping, or deep grooves. If damaged, replace them to ensure safe braking performance. Resurfacing is an option if the rotor is worn but not severely damaged.
Conclusion
Removing a brake rotor is easier than many expect. Follow the steps carefully and take your time. Use the right tools to avoid damage or injury. Clean the area well before installing a new rotor. Check other brake parts for wear and tear.
Regular maintenance keeps your brakes working safely. Stay patient and focused throughout the process. This skill helps save money and boosts confidence. Remember, safety first when working on your car. Now you’re ready to handle brake rotor removal with ease.