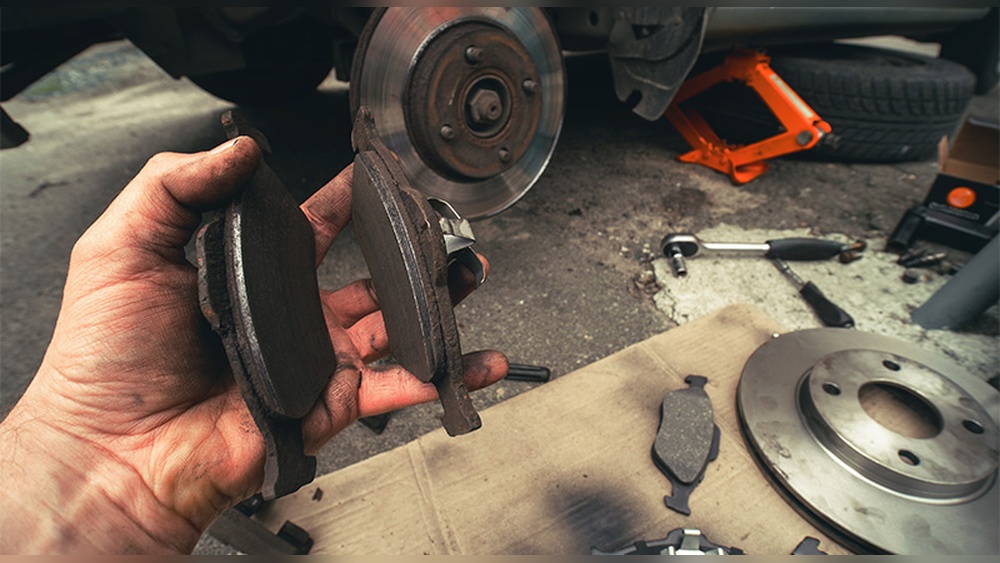
Are you unsure if your brake rotors are still in good shape? Knowing how to measure brake rotors can save you time, money, and keep your car running safely.
If you ignore worn-out rotors, you risk poor braking performance or even dangerous accidents. You’ll learn simple steps to check your brake rotors accurately, so you can decide when it’s time to replace them. Stay with me, and by the end, you’ll feel confident handling this important part of your car’s braking system.
Credit: www.buybrakes.com
Tools Needed
Measuring brake rotors requires the right tools for accurate results. Using proper equipment ensures safety and proper brake function. Below are the key tools needed to measure your brake rotors precisely.
Caliper Types
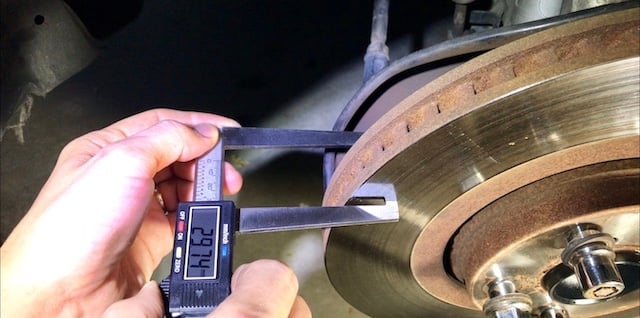
Calipers are essential for measuring rotor thickness. Digital calipers offer clear, easy-to-read results. Dial calipers provide reliable analog measurements. Vernier calipers are a budget-friendly option. Choose one that fits your comfort and accuracy needs.
Micrometer Use
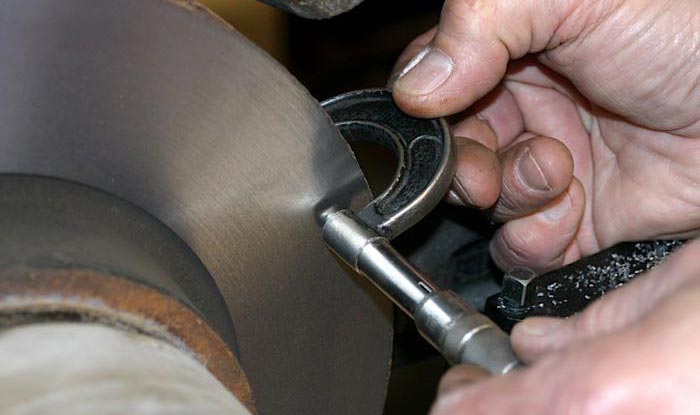
A micrometer gives very precise thickness readings. It measures small changes in rotor wear. Use an outside micrometer for rotor surfaces. Make sure the micrometer is calibrated for accuracy. Handle it carefully to avoid measurement errors.
Additional Equipment
A flat surface or rotor stand helps hold the rotor steady. A clean cloth is needed to wipe off dirt and debris. Use a flashlight to see measurement points clearly. These extras improve measurement accuracy and ease.
Credit: www.import-car.com
Preparing The Vehicle
Preparing the vehicle is the first step in measuring brake rotors. It ensures a safe and smooth process. You need to get the car ready to reach the rotors easily. This preparation helps avoid damage and injury. Follow these steps carefully before measuring the brake rotors.
Safety Measures
Always start with safety. Park the vehicle on a flat surface. Use wheel chocks to stop it from moving. Wear gloves to protect your hands. Use safety glasses to guard your eyes. Never work under a vehicle without proper support. Use jack stands after lifting the car. Avoid rushing through these steps.
Removing The Wheel
Loosen the lug nuts while the car is still on the ground. Use a lug wrench for better grip. Lift the vehicle with a jack. Place the jack stands under the frame. Remove the lug nuts completely. Take the wheel off and set it aside. This step gives clear access to the brake parts.
Accessing The Rotor
Locate the brake caliper mounted over the rotor. Remove the caliper bolts carefully. Hang the caliper using a hook or wire. Do not let it hang by the brake hose. Remove the caliper to expose the rotor fully. Check if the rotor is loose or stuck. Clean the rotor surface before measuring for best results.
Measuring Rotor Thickness
Measuring rotor thickness is key to checking brake health. Thin rotors can cause poor braking and safety risks. Accurate measurement helps decide if rotors need replacement or resurfacing.
Using the right tools and method ensures safe and smooth rides. The process includes locating points, taking readings, and comparing results to specs.
Locating Measurement Points
Find the rotor’s thickest part near the braking surface. Avoid edges and areas with rust or grooves. Measure at multiple points around the rotor for accuracy.
Taking Accurate Readings
Use a micrometer or caliper for precise measurement. Place the tool gently on the rotor surface. Take at least three readings at different spots to check consistency.
Comparing To Specifications
Check your vehicle manual for the minimum rotor thickness. Compare your measurements to this number. If below minimum, replace the rotor immediately for safety.

Credit: vitrek.com
Checking Rotor Runout
Checking rotor runout is a key step in measuring brake rotors. Runout means how much the rotor surface wobbles or moves side to side. Too much wobble can cause brake vibration and uneven wear. This section explains how to check rotor runout using a dial indicator.
Setting Up Dial Indicator
First, attach the dial indicator to a stable base near the rotor. Position the indicator’s tip on the rotor surface close to the edge. Make sure the tip touches the rotor lightly and stays perpendicular. The dial should read zero before you start spinning the rotor.
Measuring Runout
Slowly rotate the rotor one full turn. Watch the dial indicator closely. Note the highest and lowest readings on the dial. The difference between these readings is the total runout. Record this number for reference.
Interpreting Results
Compare the runout value to the vehicle’s specifications. Small runout, usually under 0.002 inches, is normal. Higher values mean the rotor may be warped or uneven. This condition can cause brake issues and needs correction. Either machine or replace the rotor if runout is too high.
Identifying Rotor Warping
Identifying rotor warping is key to safe driving. Warped rotors cause vibrations and reduce brake efficiency. Early detection saves money and prevents accidents.
Signs Of Warping
Feel a pulsing or shaking in the brake pedal. Notice a vibration in the steering wheel when braking. Hear unusual noises like squealing or scraping sounds. See uneven wear or grooves on the rotor surface. These signs often indicate rotor warping.
Confirming With Measurements
Use a dial indicator to check rotor thickness variation. Measure the rotor surface at multiple points. Compare readings to the manufacturer’s specifications. A difference over 0.002 inches usually means warping. Replace or resurface the rotor if needed. Accurate measurement confirms rotor condition and ensures safety.
Recording And Analyzing Data
Recording and analyzing data is a key step in checking brake rotors. Accurate records help track rotor condition over time. This process shows whether rotors need repair or replacement. It also helps keep your vehicle safe and running well.
Documenting Measurements
Start by writing down all rotor measurements clearly. Note the rotor thickness at several points. Include the minimum thickness allowed by the manufacturer. Record any surface irregularities or warping signs. Use a simple chart or notebook for this data. Keep the measurements organized for easy reference.
Deciding On Rotor Replacement
Compare your measurements with the rotor’s minimum thickness. If measurements fall below this limit, replacement is necessary. Check for deep grooves or cracks that affect performance. Rotors with uneven wear should also be replaced. Keeping rotors within safe limits ensures reliable braking.
Maintenance Tips
Proper maintenance of brake rotors ensures safety and better vehicle performance. Simple habits can prevent costly repairs and extend rotor life. Follow these easy tips to keep your brake rotors in good shape.
Regular Inspections
Check brake rotors every few months or after heavy use. Look for cracks, grooves, or uneven surfaces. Thin rotors reduce braking power and can be dangerous. Use a micrometer to measure rotor thickness accurately. Compare measurements to manufacturer minimum thickness. Replace rotors if they fall below this limit.
Extending Rotor Life
Clean rotors regularly to remove dust and debris. Avoid hard braking unless necessary to reduce rotor wear. Use quality brake pads that match your rotor type. Rotate tires and balance wheels for even brake pressure. Proper driving habits help rotors last longer and maintain safety.
Frequently Asked Questions
How Do I Measure The Thickness Of Brake Rotors?
Use a micrometer to measure rotor thickness at multiple points. Compare measurements to the manufacturer’s minimum thickness. Replace rotors if below this limit to ensure safety and performance.
What Tools Are Needed To Measure Brake Rotors Accurately?
A micrometer or a brake rotor gauge is essential for precise thickness measurement. These tools help detect wear and prevent brake failure by ensuring rotors meet specifications.
When Should Brake Rotors Be Measured For Wear?
Measure rotors during regular brake inspections or if you hear noise or feel vibration. Early detection helps maintain braking efficiency and prevents costly repairs.
How To Measure Brake Rotor Diameter Correctly?
Measure the rotor’s outer edge to edge diameter using a caliper. Accurate diameter measurement ensures compatibility with brake pads and proper braking function.
Conclusion
Measuring brake rotors is simple with the right tools and steps. Keep your rotor thickness within the manufacturer’s limits. Regular checks help maintain safe braking performance. Worn rotors can cause vibrations and reduce stopping power. Take time to measure carefully and replace when needed.
This small task can prevent bigger car problems. Stay safe on the road by keeping your brakes in good shape. Practice measuring often, and your vehicle will thank you.