
If you’ve ever tried to remove the wheel nut covers on your Ford and found yourself stuck or unsure where to start, you’re not alone. These covers can be tricky, but knowing the right steps will save you time and prevent damage to your wheels.
In this guide, you’ll discover simple, effective methods to remove your Ford wheel nut covers quickly and safely. Keep reading—once you learn these tips, you’ll handle this task like a pro every time.
Tools Needed
Removing Ford wheel nut covers requires a few simple tools. Having the right tools makes the job easier and faster. Use tools that fit well to avoid damage to the covers or nuts.
Flathead Screwdriver
A flathead screwdriver helps pry off the wheel nut covers gently. Use one with a thin blade to fit under the edge of the cover. Be careful not to scratch the wheel surface.
Rubber Mallet
A rubber mallet is useful to tap covers loose without causing damage. It provides controlled force and reduces the risk of dents or scratches. Use light taps for best results.
Wheel Nut Wrench
A wheel nut wrench fits around the nuts once covers are removed. It helps in loosening or tightening the nuts safely. Choose the correct size to avoid slipping or stripping.
Protective Gloves
Wear protective gloves to keep your hands safe during removal. Gloves improve grip and protect from sharp edges or dirt. They also provide comfort while working.

Credit: battledental.com
Identify Wheel Nut Covers
Before removing Ford wheel nut covers, first identify them. These covers protect the wheel nuts from dirt and rust. They also add style to your wheels.
Knowing how to spot these covers helps avoid damage during removal. Some covers look like part of the wheel. Others stand out clearly.
What Are Wheel Nut Covers?
Wheel nut covers are small caps placed over wheel nuts. They keep the nuts clean and safe. Many Ford models use plastic or metal covers.
How To Spot Wheel Nut Covers On Ford Vehicles
Look closely at the wheel nuts. Covers usually have a smooth or branded surface. They may match the wheel color or differ.
Differences Between Wheel Nut Covers And Wheel Caps
Wheel nut covers cover only the nuts. Wheel caps cover the whole wheel center. Identifying the right part is key before removal.
Prepare The Vehicle
Start by parking the vehicle on a flat surface and turning off the engine. Make sure the parking brake is set to keep the car steady. This helps prevent any movement while you work on the wheel nut covers.
Park On A Flat Surface
Start by parking your Ford on a flat and stable surface. This prevents the vehicle from rolling. A level ground keeps the car steady during the process. Avoid slopes or uneven terrain to stay safe.
Engage The Parking Brake
Set the parking brake firmly. This locks the wheels and stops movement. It adds an extra layer of safety. Always use the parking brake before working near the wheels.
Turn Off The Engine
Switch off the engine completely. Remove the key from the ignition. This avoids accidental starts. It also helps you focus on the task at hand.
Gather Necessary Tools
Prepare tools like a tire iron or plastic pry tool. These help in removing wheel nut covers without damage. Having tools ready makes the job easier and faster.
Credit: www.gilgharda.com
Remove Wheel Nut Covers Safely
Removing wheel nut covers safely protects both your wheels and yourself. These covers can be tight and tricky. Using the right tools and methods avoids damage and injury. Take your time and follow these simple steps.
Using A Flathead Screwdriver
Choose a flathead screwdriver with a thin tip. Gently insert it between the cover and the wheel. Slowly twist the screwdriver to pry the cover off. Avoid using too much force to prevent damage. Work around the cover evenly for easier removal.
Using A Wheel Nut Cover Removal Tool
This tool is made for removing wheel nut covers safely. Place the tool’s prongs under the cover edge. Pull it out carefully using steady pressure. The tool reduces slipping and protects the wheel surface. It is the safest and easiest method.
Alternative Methods
Wrap the screwdriver tip with tape to avoid scratches. Use plastic pry tools as a softer option. Tap gently with a rubber mallet if covers are stuck. Always protect the wheel and avoid sharp metal edges. Patience helps prevent damage and keeps you safe.
Inspect And Clean Nut Covers
Inspecting and cleaning Ford wheel nut covers is a key step in their removal. Dirt and grime often build up around the covers. This can make removal harder and damage the cover or wheel. Taking time to check and clean the nut covers helps avoid problems later.
Careful inspection shows if the covers are cracked or loose. Cleaning removes dust and grease. This makes the covers easier to grip and take off. Clean nut covers also protect the wheel nuts from rust and wear.
Check For Damage Or Wear
Look closely at each nut cover. Search for cracks, breaks, or scratches. Damaged covers may not come off easily. They might also need replacing to protect the wheel nuts properly. Check if any covers are loose or do not fit well. Loose covers can fall off during driving.
Remove Dirt And Debris
Use a soft brush or cloth to clean around the covers. Remove mud, dust, and grease. Cleaning makes the covers easier to hold and turn. Avoid harsh tools that might scratch the covers. A gentle wipe with soapy water often works best.
Dry The Nut Covers Thoroughly
After cleaning, dry the covers with a clean cloth. Wet covers can slip and be hard to remove. Drying also prevents rust forming on the metal parts. Make sure no water stays trapped under the covers or around the nuts.
Reinstalling Wheel Nut Covers
Reinstalling wheel nut covers on your Ford is a simple task. It protects the nuts and keeps your wheels looking neat. Proper reinstallation ensures the covers stay secure while driving.
Take your time during this process. A loose cover can fall off on the road. Follow the steps below to fit them back correctly.
Cleaning The Wheel Nut Area
Before placing the covers, clean the wheel nut area. Dirt or grease can stop the cover from fitting well. Use a cloth to wipe the area clean. This helps the cover snap on firmly.
Aligning The Cover Correctly
Match the cover’s shape with the wheel nuts. Most covers have grooves or clips. Line them up carefully. Proper alignment prevents damage and ensures a tight fit.
Pressing The Cover Into Place
Push the cover gently but firmly onto the nut. Use even pressure around the edges. Avoid hitting it hard; this can break the cover. Press until you hear a click or feel it lock.
Checking The Cover’s Security
After installing, check if the cover is secure. Try to wiggle it with your hand. It should not move or fall off. A secure cover protects your wheel nuts effectively.
Troubleshooting Common Issues
Removing Ford wheel nut covers can sometimes be tricky. Small problems may stop the process. Knowing how to fix these issues helps save time and effort. This section covers common problems and easy solutions for removing wheel nut covers.
Stuck Wheel Nut Covers
Wheel nut covers can get stuck due to dirt or rust. Try spraying a small amount of lubricant around the edges. Let it sit for a few minutes. Then, use a plastic pry tool to gently lift the cover. Avoid using metal tools that can scratch the wheel.
Broken Or Damaged Covers
Covers may crack or break when removing. Use slow and steady pressure to prevent damage. If a cover breaks, replace it quickly to protect the nuts. Damaged covers can let dirt and moisture reach the wheel nuts.
Missing Or Hard-to-find Tools
Some Ford models need special tools for removal. Look for a plastic removal tool or a flathead screwdriver wrapped in cloth. If no tools are available, use your hands carefully. Avoid force to prevent damage to covers or wheels.
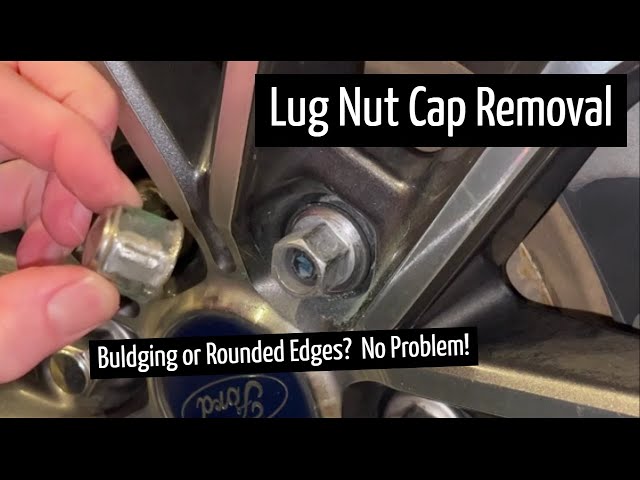
Credit: www.youtube.com
Frequently Asked Questions
How Do I Safely Remove Ford Wheel Nut Covers?
Use a flathead screwdriver or plastic trim tool. Gently pry the cover from the wheel nut. Avoid applying excessive force to prevent damage.
What Tools Are Needed To Remove Ford Wheel Nut Covers?
A flathead screwdriver or plastic trim tool is ideal. These tools help pry off the covers without scratching the wheel. Avoid metal tools that may damage the surface.
Can I Remove Wheel Nut Covers Without Damaging Them?
Yes, by using gentle prying techniques and plastic tools. Avoid metal tools and excessive force to keep covers intact. Take your time to remove them carefully.
Why Remove Ford Wheel Nut Covers?
Removing covers allows access to the lug nuts for tire maintenance. It also helps in cleaning or replacing damaged covers. Proper removal prevents damage to both covers and wheels.
Conclusion
Removing Ford wheel nut covers is simple with the right steps. Use basic tools and a gentle touch to avoid damage. Take your time to carefully pry each cover off. Keeping covers clean helps them last longer. Regular checks make removal easier next time.
This small task saves money and keeps your wheels looking good. Practice these tips for smooth, safe removal every time.


