Are you struggling to get the perfect foam spray from your foam cannon? Sometimes, the orifice inside your foam cannon can block or limit the flow, making your car wash less effective and more frustrating.
Removing the orifice can boost your foam output and give you that thick, rich foam you want. In this guide, you’ll learn exactly how to remove the orifice safely and easily, step by step. Keep reading, and you’ll be able to upgrade your foam cannon for a cleaner, shinier finish every time.
Tools Needed
Removing the orifice from a foam cannon requires the right tools. Having these tools ready makes the process easier and faster. It helps avoid damage to the foam cannon and ensures safety.
Essential Equipment
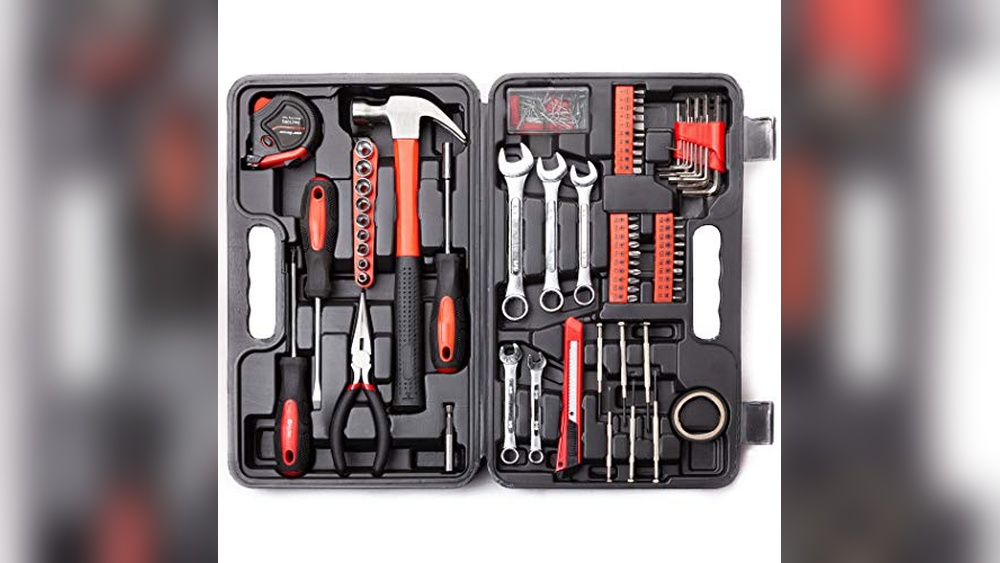
You need a small wrench or adjustable spanner to loosen the orifice. A pair of needle-nose pliers helps grip and pull the orifice out. A flathead screwdriver can assist in prying the orifice gently. A clean cloth is useful to wipe the area after removal. Keep a container nearby to hold small parts safely.
Safety Gear
Wear safety glasses to protect your eyes from debris. Use gloves to avoid cuts or scrapes while handling tools. Work in a well-lit area to see small parts clearly. Ensure your workspace is stable and clean to prevent slips or falls.
Preparing The Foam Cannon
Preparing the foam cannon is the first step before removing the orifice. It ensures safety and makes the process easier. Proper preparation also protects your equipment from damage. Follow these steps carefully to get ready.
Disconnecting From Pressure Washer
Turn off the pressure washer completely. Unplug it from the power source. Release any built-up pressure by pressing the trigger. Unscrew the foam cannon from the pressure washer nozzle. Place the foam cannon on a clean surface. This prevents dirt from entering the system.
Cleaning The Exterior
Wipe the outside of the foam cannon with a damp cloth. Remove any soap residue or dirt. Use mild soap if needed for stubborn spots. Avoid soaking the foam cannon in water. Dry it well with a soft towel. Clean exterior helps you see the orifice clearly.
Locating The Orifice
Finding the orifice on your foam cannon is the first step to remove it safely. The orifice controls the flow of soap and water. It is a small, often hidden part inside the foam cannon. Knowing its location helps with cleaning or replacement tasks. This section guides you on where to find the orifice quickly and what type it might be.
Common Orifice Placement
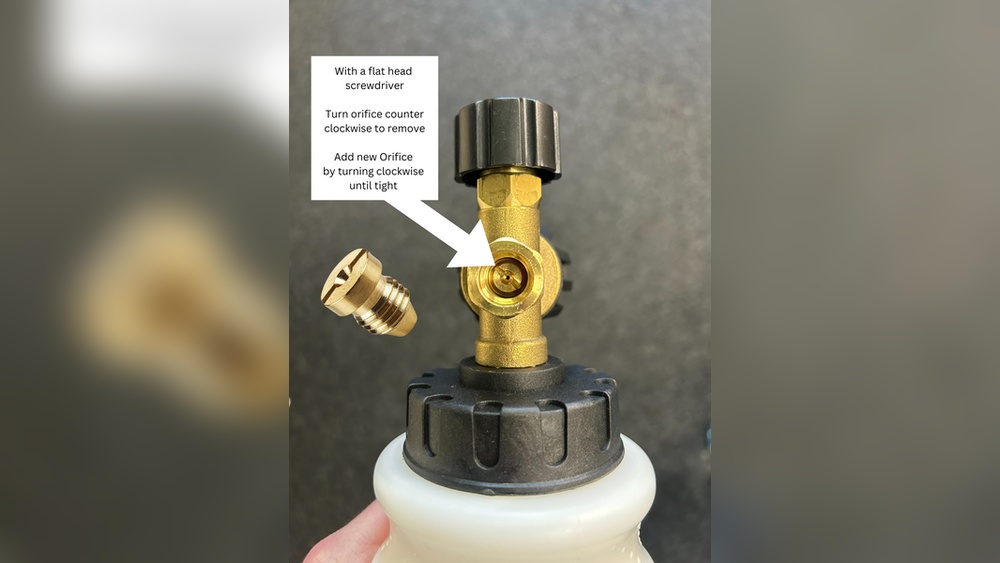
The orifice usually sits inside the foam cannon’s soap inlet. It looks like a tiny nozzle or a small hole. You can find it by removing the soap bottle from the cannon. Check the base where the soap bottle connects. The orifice may also be inside the spray head. Look carefully for a small, round piece that controls liquid flow.
Identifying Orifice Type
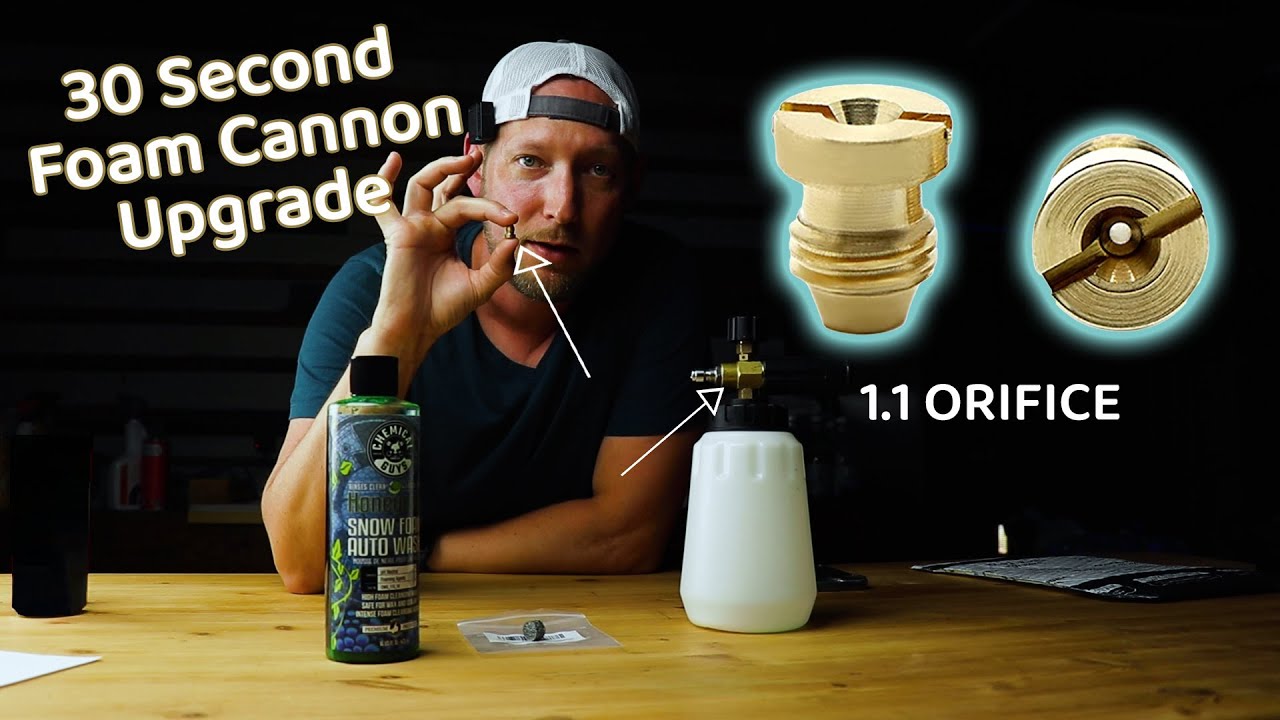
Orifices come in different shapes and sizes. Some are simple round holes. Others have a tiny screen or mesh to filter soap. Plastic or brass are common materials for orifices. Identifying the type helps you pick the right tool for removal. Check if your orifice has threads or snaps into place. This detail affects how you detach it without damage.
Credit: www.youtube.com
Removing The Orifice
Removing the orifice from a foam cannon is a simple task that helps with cleaning and maintenance. The orifice controls the foam flow, so handling it carefully is important. Proper removal extends the life of your foam cannon and keeps it working well.
Loosening Techniques
Start by turning the foam cannon upside down. Use your fingers to gently twist the orifice counterclockwise. If it feels tight, use a pair of pliers with a cloth to avoid scratches. Apply steady, light pressure to avoid stripping the threads. Warm water can help loosen any stuck debris around the orifice. Soak the foam cannon head for a few minutes before trying again.
Avoiding Damage
Do not use excessive force when removing the orifice. Avoid metal tools that can scratch or bend parts. Always protect the surface with a soft cloth or rubber grip. Avoid dropping the foam cannon during removal, as it can crack the plastic. Clean the orifice gently with a soft brush after removal. This keeps the foam cannon in good shape for future use.
Cleaning And Maintenance
Cleaning and maintenance keep your foam cannon working well. Dirt and soap can block the orifice. Regular care helps avoid damage and keeps the spray strong.
Simple steps make a big difference. Clear blockages fast. Check parts for wear. These tasks extend your foam cannon’s life.
Clearing Blockages
Remove the orifice carefully from the foam cannon. Use a small brush or needle to clear dirt. Run warm water through the orifice to flush out soap. Avoid using sharp tools that can damage the parts. Clean the foam cannon after each use to stop clogs from building up.
Inspecting For Wear
Look closely at the orifice for cracks or holes. Worn parts can cause leaks or weak spray. Replace the orifice if it shows damage. Check seals and connectors too. Regular inspection helps spot problems early, saving money on repairs.
Reassembling The Foam Cannon
Reassembling the foam cannon is a key step after removing the orifice. It ensures the tool works well again. Take your time to put all parts back in the right order. This will help avoid leaks or poor spray patterns.
Careful reassembly keeps your foam cannon ready for the next wash. Clean parts fit better and last longer. Follow these tips to put everything back correctly.
Replacing Components
Start by checking each part you removed. Replace any worn or damaged pieces with new ones. This includes seals, washers, and the orifice itself.
Place each component in its correct spot. Use gentle pressure to fit parts without forcing them. Tighten screws and fittings evenly to avoid damage.
Testing For Proper Function
After reassembling, test the foam cannon before full use. Attach it to your pressure washer and turn on the water.
Watch for leaks or weak spray. Adjust parts if needed. A good test saves time and prevents problems during washing.
Tips For Better Foam Performance
Improving foam performance is key to a better cleaning experience. Small changes can make a big difference in foam quality and coverage. Below are simple tips that help you get thicker, longer-lasting foam from your foam cannon.
Focus on the right settings and soap choice. Both affect how foam forms and sticks to surfaces. Understanding these factors helps you clean more effectively and save time.
Adjusting Mixture Settings
Start by checking the mixture ratio on your foam cannon. Too much water thins the foam, making it weak. Too much soap can cause heavy residue. Find a balance for rich, stable foam.
Use the adjustment knob to change the soap flow. Turn slowly and test the foam on a small area. Watch for bubbles that hold shape without popping quickly.
Try several settings to see which works best with your water pressure and soap type. Keep notes for future use. Consistency helps achieve better results every time.
Choosing The Right Soap
Not all soaps work well in a foam cannon. Use soaps designed for foam cannons or pressure washers. These create thick foam that clings to surfaces longer.
Avoid regular dish soap or harsh detergents. They can damage your equipment and produce weak foam. Look for pH-balanced, biodegradable soaps for safety and better cleaning.
Test different brands to find one that produces dense foam with your setup. Quality soap improves foam strength and cleaning power without extra effort.

Credit: www.reddit.com

Credit: www.amazon.com
Frequently Asked Questions
How Do I Safely Remove The Orifice From A Foam Cannon?
To remove the orifice safely, first detach the foam cannon from the pressure washer. Use a small wrench or pliers to unscrew the orifice gently. Avoid applying excessive force to prevent damage. Clean the area before reassembling to ensure optimal performance.
Why Should I Remove The Orifice From My Foam Cannon?
Removing the orifice helps to adjust the foam thickness and spray pattern. It allows for better flow control and customization based on the cleaning task. This can improve efficiency and save detergent when washing different surfaces.
What Tools Are Needed To Remove The Orifice From A Foam Cannon?
Typically, you need a small adjustable wrench or needle-nose pliers. Some models may require a flathead screwdriver. Ensure the tools fit well to avoid stripping the orifice or damaging the foam cannon components.
How Often Should I Clean Or Remove The Orifice In A Foam Cannon?
Clean or remove the orifice after every few uses or if foam output decreases. Regular maintenance prevents clogging, ensuring consistent foam quality and longer equipment life. Always flush with clean water after each use.
Conclusion
Removing the orifice from a foam cannon is simple with the right steps. Take your time and follow each instruction carefully. This small change can improve your foam cannon’s spray pattern. Clean the parts regularly to keep everything working well.
Remember, safety matters—wear gloves and work in a clean area. Practice makes perfect, so don’t worry if it takes a few tries. Enjoy a better car wash experience with your foam cannon.