Are you struggling to remove your RV wheel covers without causing damage? You’re not alone.
Many RV owners find this task tricky and frustrating. But don’t worry—removing your wheel covers can be quick and easy once you know the right steps. You’ll discover simple, effective techniques that save you time and protect your wheels. Keep reading to learn how to get the job done smoothly and confidently.

Credit: www.youtube.com
Tools Needed
Removing RV wheel covers is easier with the right tools. Having them ready saves time and effort. Knowing what tools to gather helps the process go smoothly.
Essential Tools
A flathead screwdriver is key to prying off wheel covers safely. It fits under the edge and lifts without damage. A rubber mallet helps tap covers loose without dents. Lug wrench or socket set is needed to remove lug nuts if the cover is behind them. Work gloves protect your hands from sharp edges and dirt. A flashlight helps see tight spots or dark areas around the wheel.
Optional Accessories
Plastic pry tools can prevent scratches on the wheel surface. Penetrating oil loosens rusty or stuck parts. A small wire brush helps clean dirt or rust before removal. A magnetic tray keeps small screws and nuts safe. A cloth or towel helps wipe the wheel cover and surrounding area clean after removal.
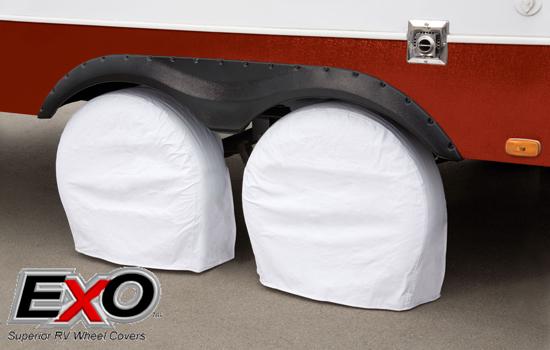
Credit: www.nationalrvcovers.com
Prepare The Rv
Preparing your RV before removing the wheel covers is important. It keeps you safe and makes the job easier. Taking simple steps helps avoid accidents and damage. Let’s start by setting up the RV properly.
Park On A Level Surface
Find a flat, level spot to park your RV. This stops it from rolling or tipping. Uneven ground can make wheel cover removal risky. A stable surface keeps the RV steady while you work.
Engage Parking Brake
Always set the parking brake after parking. This holds the RV in place firmly. It prevents any movement during the wheel cover removal. Safety first—never skip this step.
Locate Wheel Cover Fasteners
Locating the fasteners on your RV wheel cover is the first step to removing it safely. These fasteners hold the cover firmly in place. Knowing where to find them helps avoid damage to the cover or wheel. Fasteners come in different forms depending on the wheel cover design.
Take your time to inspect the wheel cover closely. Look around the edge and center for any visible attachments. Sometimes fasteners blend in with the cover color, so a careful look is necessary. Identifying the fastener type guides you on which tools to use for removal.
Identify Clip Types
Many RV wheel covers use clips to stay attached. Clips often snap into place around the wheel rim. They can be plastic or metal and may be visible or hidden under the cover edge. Gently press or pull on the cover edge to feel for clips. Knowing the clip type helps you release it without breaking.
Check For Screws Or Bolts
Some wheel covers use screws or bolts as fasteners. These are usually found near the center of the cover or around the rim. Use a flashlight to spot small screws or bolts. You may need a screwdriver or wrench to remove them. Always check both sides of the wheel cover for hidden fasteners.
Remove Clips And Screws
Removing the clips and screws is the first step to take off your RV wheel covers. These small parts hold the cover tightly to the wheel. You need to remove them carefully to avoid damage.
Start by finding all the clips around the wheel cover. Some covers also have screws that keep them secure. Removing these fasteners lets you pull off the cover easily.
Using A Flathead Screwdriver
A flathead screwdriver is handy for popping out clips. Gently insert the tip under the clip edge. Twist the screwdriver slowly to lift the clip away from the wheel.
Do this carefully to avoid breaking the clips. Work your way around the wheel cover, removing each clip. This tool also helps to loosen screws if needed.
Using A Socket Wrench
Some RV wheel covers use screws instead of clips. A socket wrench fits over these screws perfectly. Choose the right size socket to avoid stripping the screws.
Turn the wrench counterclockwise to loosen each screw. Keep the screws safe for reinstallation later. Using the wrench makes the removal process faster and easier.
Pry Off The Wheel Cover
Prying off an RV wheel cover is a simple task with the right approach. This step is important to avoid damage to the wheel or cover. Use a tool that fits well and apply gentle pressure. Work slowly to loosen the cover from the wheel. This method helps keep the cover reusable and the wheel safe.
Proper Pry Points
Identify the right spots to pry the cover off. Look for small gaps between the cover and the wheel rim. These gaps are designed for easy removal. Use a flat tool like a pry bar or screwdriver. Insert the tool gently into the gap. Apply slow, steady pressure to lift the cover. Move around the wheel to loosen it evenly.
Avoiding Damage
Protect the wheel and cover during removal. Use a cloth or rubber pad under the pry tool. This prevents scratches and dents. Avoid using too much force. Forcing the cover can break clips or bend metal. Remove the cover gradually by prying from multiple points. Check the cover’s grip as you go to prevent damage.
Inspect The Wheel And Cover
Before removing RV wheel covers, it is important to inspect the wheel and cover carefully. This step helps avoid damage during removal. It also ensures the wheel and cover are safe to handle. Taking a few minutes here can save time and money later.
Checking the condition of both the wheel and cover shows if any repairs are needed. It also makes the removal process smoother and safer for your RV.
Check For Damage
Look closely at the wheel cover for cracks, dents, or broken clips. These signs show the cover may be fragile. Inspect the wheel itself for rust, corrosion, or bends. Damaged parts may need special care when removing the cover. Handle them gently to avoid worsening the damage.
Clean The Surface
Remove dirt and grime from the wheel and cover surface. Use a soft brush or cloth to clean gently. Dirt can cause slipping or scratching during removal. A clean surface helps you see the clips and fasteners clearly. This makes the process easier and safer for both parts.
Store Wheel Covers Safely
Storing RV wheel covers safely protects them from damage and extends their life. Proper storage keeps dirt, dust, and moisture away. This care saves money and effort on replacements. Follow simple steps to keep your wheel covers in good shape between uses.
Avoid Scratches
Scratches can ruin the look of wheel covers. Clean the covers before storing. Use a soft cloth to wipe off dirt and grime. Place the covers on a smooth, flat surface. Avoid stacking covers directly on top of each other. Use a soft barrier like a cloth or foam between covers.
Use Protective Covers
Protective covers add an extra layer of defense. Use bags or sleeves made for wheel covers. These covers keep dust and moisture out. Store the covered wheel covers in a dry place. Avoid areas with extreme heat or cold. Proper protection keeps the covers ready for the road.
Credit: www.thorforums.com
Frequently Asked Questions
How Do I Safely Remove Rv Wheel Covers?
To safely remove RV wheel covers, first loosen the lug nuts slightly. Use a flathead screwdriver or plastic pry tool to gently pry the cover off. Avoid using excessive force to prevent damage to the cover or wheel.
What Tools Are Needed To Remove Rv Wheel Covers?
You typically need a flathead screwdriver or plastic pry tool and a wrench. The pry tool helps lift the cover carefully, while the wrench loosens the lug nuts if needed. Avoid metal tools that might scratch the cover.
Why Should I Remove Rv Wheel Covers Regularly?
Removing wheel covers helps inspect the tires, brakes, and lug nuts. It prevents dirt buildup and corrosion. Regular removal ensures your wheels are safe and well-maintained for travel.
Can I Remove Rv Wheel Covers Without Damaging Them?
Yes, by using gentle prying tools and avoiding metal tools, you can remove covers without damage. Work slowly and avoid forcing the cover off. Proper technique preserves the cover’s appearance and function.
Conclusion
Removing RV wheel covers is easier than it seems. Just follow the steps carefully and take your time. Use the right tools to avoid damage. Clean the wheel and cover before reinstalling. Regular maintenance keeps your RV wheels in good shape.
Now, you can handle wheel covers with confidence. Enjoy your travels with well-maintained wheels!