

Are your wheels looking dull or damaged? Installing bolt-on wheel covers is a simple way to give your car a fresh, stylish look without spending a fortune.
If you’ve ever wondered how to do it yourself, you’re in the right place. This guide will walk you through each step clearly and quickly, so you can transform your wheels with confidence. By the end, you’ll have the skills to upgrade your ride and turn heads wherever you go.
Ready to get started? Let’s dive in!
Tools Needed
Installing bolts on wheel covers needs the right tools. These tools help make the job safe and easy. Having them ready saves time and prevents mistakes.
Socket Wrench
A socket wrench fits bolts tightly. It helps turn bolts quickly without slipping. Choose the right size socket for your bolt heads.
Torque Wrench
A torque wrench ensures bolts are tight enough. Too loose or too tight bolts cause problems. This wrench measures exact tightness for safety.
Flathead Screwdriver
A flathead screwdriver helps remove old covers or bolts. It also pries covers gently without damage. Keep it handy for small adjustments.
Rubber Mallet
A rubber mallet taps covers into place softly. It avoids scratching or bending the covers. Use light taps to fit covers securely.
Gloves
Gloves protect your hands from dirt and sharp edges. They improve grip on tools and parts. Wear gloves for comfort and safety.

Credit: www.youtube.com
Preparing The Wheel
Preparing the wheel is a key step before installing bolt-on wheel covers. Clean and check the wheel carefully. This makes sure the covers fit well and stay in place.
Dirty or damaged wheels can cause problems. Take time to get the wheel ready. This helps the installation go smoothly and keeps the covers secure for longer.
Cleaning The Wheel Surface
Start by washing the wheel with soap and water. Remove all dirt, grease, and brake dust. Use a soft brush or cloth to scrub the surface gently. Dry the wheel completely before moving on.
Inspecting For Damage
Look closely for cracks, dents, or rust. Damaged areas can stop the cover from fitting right. Fix small problems or replace the wheel if needed. A smooth surface gives the best hold for the wheel cover.
Removing Old Covers And Debris
Take off any old wheel covers carefully. Check the wheel rim for leftover clips or glue. Clear away all debris to avoid bumps. A clean rim helps the new bolt-on cover sit flat and tight.
Checking Wheel Lug Nuts
Make sure the lug nuts are tight and in good shape. Loose or worn nuts can affect the cover’s fit. Tighten them with a wrench if necessary. The right fit keeps the wheel cover from moving.
Aligning The Bolt-on Covers
Aligning bolt-on wheel covers is a key step in the installation process. Proper alignment ensures the covers fit tightly and look great. Misalignment can cause rattling or damage over time. This section explains how to position and adjust the covers for a perfect fit.
Check The Bolt Holes
Start by matching the cover’s bolt holes with the wheel’s bolts. Each hole must line up exactly. Rotate the cover slowly to find the right position. If holes do not match, the cover will not sit properly.
Hand Tighten Bolts First
Insert all bolts by hand before using tools. This step helps keep the cover in place. Hand tightening prevents cross-threading and damage. Tighten bolts evenly around the cover for balance.
Use A Cross Pattern To Tighten
Tighten bolts in a cross or star pattern. This method spreads pressure evenly. Avoid tightening one bolt fully before others. Gradual tightening ensures the cover stays aligned and secure.
Check For Gaps And Movement
After tightening, check for any gaps between cover and wheel. Try to move the cover gently. If it shifts, retighten bolts slightly. A snug fit prevents noise and wear.

Credit: www.wikihow.com
Securing The Bolts
Securing the bolts on wheel covers is a key step. It keeps the cover firmly attached to the wheel. Loose bolts can cause rattling or even make the cover fall off. Tightening bolts correctly ensures safety and a neat look.
Gather The Right Tools
Use a socket wrench or a lug wrench that fits your bolts. Avoid using tools that are too big or small. This helps prevent damage to the bolt heads and ensures a tight fit.
Hand-tighten First
Start by screwing the bolts in by hand. This reduces the risk of cross-threading. Cross-threaded bolts can damage the wheel cover and make removal hard later.
Tighten In A Star Pattern
Use the wrench to tighten bolts in a star or crisscross pattern. This spreads the pressure evenly. It helps the wheel cover sit flush against the wheel surface.
Apply The Correct Torque
Check your vehicle’s manual for the right torque setting. Use a torque wrench to tighten bolts to this exact value. Over-tightening can strip threads, while under-tightening can loosen the cover.
Double-check Each Bolt
After tightening all bolts, re-check each one. This confirms that none have loosened during the process. Secure bolts keep the wheel cover safe on every drive.
Checking The Fit
Checking the fit is an important step before installing bolt on wheel covers. It helps to avoid problems like loose covers or damage to the wheels. This process ensures the wheel cover stays secure and looks good on your vehicle.
Take your time to check the fit carefully. Proper fit means the cover aligns well with the wheel bolts and sits flush against the wheel surface. Poor fit can cause vibrations or even cause the cover to fall off while driving.
Measure The Wheel Cover Diameter
Start by measuring the diameter of the wheel cover. Use a tape measure for accuracy. Compare this size to the wheel diameter. Both sizes should match closely to ensure the cover fits well.
Align Bolt Holes With Wheel Bolts
Next, check if the bolt holes on the cover line up with the wheel bolts. Hold the cover near the wheel and see if the holes match. Misalignment can stop the cover from fitting securely.
Test Fit By Hand
Place the cover on the wheel by hand without tightening bolts yet. Press gently to see if it sits evenly. The cover should not wobble or feel loose. Adjust if needed before final installation.
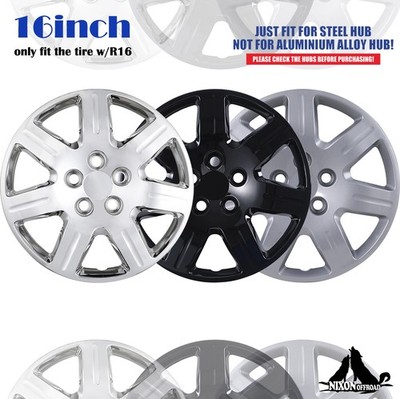
Credit: www.ebay.com
Common Installation Mistakes
Installing bolt-on wheel covers may seem easy, but many people make simple mistakes. These errors can cause the covers to fit poorly or fall off while driving. Avoiding common installation mistakes saves time and money. It also keeps your wheels safe and looking good.
Below are some common mistakes to watch out for during installation. Knowing these helps you get a secure fit the first time.
Improper Alignment Of Bolt Holes
Aligning the bolt holes incorrectly is a frequent problem. The holes must match the wheel bolts exactly. Misalignment causes the cover to sit unevenly or not fit at all. Take time to line up each hole before tightening bolts.
Overtightening The Bolts
Many people tighten the bolts too much. This can crack or warp the wheel cover. Tighten bolts firmly but gently. Stop once the cover feels secure without forcing it.
Ignoring Wheel Cover Size
Using the wrong size wheel cover causes fitting issues. Covers come in different sizes for various wheels. Measure your wheels carefully before buying covers. A proper size ensures easy installation and a snug fit.
Failing To Clean The Wheel Surface
Dirt and grime on the wheel surface affect cover grip. Clean the wheel thoroughly before installing covers. A clean surface helps the cover attach securely and prevents damage.
Maintenance Tips
Maintaining bolt-on wheel covers helps keep them secure and looking good. Regular care prevents damage and extends the life of your wheel covers. Simple steps make maintenance easy and effective.
Check Bolts Regularly
Check the bolts often to ensure they are tight. Loose bolts can cause wheel covers to fall off. Use a wrench to tighten any loose bolts carefully. Avoid over-tightening, which can strip the bolt threads.
Clean Wheel Covers Gently
Wash wheel covers with mild soap and water. Use a soft cloth or sponge to avoid scratches. Avoid harsh chemicals that damage the cover’s finish. Dry the covers completely to prevent rust on the bolts.
Inspect For Damage
Look for cracks or dents on the wheel covers. Damaged covers may not fit properly and can fall off. Replace any wheel covers that show signs of wear or damage. Check the bolt holes to ensure they are not stripped.
Apply Anti-rust Spray
Spray bolts with anti-rust lubricant to prevent corrosion. Rust can weaken bolts and cause failure. Apply the spray every few months, especially in wet climates. Wipe off excess spray to avoid dirt buildup.
Tighten After Driving
Check bolt tightness after driving a few miles. Vibrations can loosen bolts after initial installation. Tighten bolts again to ensure the wheel covers stay secure. This step improves safety and prevents loss.
Frequently Asked Questions
How Do I Install Bolt-on Wheel Covers Safely?
First, clean the wheel surface thoroughly. Align the cover with the wheel bolts. Press firmly until it snaps into place. Use a wrench to tighten bolts evenly. Double-check the fit to ensure safety and stability.
What Tools Are Needed To Install Bolt-on Wheel Covers?
You will need a wrench or socket set to tighten the bolts. A clean cloth for wiping the wheels is helpful. No special tools are required beyond basic hand tools. Proper tools ensure a secure and smooth installation.
Can I Install Bolt-on Wheel Covers Myself?
Yes, installing bolt-on wheel covers is simple and DIY-friendly. Basic tools and careful alignment are all you need. Follow the instructions step-by-step for best results. It saves time and money compared to professional installation.
How To Prevent Bolt-on Covers From Falling Off?
Ensure all bolts are tightened evenly and firmly. Regularly check for any loosening after driving. Avoid hitting curbs or potholes that may dislodge the covers. Proper installation and maintenance prevent accidental loss.
Conclusion
Installing bolt on wheel covers is simple with the right steps. Take time to align each cover carefully. Tighten the bolts evenly to avoid damage. Check the fit after installation to ensure safety. Regularly inspect the covers to keep them secure.
Enjoy the fresh look your wheels now have. This small task improves your car’s style and protection. Practice makes perfect, so don’t rush the process. You can handle this project confidently and easily.


