Are your snap-on wheel covers stuck or looking worn out? Removing them might seem tricky, but it doesn’t have to be a hassle.
Knowing the right steps can save you time, protect your wheels, and get your car looking fresh again. In this guide, you’ll discover simple, effective ways to remove your snap-on wheel covers without damaging them or your rims. Keep reading to learn how to make the job easy and stress-free.
Tools Needed
Removing snap-on wheel covers is easier with the right tools. Having these tools ready saves time and prevents damage to your wheels or covers. Each tool plays a specific role in safely detaching the covers.
Flathead Screwdriver
A flathead screwdriver helps pry the wheel cover gently. Choose one with a wide, flat tip for better leverage. Wrap the tip with a cloth to avoid scratching the wheel.
Rubber Mallet
A rubber mallet can tap stubborn clips loose. It applies force without damaging the cover or wheel. Use light taps and check progress frequently.
Protective Gloves
Wear gloves to protect your hands from sharp edges. Gloves also improve your grip on slippery surfaces. Choose gloves that fit well and allow good hand movement.
Tire Iron Or Pry Bar
A tire iron or small pry bar can help in tough spots. Use it carefully to avoid bending or breaking clips. Place a cloth under the tool to prevent scratches.
Work Light
A work light brightens dark areas around the wheel. Good lighting helps you see clip positions and avoid mistakes. Portable LED lights are useful for this task.

Credit: www.amazon.com
Safety Precautions
Removing snap-on wheel covers requires care and attention to safety. Taking precautions protects you from injury and prevents damage to your vehicle. Safety is the first step before starting any work on your wheels.
Always prepare your workspace and tools properly. Following safety guidelines ensures a smooth and risk-free process.
Wear Protective Gloves
Gloves protect your hands from sharp edges and dirt. They also improve your grip on the wheel cover. Choose gloves that fit well and are durable.
Use Eye Protection
Wheel covers can snap off quickly and hit your face. Safety glasses shield your eyes from flying debris. Always wear them to avoid eye injury.
Park On A Flat Surface
Park your car on a level area to prevent rolling. Engage the parking brake for extra safety. This keeps the car steady while you work.
Work With The Engine Off
Turn off the engine before removing wheel covers. This reduces the risk of accidental movement. It also lowers the chance of injury.
Handle Tools Carefully
Use the right tools to avoid damage or slips. Pry bars or flathead screwdrivers work best. Insert tools gently to prevent scratching the wheel.
Locate Snap Points
Start by finding the snap points around the wheel cover’s edge. These small clips hold the cover tight to the wheel. Gently press or pry these points to release the cover without damage.
Understanding Snap Points On Wheel Covers
Snap points are small clips that hold the wheel cover tightly on the rim. These points keep the cover secure while driving. To remove the cover, you must first find these snap points.
They are usually spaced evenly around the edge of the wheel cover. Each snap point clicks into a groove or lip on the wheel rim.
How To Identify Snap Points Easily
Look closely along the edge of the wheel cover. You will see tiny raised areas or indentations. These marks show where the snap points are located.
Sometimes, you can feel the snap points by gently running your fingers around the cover’s edge. They feel like small bumps or clips under the surface.
Using Tools To Locate Snap Points Safely
A flathead screwdriver or a plastic pry tool helps find snap points without damage. Insert the tool gently near the edge and move it slowly to feel the clips.
Do not force the tool too hard. Pressing lightly helps locate all the snap points without scratching the cover or wheel.

Credit: www.youtube.com
Loosen The Wheel Cover
Loosening a snap-on wheel cover is the first step to remove it safely. This task requires care to avoid damage to the wheel or cover. Using the right tools and technique makes the job easier.
Start by gently prying the cover away from the wheel. Work slowly and check your progress often. This helps prevent bending or breaking the cover.
Use A Flathead Screwdriver
A flathead screwdriver is perfect for loosening snap-on wheel covers. Choose one with a wide, flat tip for better grip. Insert the screwdriver carefully between the wheel and cover edge.
Move the screwdriver slowly to create a small gap. Do not force it. This step lets air in and loosens the cover’s grip.
Apply Gentle Pressure
After inserting the screwdriver, apply gentle pressure to pry the cover. Push the tool just enough to lift the edge. Too much force can crack the cover or scratch the wheel.
Work your way around the cover, lifting slightly at several points. This balances the pressure and helps the cover come off smoothly. Patience is key during this process.
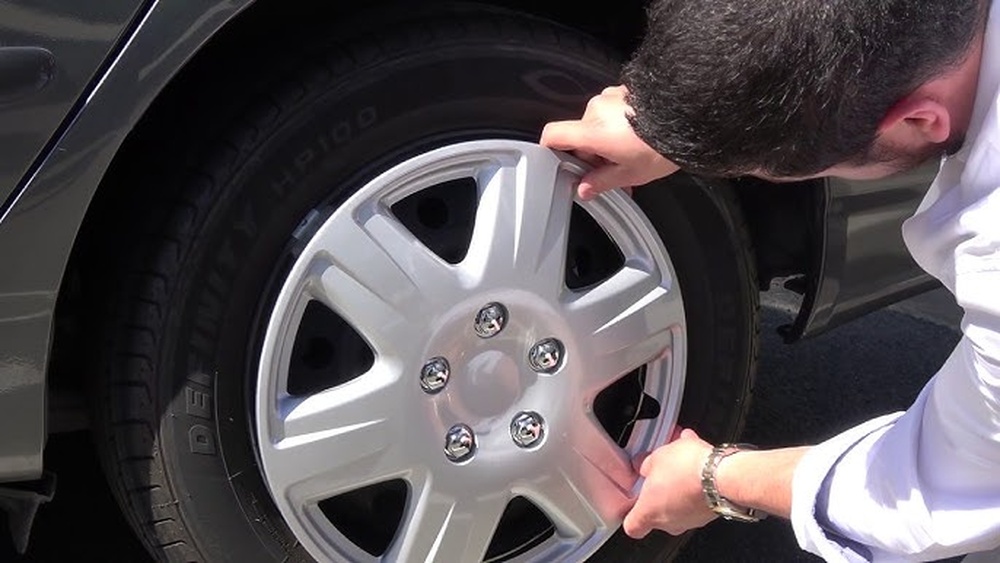
Remove The Wheel Cover
Removing a snap-on wheel cover is easier with the right method. The cover fits tightly on the wheel rim. You need to work carefully to avoid damage. This section explains how to take off the wheel cover safely and smoothly.
Work Around The Edges
Start by checking the edges of the wheel cover. Use your fingers or a plastic tool to gently pry at one edge. Move slowly to find the clips holding the cover. Work your way around the wheel, loosening clips bit by bit. Avoid forcing the cover off in one spot. This spreads the pressure and prevents cracks.
Avoid Damaging The Cover
Use plastic tools instead of metal ones to protect the cover. Metal tools can scratch or break the plastic. Keep your movements slow and steady to reduce stress on the cover. Place a cloth between the tool and the cover for extra protection. If the cover feels stuck, try another spot rather than pulling harder. Patience helps keep the cover in good shape for reuse.
Clean And Inspect
Cleaning and inspecting your snap-on wheel covers is an important step. It helps keep them in good shape and ready for reinstallation. Dirt, grime, and damage can cause problems later. Taking time to clean and check covers extends their life.
Clean The Wheel Covers
Start by rinsing the covers with water. Use a soft brush or cloth to remove dirt. Avoid harsh chemicals that can damage the finish. Mild soap and warm water work best. Clean all sides, including the back and edges.
Dry The Covers Thoroughly
After washing, dry the covers well. Use a soft towel or let them air dry. Moisture left on covers can cause rust on metal parts. Drying also helps spot cracks or damage more easily.
Inspect For Cracks And Damage
Look closely at the covers for cracks or breaks. Check the clips and edges for wear or bending. Damaged clips may not hold the cover securely. Replace any covers or clips that show signs of damage.
Check For Dirt In The Clips
Dirt stuck in the clips can stop them from snapping on properly. Use a small brush to clean inside each clip. Make sure clips move freely and are not broken. Clean clips ensure a tight fit on the wheel.
Reinstalling Tips
Reinstalling snap-on wheel covers is simple with the right approach. Careful steps help the cover fit snugly and stay secure during driving. Follow these tips to avoid damage and ensure a smooth installation.
Clean The Wheel And Cover
Wipe the wheel surface clean before placing the cover. Remove dirt and dust for better grip. Clean the inside edges of the cover too. This prevents slipping and keeps the cover tight.
Align The Cover Correctly
Match the cover’s clips with the wheel’s rim holes. Proper alignment makes snapping easier. Check for any logo or design that must face outward. Misalignment can cause uneven fitting and noise.
Press Evenly Around The Edges
Push the cover gently but firmly around the rim. Start at one clip and move to the next. Apply even pressure to avoid bending or cracking. Listen for clicks indicating the cover is locked.
Check For Loose Spots
After installation, inspect all edges for gaps. Press any loose areas until secure. A loose cover can fall off while driving. Make sure every clip snaps in place tightly.
Test The Fit With A Light Pull
Pull the cover lightly to test its hold. It should not move or shift. If it does, repeat the pressing step. A secure fit keeps the cover safe and stable on the road.

Credit: www.ubuy.com.br
Frequently Asked Questions
How Do I Safely Remove Snap-on Wheel Covers?
Use a flathead screwdriver or pry tool to gently lift the edge. Work around the cover evenly to avoid damage. Applying gentle, steady pressure helps prevent scratching the wheel or cover.
What Tools Are Needed To Remove Snap-on Wheel Covers?
A flathead screwdriver or a specialized wheel cover removal tool works best. Avoid sharp or pointed tools that can damage the cover or wheel surface.
Can I Remove Snap-on Wheel Covers Without Damaging Them?
Yes, by carefully prying at the clips and avoiding excessive force. Removing them slowly and evenly ensures the covers stay intact and reusable.
How Do I Avoid Scratching Wheels When Removing Covers?
Use a soft cloth or tape on the tool’s edge before prying. This cushioning protects the wheel’s finish while you gently remove the cover.
Conclusion
Removing snap-on wheel covers is simple with the right steps. Use the right tools to avoid damage. Work slowly and carefully to protect your wheels. Clean the area after removal for better results. Practice makes the task easier over time.
Taking your time saves money and stress. Now, you can remove wheel covers safely and confidently.