
Removing vinyl wrap from your van might seem like a tough job, but it doesn’t have to be. If you want to keep your van looking great without damaging the paint underneath, you need the right steps and tools.
In this guide, you’ll discover simple, effective ways to peel off that vinyl wrap smoothly and safely. Whether you’re refreshing your van’s look or preparing it for a new design, follow along to save time, avoid frustration, and get professional results.
Ready to take off that wrap like a pro? Let’s dive in!
Preparing Your Workspace
Preparing your workspace is the first step to remove vinyl wrap from your van safely and efficiently. A clean and organized area helps you work faster. It also reduces the risk of damage to your vehicle or surroundings. Taking time to set up the right environment makes the task easier and less stressful.
Focus on having all tools ready, picking a good location, and protecting nearby parts. These steps create a smooth process and better results.
Gathering Necessary Tools
Start by collecting all tools needed for vinyl wrap removal. You will need a heat gun or hairdryer to warm the vinyl. A plastic scraper helps lift the edges without scratching. Rubbing alcohol or adhesive remover cleans sticky residue. Soft cloths and gloves protect your hands and surfaces. Having these tools handy saves time and avoids interruptions.
Choosing The Right Location
Pick a place with good lighting and ventilation. Outdoor spots or garages work well. Avoid direct sunlight to prevent the vinyl from overheating too fast. A flat surface lets you move around the van easily. Make sure the area is dry and dust-free to keep the wrap clean during removal.
Protecting Surrounding Areas
Cover nearby parts like windows, mirrors, and trim with painter’s tape or plastic sheets. This stops accidental damage from tools or heat. Lay down drop cloths or old blankets under the van to catch falling vinyl pieces. Protecting these areas keeps your van safe and reduces cleanup time later.

Credit: sussexsigns.com
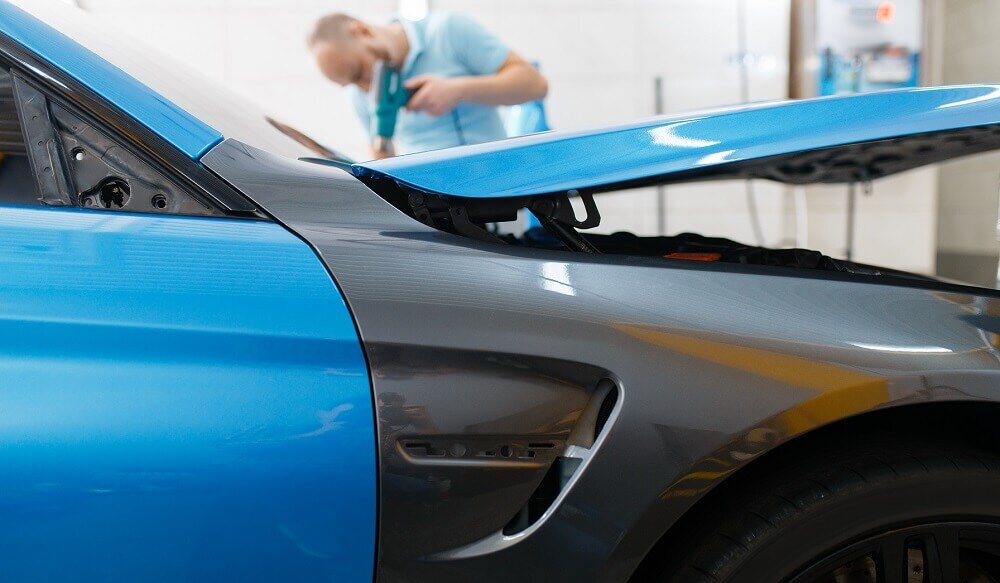
Heating The Vinyl Wrap
Heating the vinyl wrap is a key step in removing it from your van. Warm vinyl becomes soft and easier to peel off. This reduces the chance of tearing or leaving adhesive behind. Proper heating speeds up the process and protects your van’s paint.
Using A Heat Gun Safely
Hold the heat gun about six inches from the vinyl surface. Move it in slow, steady motions to avoid overheating one spot. Keep your hands steady and use gloves for protection. Never point the heat gun at yourself or others. Turn off the heat gun when not in use.
Optimal Temperature Settings
Set the heat gun between 250°F and 300°F (120°C to 150°C). This range softens the vinyl without harming the paint. Too much heat can damage the van’s surface. Start with a lower temperature and increase if needed. Test a small area before heating the whole section.
Avoiding Damage To Van Surface
Keep the heat gun moving to avoid burns or bubbles. Do not stay too long on one spot. Use a plastic scraper to lift the edges gently. Avoid metal tools that can scratch paint. Let the vinyl cool slightly before peeling to reduce stress on the paint.
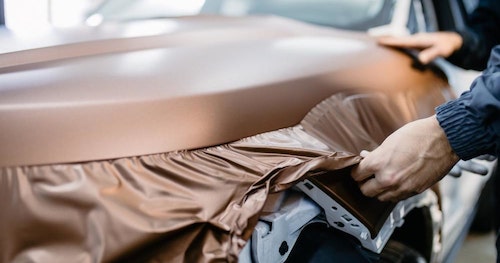
Peeling Off The Vinyl
Removing vinyl wrap from a van needs care and patience. Peeling off the vinyl is the first step. Doing it right helps protect the van’s paint. It also makes the process easier. Start carefully to avoid damage and extra work.
Starting At The Edges
Find a corner of the vinyl wrap. Use your fingernail or a plastic tool to lift it. Avoid sharp objects that can scratch the paint. Gently pull up enough vinyl to hold. This small section will be your starting point.
Slow And Steady Removal
Pull the vinyl back slowly and evenly. Keep a low angle, about 45 degrees, to the surface. This reduces stress on the paint and vinyl. Take breaks if the vinyl feels tight. Slow removal stops tearing and leaves less residue.
Dealing With Stubborn Sections
Some parts may stick more than others. Use a heat gun or hair dryer on low heat. Warm the vinyl gently to soften the adhesive. Avoid too much heat to protect the paint. Peel slowly after warming these tough spots.
Removing Adhesive Residue
Removing vinyl wrap from your van often leaves sticky adhesive behind. This residue can attract dirt and damage the paint if left untreated. Cleaning it up carefully is important for a smooth, clean surface. Follow these steps to remove adhesive residue safely and effectively.
Choosing The Right Adhesive Remover
Select a remover made for automotive use. Avoid harsh chemicals that can harm paint or plastic parts. Products with citrus or soy bases work well and are gentle. Test the remover on a small, hidden area first. This prevents unexpected damage to your van’s finish.
Applying Remover Safely
Wear gloves to protect your hands from chemicals. Apply the remover to a soft cloth, not directly on the vehicle. Rub the adhesive gently in small circles. Let the remover sit for a few minutes to soften the residue. Avoid using sharp tools that might scratch the paint.
Cleaning The Surface Thoroughly
After the residue softens, wipe it away with a clean cloth. Use warm, soapy water to wash the treated area. Rinse the surface well and dry it completely. This step removes any leftover remover and protects your van’s paint. Inspect the surface to ensure all residue is gone.
Final Surface Preparation
Final surface preparation is a key step after removing vinyl wrap from your van. It ensures the surface is clean and smooth. This step helps avoid any problems with new paint or wrap. Proper preparation also protects your van’s finish and gives better results.
Washing And Drying The Van
Start by washing the van with soap and water. Use a soft cloth or sponge to avoid scratches. Remove all dirt, glue, and debris left from the wrap. Rinse thoroughly with clean water. Dry the surface completely using a clean towel. A dry surface prevents dirt from sticking again.
Inspecting For Damage
Look closely at the van’s surface for any damage. Check for scratches, dents, or paint chips. Small problems can get worse if ignored. Mark any areas that need repair. Fix these issues before applying a new wrap or paint. This step helps keep the van looking fresh and new.
Preparing For New Wrap Or Paint
Use a surface cleaner or alcohol-based solution to wipe the van. This removes oils and residues that soap might miss. Lightly sand rough spots for a smooth finish. Cover areas that need protection from paint or wrap. A clean, smooth surface ensures the new wrap or paint sticks well and lasts long.
Credit: www.housecallpro.com
Common Mistakes To Avoid
Removing vinyl wrap from a van may seem easy. Many make mistakes that damage the paint or leave sticky residue. Avoiding these errors saves time and effort. Focus on careful steps and patience. Here are common mistakes to watch out for during removal.
Overheating The Vinyl
Heat softens vinyl, making removal easier. Too much heat can warp or damage the van’s paint. Use a heat gun or hairdryer at a moderate temperature. Keep the heat moving and avoid staying in one spot. Overheating causes the vinyl to stretch or burn. Take breaks to cool down if needed.
Ripping Too Quickly
Pulling the vinyl off fast can tear it or pull paint off. Remove the wrap slowly and at a low angle. Slow pulling helps the adhesive release gently. Stop if you feel resistance. Ripping too fast often leaves sticky glue behind. Patience prevents damage and makes the job cleaner.
Ignoring Surface Cleaning
After removing the vinyl, clean the van’s surface. Leftover adhesive attracts dirt and dust. Use a mild cleaner and soft cloth for best results. Skipping this step leaves the surface sticky and uneven. Clean surfaces prepare the van for new wraps or paint.
Credit: www.raccoon.co.uk
Frequently Asked Questions
How Do You Safely Remove Vinyl Wrap From A Van?
To safely remove vinyl wrap, heat the surface using a heat gun or hairdryer. Peel the wrap slowly at a 45-degree angle to avoid damaging the paint underneath. Use adhesive remover for leftover residue and clean the surface thoroughly after removal.
Can Vinyl Wrap Damage My Van’s Paint?
Vinyl wraps usually don’t damage factory paint if applied properly. However, poor removal techniques or old, damaged paint can lead to peeling or scratches. Always remove vinyl wrap carefully and consider professional help if the paint condition is uncertain.
What Tools Are Needed To Remove Vinyl Wrap From A Van?
Essential tools include a heat gun or hairdryer, plastic scraper, adhesive remover, microfiber cloth, and gloves. These help soften the vinyl, lift edges without scratching, remove adhesive, and keep your hands protected during the process.
How Long Does It Take To Remove A Vinyl Wrap From A Van?
Removing vinyl wrap can take from a few hours to a full day depending on wrap size and condition. Smaller vans take less time, while larger or older wraps may require more effort and patience for complete removal.
Conclusion
Removing vinyl wrap from your van takes patience and care. Heat the wrap gently to make peeling easier. Pull slowly to avoid damaging the paint underneath. Use adhesive remover to clean leftover glue spots. Take breaks if the process feels tough.
A neat job helps keep your van looking great. With these tips, removing vinyl wrap is simpler than it seems. Give your van a fresh look by following these steps carefully.


