
Are you looking to give your car a fresh, stylish look without spending a fortune? Vinyl wrapping your car mirror is a simple and effective way to do just that.
Whether you want to match your car’s color, add a pop of contrast, or protect the mirror from scratches, this guide will walk you through every step. You don’t need special skills or expensive tools—just a little patience and the right techniques.
Keep reading, and you’ll discover how easy it is to transform your car mirrors like a pro.

Credit: www.youtube.com
Materials Needed
Before you start vinyl wrapping a car mirror, gather the right materials. Having everything ready makes the process smoother. The quality of your materials affects the final look and durability. Focus on choosing the right vinyl and essential tools.
Choosing The Right Vinyl
Select vinyl designed for automotive use. It should be flexible and easy to stretch. Glossy or matte finishes change the mirror’s look. Pick a color that matches or contrasts your car.
Look for vinyl with air-release technology. This helps avoid bubbles during application. Also, check if the vinyl is weather-resistant. It should handle rain, sun, and car washes.
Essential Tools
Prepare tools to make wrapping easier. A squeegee smooths out air bubbles and creases. Use a heat gun or hair dryer to soften the vinyl for curves.
Have a sharp utility knife or blade to trim excess vinyl. Use cleaning supplies like rubbing alcohol and microfiber cloths to clean the mirror. Clean surfaces help the vinyl stick better.
Preparing The Mirror
Preparing the car mirror before vinyl wrapping is important. A clean and smooth surface helps the vinyl stick well. It also prevents bubbles and wrinkles. Taking time to prepare the mirror ensures a neat, lasting finish.
Cleaning The Surface
Start by washing the mirror with soap and water. Use a soft cloth to remove dirt and dust. Dry the mirror completely with a clean towel. Next, wipe the surface with rubbing alcohol. This removes oils and grease that block adhesion.
Removing Old Wrap Or Debris
Check the mirror for old vinyl or stickers. Peel off any loose pieces carefully. Use a plastic scraper to lift stubborn bits. Clean leftover glue with adhesive remover or rubbing alcohol. Make sure the surface is smooth and free of debris.
Cutting The Vinyl
Cutting the vinyl is a crucial step in wrapping your car mirror. It ensures the vinyl fits perfectly without wrinkles or bubbles. Proper cutting saves time and gives a smooth finish. Take your time and be precise for the best results.
Measuring The Mirror
First, measure the mirror’s surface carefully. Use a tape measure or ruler to get the width and height. Add an extra half inch to each side. This extra space helps cover edges completely. Write down your measurements clearly before cutting.
Trimming The Vinyl Sheet
Place the vinyl sheet on a flat surface. Mark the measurements using a pencil or a washable marker. Cut slowly with sharp scissors or a craft knife. Keep your hands steady for straight lines. Avoid cutting too close to the edges. Leave a small margin for adjustments during wrapping.
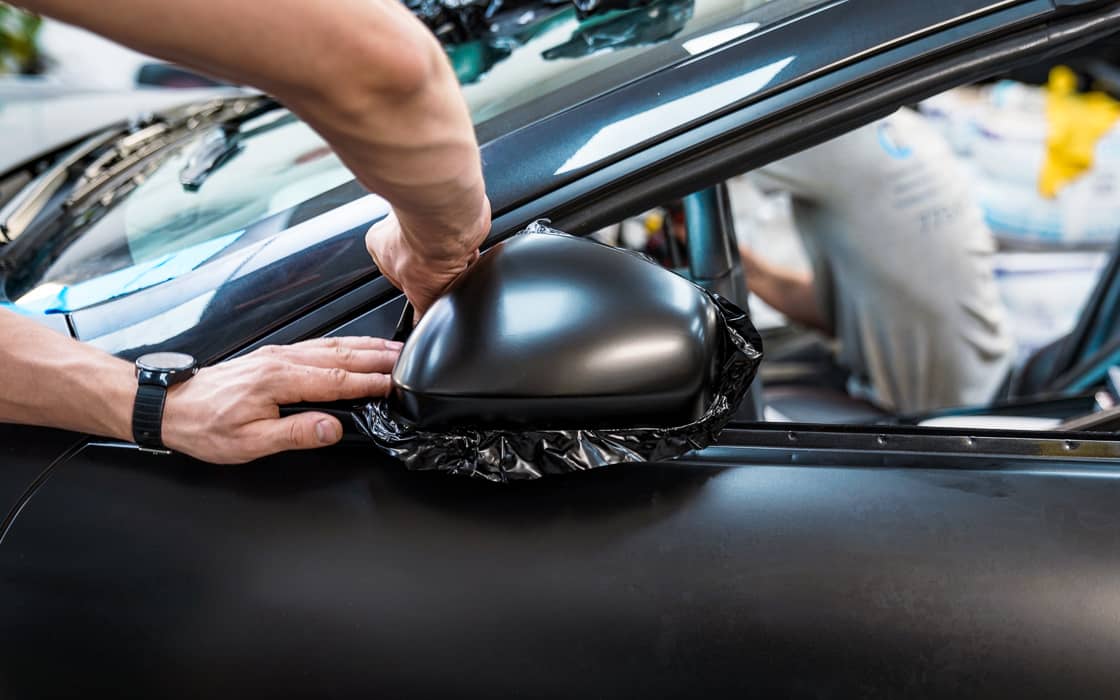
Applying The Vinyl
Applying vinyl to a car mirror takes care and patience. This step shapes the final look of your wrapped mirror. Follow these simple actions to get a smooth, clean finish. Small mistakes here can cause bubbles or wrinkles. Work slowly and carefully for the best results.
Positioning The Vinyl
Start by placing the vinyl on the mirror surface. Align it well to cover all edges. Leave a small extra margin to wrap around corners. Avoid stretching the vinyl at this stage. Hold it gently in place before you press down.
Smoothing Out Bubbles
Use a soft squeegee or cloth to push bubbles out. Begin from the center and move toward the edges. Small bubbles can pop under pressure. Be gentle to avoid tearing the vinyl. Smooth out every part for a flat, clean look.
Heating And Stretching
Use a heat gun to warm the vinyl slightly. This makes it more flexible and easier to stretch around curves. Move the heat gun evenly to avoid burns. Stretch the vinyl carefully over corners and edges. Heat helps the vinyl stick better and last longer.
Finishing Touches
Finishing touches are key to a neat and lasting vinyl wrap on your car mirror. These final steps ensure the wrap fits perfectly and stays secure. Taking time here improves the overall look and durability.
Trimming Excess Vinyl
Use a sharp blade or craft knife for trimming. Cut close to the mirror edges without cutting the surface. Work slowly to avoid mistakes. Small, careful cuts give the best results. Remove any extra vinyl to prevent peeling or bubbling later.
Sealing The Edges
Press down the vinyl edges firmly using a squeegee or your fingers. Heat the edges lightly with a heat gun to make the vinyl stick better. This step stops water and dirt from getting under the wrap. Proper sealing helps the wrap last longer and look smooth.
Common Mistakes To Avoid
Vinyl wrapping a car mirror can be simple with the right steps. Yet, many make avoidable mistakes that affect the final look. Knowing what to avoid saves time and effort. It also helps achieve a smooth and clean finish. Below are two common mistakes that many beginners make.
Overstretching The Vinyl
Pulling the vinyl too hard can cause it to stretch unevenly. This leads to bubbles, wrinkles, and distortion. Overstretching may also cause the vinyl to lose its adhesive strength. Work slowly and gently stretch only as much as needed. Keep the vinyl relaxed to maintain its shape and texture.
Skipping Surface Preparation
Not cleaning the mirror surface properly causes poor adhesion. Dirt, grease, or dust can trap under the vinyl, causing bumps. Use a good cleaner and dry the mirror completely before wrapping. A clean surface ensures the vinyl sticks well and lasts longer. Do not rush this important step.
Maintenance Tips
Keeping your vinyl-wrapped car mirrors in good shape helps them last longer. Proper care protects the wrap from damage and keeps it looking fresh. Follow simple steps to maintain your wrapped mirrors easily.
Cleaning Wrapped Mirrors
Use a soft cloth to clean the vinyl wrap gently. Avoid rough materials that can scratch the surface. Clean with mild soap and water only. Do not use harsh chemicals or strong cleaners. Rinse the mirror well to remove soap residue. Dry with a soft towel to prevent water spots.
Repairing Small Damages
Small scratches or tears can be fixed quickly. Use vinyl wrap repair kits available online or in stores. Cut a small piece of matching vinyl to cover the damage. Press it firmly to avoid air bubbles. For minor scratches, use a heat gun to soften and smooth the vinyl. Act fast to stop damage from worsening.

Credit: www.reddit.com
Credit: www.tintingchicago.com
Frequently Asked Questions
How Do You Prepare A Car Mirror For Vinyl Wrapping?
Clean the mirror surface thoroughly with isopropyl alcohol. Remove dirt, grease, and wax for better vinyl adhesion. Dry completely before applying the vinyl wrap.
What Tools Are Needed To Vinyl Wrap A Car Mirror?
Essential tools include vinyl wrap, a heat gun, a squeegee, scissors, and a microfiber cloth. These help in cutting, heating, and smoothing the vinyl.
Can Vinyl Wrap Be Removed From A Car Mirror Easily?
Yes, vinyl wrap can be peeled off without damage. Use heat to soften the adhesive, then carefully lift the wrap from the edges.
How Long Does Vinyl Wrap Last On A Car Mirror?
A well-applied vinyl wrap can last 5 to 7 years. Exposure to weather and sun may reduce its lifespan.
Conclusion
Vinyl wrapping a car mirror can change its look easily. Take your time and follow each step carefully. Use the right tools and keep the surface clean. Small bubbles can be smoothed out with patience. Practice makes the process simpler and more fun.
You can refresh old mirrors or add color without painting. Enjoy the new style and protect your car parts. Try it yourself and see the difference vinyl wrap makes. Simple, quick, and affordable.


