
Have you ever looked at your car’s vinyl wrap and wondered how to remove it without damaging the paint underneath? Whether you’re ready for a new look or need to fix a worn-out wrap, knowing the right steps can save you time, money, and frustration.
In this guide, you’ll discover simple, effective methods to peel off your vinyl wrap smoothly. Keep reading, and you’ll find out how to protect your vehicle while giving it a fresh start. Your car deserves the best care, and you’re just one click away from mastering the removal process.
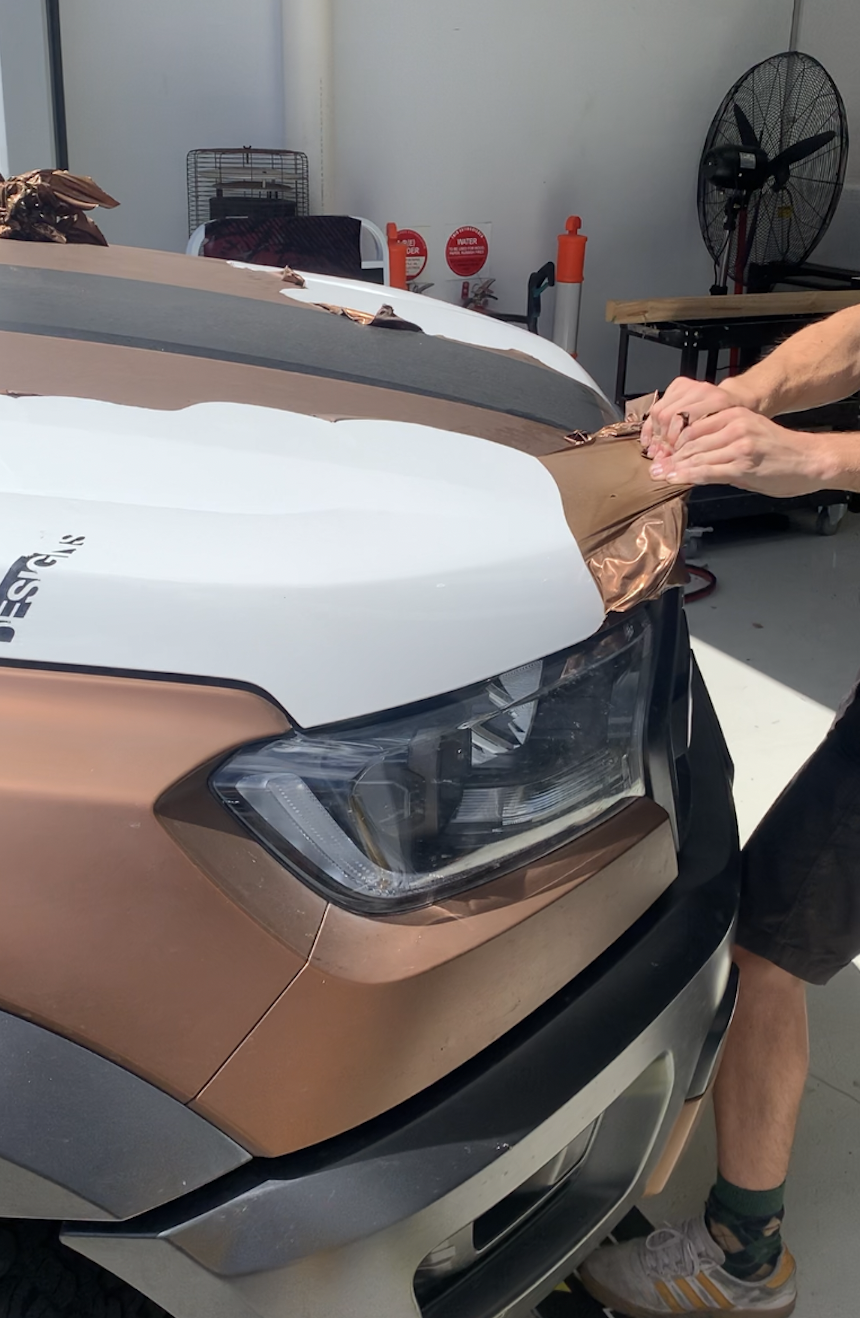
Credit: crgdesigns.com.au
Preparing For Removal
Preparing to remove a vinyl wrap is an important first step. It helps make the process smooth and less stressful. Taking time to prepare can save effort and avoid damage to your surface. Small steps before removal make a big difference.
Gathering Necessary Tools
Collect all tools before starting. You will need a heat gun or hair dryer to soften the vinyl. A plastic scraper helps lift edges without scratching. Have a cleaning cloth and adhesive remover ready. Keeping tools close avoids interruptions.
Choosing The Right Environment
Pick a clean, dry place for removal. Avoid windy or dusty areas to keep dirt away. Work in a shaded spot to prevent vinyl from overheating. A moderate temperature helps the vinyl peel better. Good lighting lets you see edges clearly.
Cleaning The Surface
Wipe the vinyl surface gently before peeling. Remove dirt and dust with a soft cloth and mild soap. A clean surface helps the heat reach vinyl evenly. It also stops particles from scratching the surface. Dry the area completely before starting.
Heating The Vinyl Wrap
Heating the vinyl wrap is a key step to remove it easily. Warmth softens the adhesive, making the wrap peel off smoothly. This process lowers the risk of tearing or leaving sticky residue. Proper heating helps protect your car’s paint during removal.
Using A Heat Gun Safely
A heat gun is a popular tool for heating vinyl wrap. Keep the gun moving to avoid overheating one spot. Hold it about 6 to 8 inches away from the surface. Use medium heat settings to soften the vinyl gently.
Wear gloves to protect your hands from heat. Avoid pointing the gun at plastic parts or rubber seals. Stop heating if the wrap starts to bubble or smoke. Let the wrap cool slightly before peeling it off.
Alternative Heating Methods
A hairdryer can work if you don’t have a heat gun. Use the highest heat setting and keep it close to the wrap. Heat the area evenly to soften the adhesive well.
Warm water is another gentle option. Soak a cloth in warm water and apply it to the wrap. The heat will loosen the adhesive slowly. This method takes longer but is safe for all surfaces.
Peeling Off The Wrap
Peeling off a vinyl wrap is a careful task. It needs patience and the right steps. Removing the wrap correctly prevents damage to the surface below. The process starts by finding the right spot to lift the wrap. Then, you pull slowly and evenly. Some parts may be harder to remove and require gentle handling. Follow these simple steps to peel off the vinyl wrap smoothly.
Starting From The Edges
Begin peeling at a corner or edge of the wrap. Edges are easier to lift without tearing. Use your fingernail or a plastic tool to lift the wrap slightly. Avoid metal tools that might scratch the surface. Once the edge lifts, you have a good grip to start pulling. This step is the key to a clean removal.
Maintaining A Steady Pull
Pull the wrap slowly at a 45-degree angle. A steady, even pull reduces the risk of tearing. Do not rush or yank the wrap off. Keep your hand steady and consistent. If the wrap pulls too fast, it may leave adhesive behind. Slow peeling helps the wrap come off in one piece.
Handling Stubborn Areas
Some spots may stick tightly and resist peeling. Apply gentle heat with a hairdryer to soften the vinyl. Keep the heat moving to avoid damage. Use slow, small pulls on these areas. If adhesive remains, clean it with a mild adhesive remover. Take your time and be gentle to protect the surface.

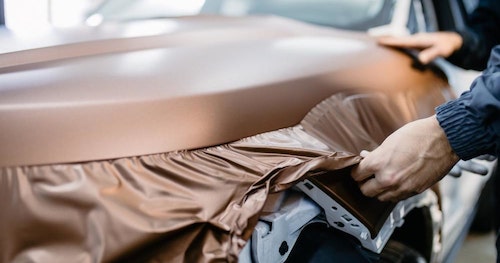
Credit: www.youtube.com
Removing Adhesive Residue
Removing adhesive residue after taking off a vinyl wrap is important. Leftover glue can make surfaces sticky and dirty. Cleaning it well helps keep the surface smooth and ready for new use or wrapping. Use the right methods to avoid damage and get the best result.
Using Adhesive Removers
Adhesive removers are made to dissolve sticky glue easily. Apply a small amount to a cloth or sponge. Rub gently on the residue until it starts to lift. Let it sit for a few minutes if the glue is tough. Wipe clean with a dry cloth. Always test removers on a small hidden spot first.
Natural Cleaning Alternatives
Natural options work well and are gentle on surfaces. Warm soapy water helps loosen glue without harsh chemicals. White vinegar can break down sticky residue too. Apply vinegar with a cloth and let it sit a moment. Use oil, like olive or baby oil, to soften glue. Rub slowly and wipe off the residue. Natural choices are safe and affordable.
Avoiding Surface Damage
Protect the surface by using soft cloths or sponges. Avoid metal scrapers or rough tools that can scratch. Do not use strong chemicals on delicate surfaces. Test any product in a small area first. Work slowly and carefully to keep the surface intact. Patience helps keep your item looking great.
Final Surface Care
After removing vinyl wrap, the surface needs careful attention. Final surface care protects the paint and keeps your vehicle looking great. This step removes any leftover residue and restores shine. Follow simple steps to clean and polish for a smooth finish.
Washing And Drying
Start by washing the surface with mild soap and water. Use a soft cloth or sponge to avoid scratches. Clean off any sticky residue left by the vinyl wrap. Rinse thoroughly with clean water. Dry the surface gently with a microfiber towel to prevent water spots. Make sure the surface is completely dry before moving on.
Polishing For A Smooth Finish
Polishing helps restore the paint’s natural shine and smoothness. Choose a gentle polish suitable for your vehicle’s paint type. Apply a small amount on a soft applicator pad. Work in small circles, applying light pressure. Buff the area with a clean microfiber cloth to remove polish residue. This step removes minor imperfections and gives a fresh, smooth finish.
Tips For Future Vinyl Wraps
Planning for a vinyl wrap? These tips help keep it fresh and easy to remove later. Good choices and care make a big difference in how long your wrap lasts.
Choosing Quality Vinyl
Pick vinyl made for durability and easy removal. High-quality vinyl sticks well but peels off without damage. Avoid cheap vinyl that tears or leaves glue behind. Check reviews and brand reputation before buying.
Proper Installation Techniques
Clean the surface before applying the wrap. Dirt or oil causes bubbles and poor adhesion. Use a heat gun to help smooth out wrinkles. Work slowly and carefully for a tight fit. Poor installation makes removal hard and can harm paint.
Regular Maintenance Practices
Wash your wrap gently with mild soap and water. Avoid strong chemicals or abrasive tools that damage vinyl. Check edges regularly for lifting or peeling. Fix small issues quickly to prevent bigger problems. Proper care extends your wrap’s life and keeps it easy to remove.
Credit: www.housecallpro.com
Frequently Asked Questions
How Do I Safely Remove Vinyl Wrap From A Car?
Use a heat gun to warm the vinyl wrap gently. Peel the edges slowly to avoid paint damage. Use adhesive remover for residue cleanup.
What Tools Are Needed To Remove Vinyl Wrap Effectively?
You need a heat gun, plastic scraper, adhesive remover, microfiber cloth, and gloves for safe vinyl wrap removal.
Can Vinyl Wrap Removal Damage My Vehicle’s Paint?
If done carefully, vinyl wrap removal does not damage paint. Avoid harsh scraping and use heat to loosen adhesive.
How Long Does It Take To Remove A Vinyl Wrap?
Vinyl wrap removal usually takes 1 to 3 hours, depending on the vehicle’s size and wrap condition.
Conclusion
Removing vinyl wrap takes patience and the right steps. Heat the wrap gently to loosen it. Peel slowly to avoid damage to the surface. Use adhesive remover to clean leftover glue. Take breaks if the process feels tough. With care, your vehicle will look smooth and clean again.
Remember, careful work saves time and effort later. Keep tools handy and follow these tips for best results.


