Are your motorcycle brakes feeling less smooth than before? If you notice vibrations or hear strange noises when you brake, it might be time to resurface your brake rotors.
But don’t worry—resurfacing your motorcycle brake rotors is easier than you think, and it can save you money while keeping your bike safe. In this guide, you’ll learn simple, step-by-step tips to bring your rotors back to perfect condition. Keep reading, and you’ll gain the confidence to handle this important task yourself.
Your safety and riding experience depend on it!

Credit: swietylukasz.radom.pl
Tools And Materials Needed
Before resurfacing motorcycle brake rotors, gather the right tools and materials. This step saves time and ensures a smooth process. Using proper equipment helps achieve the best results and keeps you safe during the job.
Essential Tools
- Socket wrench set for removing the wheel
- Torque wrench to tighten bolts correctly
- Dial indicator to check rotor runout
- Brake rotor resurfacing machine or lathe
- Brake cleaner spray for cleaning the rotor
- Safety gloves and goggles for protection
- Jack or stand to lift the motorcycle
Recommended Materials
- Fine grit sandpaper (400-600 grit) for light smoothing
- High-quality brake cleaner for removing dust and oil
- Anti-seize lubricant for bolts during reassembly
- Shop towels or lint-free cloths for wiping surfaces
- Replacement brake pads if wear is significant
- Thread locker to secure bolts safely
Preparing Your Motorcycle
Before you resurface your motorcycle brake rotors, preparation is key. This step makes the job easier and safer. You need the right tools and a clean workspace. Also, make sure your bike is stable and secure. Proper preparation helps avoid mistakes and accidents.
Start by understanding the parts you will work with. This helps you handle them carefully. Take your time. Rushing can cause damage or injury. Follow the steps below to prepare your motorcycle well.
Safety Measures
Safety comes first in every repair task. Wear gloves to protect your hands from sharp edges. Use eye protection to shield against dust and debris. Work in a well-lit area to see clearly. Keep a fire extinguisher nearby, just in case. Avoid loose clothes that might get caught in tools. Always disconnect the motorcycle battery before starting.
Removing The Wheel
Start by placing the motorcycle on a stand. This keeps it stable and prevents tipping. Loosen the axle nut with the right wrench. Remove the brake caliper carefully to avoid damage. Support the caliper so it doesn’t hang by the brake line. Slide out the axle and gently remove the wheel. Keep all parts organized for easy reassembly.
Inspecting Brake Rotors
Inspecting brake rotors is a vital step before resurfacing motorcycle brake rotors. It helps ensure the rotors are safe and ready for work. This process involves checking for any visible damage and measuring the rotor thickness. Both steps confirm whether resurfacing is possible or if replacement is needed. Proper inspection protects your bike’s braking system and rider safety.
Checking For Damage
Start by cleaning the rotors with a brake cleaner. Look closely for cracks, deep grooves, or warping. Small scratches are normal but deep damage is a concern. Cracks can cause brake failure. Warped rotors lead to uneven braking. If you spot any serious damage, do not resurface. Replace the rotor instead.
Measuring Rotor Thickness
Use a micrometer or caliper to measure the rotor thickness. Find the minimum thickness value stamped on the rotor. Measure at several points around the rotor surface. The rotor must be above this minimum thickness to resurface. If the thickness is below the limit, replace the rotor. Proper thickness keeps braking performance safe and strong.

Credit: www.youtube.com
Cleaning The Rotors
Cleaning the brake rotors is an important step before resurfacing. Dirt and grime can affect the quality of the resurfacing job. Clean rotors ensure better brake performance and longer life. This section explains how to clean the rotors properly.
Removing Dirt And Debris
Start by wiping off loose dirt with a dry cloth. Use a soft brush to remove stuck debris. Avoid using hard tools that can scratch the rotor. Pay close attention to the edges and holes. Clean rotors help the resurfacing tool work smoothly.
Using Brake Cleaner
Spray brake cleaner generously on the rotor surface. Let it sit for a few seconds to dissolve grease and oil. Use a clean cloth to wipe the surface until dry. Brake cleaner evaporates quickly, leaving no residue behind. This step ensures the rotor is free from contaminants.
Resurfacing Techniques
Resurfacing motorcycle brake rotors restores smooth braking and extends rotor life. It removes uneven spots, rust, and minor damage. The process improves brake pad contact and reduces vibration. Two common techniques are using a lathe and manual sanding. Each method suits different tools and skill levels. Choose the right one for your needs.
Using A Lathe
A lathe gives precise and even rotor resurfacing. The rotor spins while a cutting tool removes a thin layer of metal. This method fixes warping and deep grooves efficiently. It requires special equipment and skill to operate safely. Professionals often use a lathe for best results. The finished rotor surface is smooth and balanced. This technique ensures optimal brake performance.
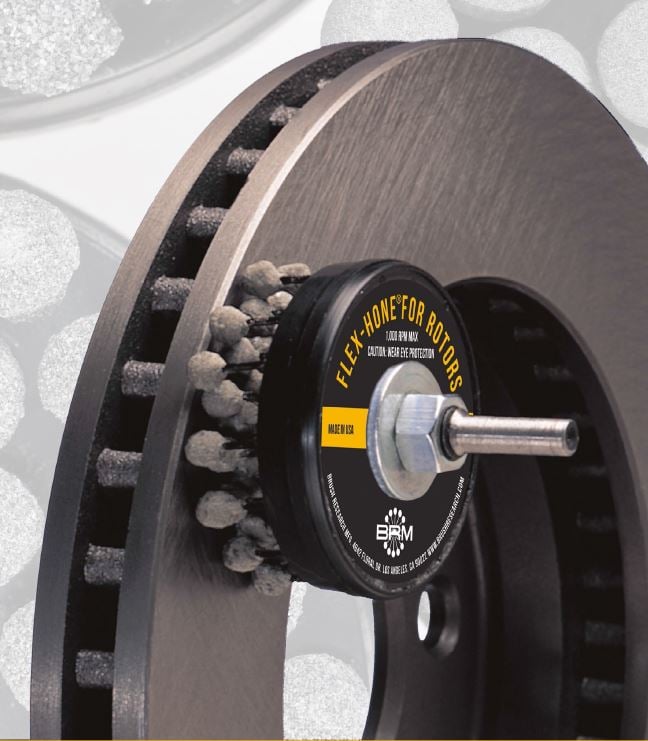
Manual Sanding Methods
Manual sanding is a simple way to resurface rotors at home. Use fine-grit sandpaper or a sanding block. Sand the rotor surface evenly in circular motions. Focus on removing rust, dirt, and light grooves. Avoid sanding too deep to keep rotor thickness safe. This method takes more time and effort but requires no special tools. It works well for minor rotor imperfections.
Reinstalling The Rotors
Reinstalling the rotors is a key step after resurfacing motorcycle brake rotors. It ensures the brake system works safely and smoothly. Proper installation avoids noise, vibration, and poor braking. Take your time to fit the rotors correctly.
Mounting The Rotor
Place the rotor back onto the wheel hub carefully. Align the bolt holes with the hub holes. Make sure the rotor sits flat against the hub surface. Do not force the rotor. Check for any dirt or debris and clean it before mounting. This helps the rotor fit snugly and prevents wobbling.
Torque Specifications
Use a torque wrench to tighten the rotor bolts. Follow the manufacturer’s torque specs exactly. Over-tightening can damage the rotor or bolts. Under-tightening can cause the rotor to loosen while riding. Tighten the bolts in a star pattern. This distributes pressure evenly and secures the rotor well.
Testing And Maintenance
Testing and maintaining your motorcycle brake rotors is key to safe riding. After resurfacing, check how the brakes perform. This helps spot issues early.
Brake Performance Check
Start by pressing the brake lever gently. Notice if it feels firm or spongy. A soft lever may mean air in the brake lines.
Listen for unusual sounds like squealing or grinding. These could mean the rotors need more work or replacement.
Test the bike’s stopping power at low speed. The bike should stop smoothly without pulling to one side.
Check for vibrations in the brake lever or pedals. Vibrations often mean uneven rotor surfaces.
Routine Maintenance Tips
Keep rotors clean. Use a brake cleaner to remove dust and grease. Avoid oily or dirty hands touching the rotors.
Inspect rotors regularly for cracks or deep grooves. Replace if damage is visible.
Check brake pads often. Worn pads can damage rotors quickly.
Bleed brakes to remove air bubbles. This keeps brake pressure strong and consistent.
Store your motorcycle in a dry place. Moisture can cause rust on rotors.
Credit: blog.brushresearch.com
Frequently Asked Questions
What Tools Do I Need To Resurface Brake Rotors?
You need a lathe machine or rotor resurfacing tool, sandpaper, cleaning solvent, and safety gear. Proper tools ensure smooth, even surfaces and safe braking performance.
How Often Should Motorcycle Brake Rotors Be Resurfaced?
Resurface rotors when you notice vibrations, grooves, or uneven wear. Typically, every 20,000 to 30,000 miles is recommended, depending on riding conditions and brake use.
Can I Resurface Brake Rotors At Home Safely?
Yes, with the right tools, knowledge, and safety precautions. However, improper resurfacing can damage rotors or affect brake performance, so professional help is advisable if unsure.
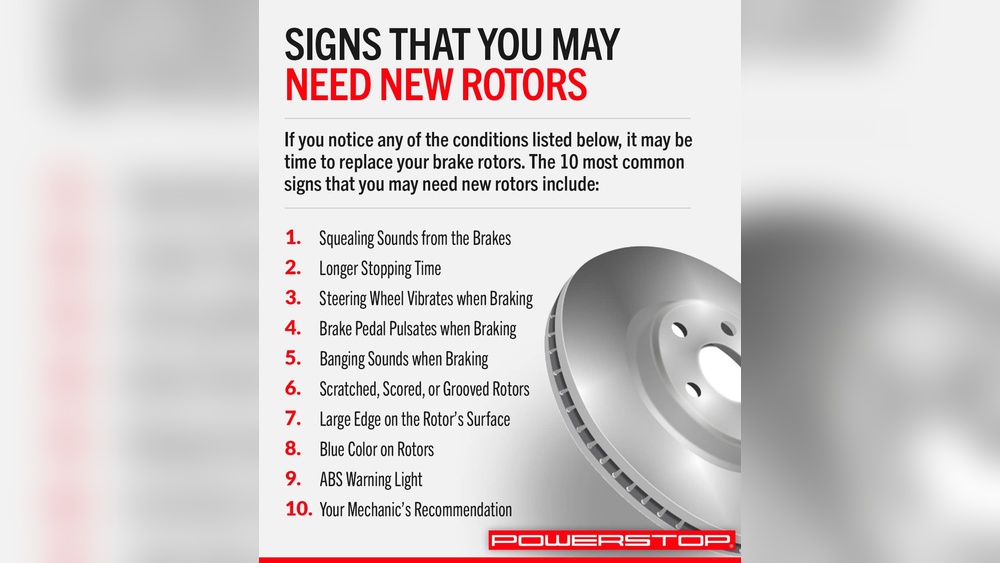
What Are The Signs That Rotors Need Resurfacing?
Look for brake vibrations, squealing, reduced braking efficiency, or visible grooves. These signs indicate rotor wear and the need for resurfacing or replacement.
Conclusion
Resurfacing motorcycle brake rotors keeps your bike safe and smooth. It helps fix wear and tear without costly replacements. Follow the steps carefully to get the best results. Regular checks can stop bigger problems later. Taking time to maintain your rotors saves money and stress.
Now, you know how to handle this important task. Ride with confidence and keep your brakes working well. Simple care makes a big difference for your motorcycle’s performance.