
Are your brakes making strange noises or feeling less responsive? It might be time to replace your brakes and rotors.
Knowing how to set new brakes and rotors yourself can save you money and give you confidence behind the wheel. In this guide, you’ll find simple, step-by-step instructions that anyone can follow, even if you’ve never worked on a car before.
By the end, you’ll understand exactly what to do to make your braking system safe and smooth again. Ready to take control of your car’s safety? Let’s get started!
Tools And Materials Needed
Setting new brakes and rotors requires specific tools and materials. Having the right items makes the job easier and safer. This section covers everything needed before starting the work.
Essential Tools
A reliable car jack is necessary to lift the vehicle safely. Jack stands keep the car stable while working underneath. Lug wrenches help remove the wheel nuts quickly. A socket set with ratchets fits bolts of different sizes. Brake caliper tools push the pistons back for new pads. A C-clamp works well for pressing the caliper pistons. Screwdrivers assist in removing clips or small screws. A torque wrench ensures bolts tighten to the right pressure. Clean rags help wipe away dirt and brake dust.
Choosing The Right Brakes And Rotors
Select brakes and rotors that fit your vehicle model. Check the owner’s manual or online guides for exact sizes. Choose quality parts that meet safety standards. OEM parts match the original components perfectly. Aftermarket parts can be less expensive but vary in quality. Brake pads come in ceramic, semi-metallic, or organic types. Rotors may be solid, drilled, or slotted for better performance. Match pads and rotors to avoid uneven wear or noise.
Credit: www.powerstop.com
Preparing Your Vehicle
Preparing your vehicle is a key first step for setting new brakes and rotors. This step makes the job easier and safer. Taking time now helps avoid problems later. Follow clear instructions to get your car ready.
Safety Precautions
Wear gloves to protect your hands from dirt and sharp parts. Use safety glasses to shield your eyes. Work in a well-lit place. Keep tools organized and close by. Avoid loose clothing that can get caught. Never rush through this process. Safety helps finish the job without injury.
Lifting And Securing The Car
Park on a flat surface and apply the parking brake. Loosen the lug nuts slightly before lifting. Use a reliable jack to raise the car. Place jack stands under the frame to hold the car up. Never rely on the jack alone. Make sure the car is stable before working. This step protects you from accidents while changing brakes and rotors.
Removing Old Brakes And Rotors
Removing old brakes and rotors is the first step in replacing your brake system. It needs care and the right tools. This process helps you see if parts are worn out or damaged. You will remove the wheel, brake caliper, and rotor to prepare for new parts. Follow each step carefully to avoid mistakes.
Removing The Wheel
Start by loosening the lug nuts while the car is on the ground. Use a jack to lift the vehicle safely. Remove the lug nuts completely and take off the wheel. Set the wheel aside in a safe place. This gives clear access to the brake parts.
Detaching The Brake Caliper
Locate the brake caliper attached to the rotor. Use a wrench to remove the bolts holding the caliper. Gently pull the caliper away from the rotor. Do not let the caliper hang by the brake line. Use a hook or place it on a support to avoid damage.
Taking Off The Old Rotor
Check if the rotor is held by screws or clips. Remove any screws using a screwdriver. If the rotor is stuck, tap it gently with a rubber mallet. Pull the rotor straight off the hub. Clean the hub surface before fitting new parts.
Installing New Rotors
Installing new rotors is a key step in brake replacement. It ensures smooth braking and safety on the road. Taking time to do this right helps the brakes work better and last longer.
Cleaning The Hub
Start by cleaning the hub. Use a wire brush to remove rust and dirt. A clean surface helps the rotor fit well. Dirt can cause noise or uneven wear. Wipe the hub with a rag after brushing. Make sure no dust or grease remains.
Positioning The New Rotor
Place the new rotor on the hub carefully. Align the holes in the rotor with the wheel studs. The rotor should sit flat against the hub. Avoid touching the rotor surface with your hands. Oils from skin can cause brake issues. Hold the rotor steady while installing bolts or clips.
Fitting New Brake Pads
Fitting new brake pads is a key step in replacing brakes and rotors. Proper installation ensures safe and smooth braking. Taking time to prepare and insert the pads correctly helps avoid future problems. Follow these clear steps for the best results.
Preparing The Caliper
Start by removing the caliper from the rotor. Use a suitable tool to loosen the bolts carefully. Support the caliper so it does not hang by the brake hose. Compress the caliper piston using a C-clamp or brake tool. This makes space for the new, thicker brake pads.
Clean the caliper and surrounding area using a brake cleaner. Remove dirt and old brake dust. Check the caliper for damage or leaks. Replace or repair if needed before fitting new pads.
Inserting The Brake Pads
Place the new brake pads into the caliper bracket. Ensure they fit snugly and align with the rotor. The friction surface should face the rotor. Avoid touching the pad surface with bare hands to keep it clean.
Secure the brake pads using any clips or pins provided. Double-check that the pads sit firmly. Reinstall the caliper over the pads and rotor. Tighten the caliper bolts to the correct torque value.
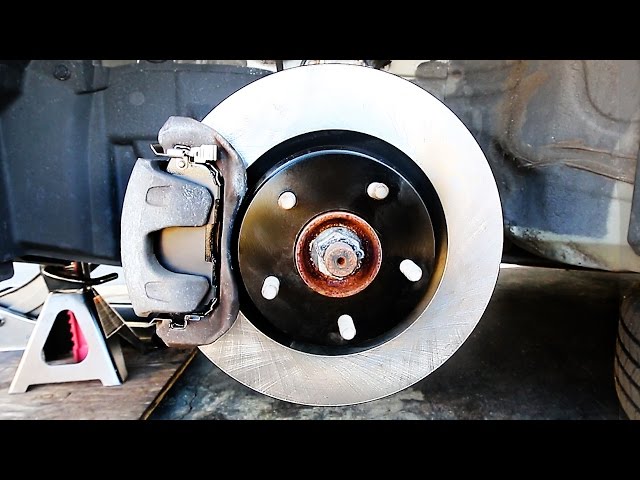
Credit: www.youtube.com
Reassembling And Testing
After installing new brakes and rotors, the next step is reassembling and testing. This step ensures everything works safely. Careful reassembly prevents damage and ensures proper brake function. Testing confirms the brakes respond correctly and the vehicle stops smoothly.
Reattaching The Caliper And Wheel
Start by placing the caliper back over the rotor. Align it carefully with the mounting bracket. Insert the bolts and tighten them firmly but not too tight. Check the brake pads sit evenly on the rotor. Next, put the wheel back on the hub. Screw the lug nuts by hand to hold the wheel in place. Lower the vehicle slightly to let the wheel touch the ground. Tighten the lug nuts in a star pattern. This prevents the wheel from wobbling.
Brake System Testing
Before driving, test the brake pedal. Press it slowly and feel for firmness. A soft or spongy pedal means air may be in the brake lines. Pump the pedal a few times to remove air. Check for any unusual noises or vibrations. Test the brakes at low speed in a safe area. The car should stop smoothly without pulling to one side. Confirm the brake warning light is off on the dashboard.
Maintenance Tips For Longevity
Keeping your brakes and rotors in good shape helps your car stop safely. Regular care extends their life and saves money. Follow simple tips to avoid early wear and costly repairs.
Regular Inspection
Check your brakes often. Look at the pads and rotors for any damage. Listen for strange noises like squeaking or grinding. These sounds can mean the brakes need attention. Inspect after every 5,000 miles or as the car manual says. Clean brake parts to remove dust and dirt. This prevents buildup that can harm performance.
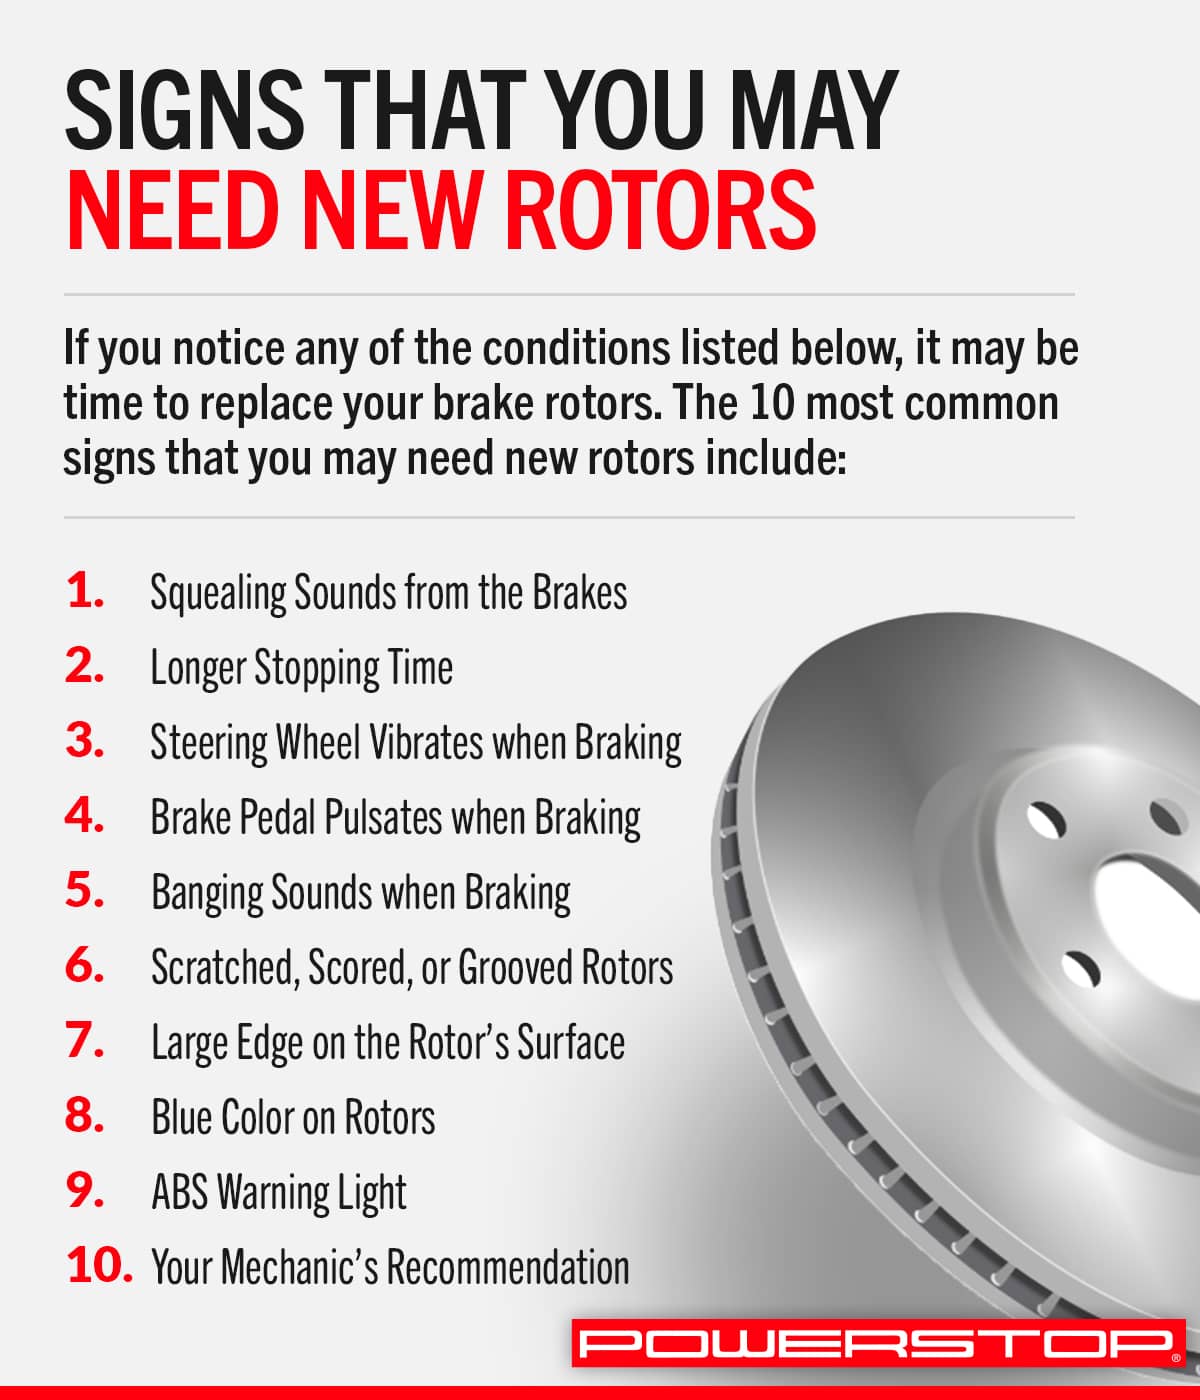
Signs Of Brake Wear
Watch for signs that brakes are wearing out. If the pedal feels soft or goes too far down, it could mean low brake fluid or worn pads. Vibrations or shaking when braking show rotor problems. If the car pulls to one side, brakes might be uneven. Bright warning lights on the dashboard also signal brake issues. Catch these signs early to keep brakes working well.

Credit: www.powerstop.com
Frequently Asked Questions
How Do I Know When To Replace Brakes And Rotors?
You should replace brakes and rotors when you hear squealing or grinding sounds. Also, check for vibrations or reduced braking performance. Inspect pads and rotors for wear and thickness regularly. These signs indicate it’s time for new brakes and rotors to ensure safety.
What Tools Are Needed To Set New Brakes And Rotors?
Essential tools include a jack, lug wrench, socket set, C-clamp, and brake cleaner. You also need a screwdriver and a torque wrench for proper tightening. Having all tools ready helps complete the job efficiently and safely.
How Long Does It Take To Replace Brakes And Rotors?
Replacing brakes and rotors typically takes about 1 to 2 hours. Time depends on your experience and vehicle type. Taking your time ensures proper installation and better brake performance afterward.
Can I Replace Brakes And Rotors Myself Safely?
Yes, with basic mechanical skills and proper tools, you can replace brakes and rotors safely. Follow step-by-step instructions carefully and work on a stable surface. If unsure, consult a professional to avoid safety risks.
Conclusion
Setting new brakes and rotors can improve your car’s safety. Follow the steps carefully to avoid mistakes. Take your time and check each part closely. Clean and secure everything before you finish. Test the brakes gently to make sure they work well.
Regular brake care helps your car stop smoothly. Stay safe on the road by keeping brakes in good shape. You can save money and feel confident driving. Simple tools and patience make this job possible for anyone.


