
Are you ready to take your foam party to the next level? Installing a foam maker into your cannon might seem tricky at first, but with the right steps, you can do it quickly and safely.
Imagine creating thick, fluffy foam that fills the air and turns any event into an unforgettable experience. In this guide, you’ll learn exactly how to set up your foam maker so it works perfectly every time. Keep reading, and you’ll have your foam cannon ready to wow your guests in no time!
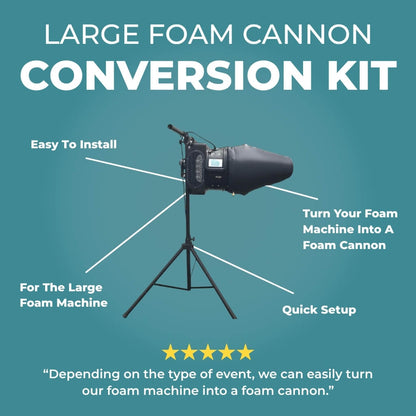
Credit: foamdaddy.com
Prepare Your Equipment
Preparing your equipment is the first step to install the foam maker into a cannon. It helps avoid mistakes and saves time. Proper preparation ensures a smooth setup and better foam performance.
Gather Necessary Tools
Collect all tools before starting the installation. Common tools include screwdrivers, wrenches, and pliers. Have a clean cloth and lubricant ready. Keep tools within reach to avoid delays.
Check Foam Maker Components
Inspect all parts of the foam maker carefully. Look for cracks, dents, or missing pieces. Make sure all connectors fit properly. Clean each component if needed.
Inspect The Cannon
Examine the cannon for damage or dirt. Check the mounting points and seals. Ensure the cannon is stable and secure. Clear any blockages inside the cannon barrel.
Safety Precautions
Installing the foam maker into a cannon involves some risks. Safety precautions help prevent accidents and injuries. Follow these steps carefully to keep yourself safe. Always prepare before you start working with the equipment.
Wear Protective Gear
Wear safety glasses to protect your eyes from splashes. Use gloves to keep your hands safe from chemicals and sharp edges. Long sleeves and pants help protect your skin. Safety shoes prevent foot injuries from heavy tools or parts.
Clear The Work Area
Remove all obstacles from the work area. A clean space helps you move freely without tripping. Keep tools organized and within reach. Make sure the floor is dry and not slippery. Good lighting helps you see clearly what you are doing.
Handle Equipment Carefully
Hold the foam maker and cannon parts firmly. Avoid rushing to prevent dropping or damaging equipment. Follow the instructions step-by-step without skipping. Use the right tools for each part. Turn off any power sources before starting installation.
Attach Foam Maker To Cannon
Attaching the foam maker to the cannon is a key step in the installation process. This part ensures the foam will flow properly during use. Follow these steps carefully to secure the foam maker firmly and correctly.
Position The Foam Maker
Start by placing the foam maker at the designated spot on the cannon. Make sure it fits snugly without forcing it. The position affects foam flow and overall performance. Align it so the foam maker matches the cannon’s opening perfectly.
Secure With Fasteners
Use the correct fasteners to hold the foam maker in place. Tighten screws or bolts evenly to avoid gaps. Check that all fasteners are tight but avoid over-tightening. Proper fastening prevents leaks and keeps the foam maker stable during use.
Check Alignment
After securing, inspect the alignment of the foam maker and cannon. Both parts should be straight and connected without gaps. A misaligned foam maker can block foam flow or cause damage. Adjust if needed until the fit is perfect and stable.
Connect Air And Fluid Lines
Connecting the air and fluid lines is a key step in installing the foam maker into a cannon. These lines carry the essential materials that create foam. Proper connection ensures smooth and safe operation of the foam cannon.
Take your time to connect each line carefully. This helps avoid leaks and keeps the foam flow steady. Follow these steps to connect the air and fluid lines correctly.
Identify Connection Points
Look at the foam maker and the cannon to find the air and fluid ports. The air connection is usually smaller and marked with a label or icon. The fluid connection is larger and near the base. Check the user manual if you are unsure.
Attach Air Hose
Take the air hose and fit it onto the air port. Push it firmly until it clicks or feels secure. Use a clamp or fitting if your setup requires extra tightness. Make sure the hose is straight and not twisted.
Attach Fluid Hose
Connect the fluid hose to the fluid port on the foam maker. Push the hose onto the fitting until it fits snugly. Secure it with a clamp if needed. Avoid bending or kinking the hose to keep the fluid flowing well.
Test For Leaks
Turn on the air and fluid supplies slowly. Watch each connection closely. Look for bubbles or wet spots that show leaks. Tighten any loose fittings. Fix leaks before using the foam cannon fully.
Test The Foam Maker
Testing the foam maker after installation is essential. It confirms the device works well with the cannon. Proper testing avoids problems during use. Follow these steps to ensure smooth operation and quality foam production.
Power On The Cannon
Start by turning on the cannon’s power switch. Check the power source is stable. Watch for any warning lights or error messages. A steady power supply is key to test the foam maker properly.
Adjust Foam Settings
Set the foam density and flow rate controls. Begin with medium settings for balanced foam output. Fine-tune these controls to match your event needs. Adjusting settings early saves time later.
Conduct Initial Foam Test
Activate the foam maker briefly to produce foam. Observe the quality and volume of foam output. Look for smooth, consistent foam with no clumps. Make small adjustments to improve foam if needed. Repeat testing until results meet expectations.

Credit: clinicadentalrociomontero.com
Troubleshoot Common Issues
Troubleshooting common issues helps keep your foam maker working well. Problems can stop foam from coming out or cause leaks. Fixing these problems fast keeps your foam cannon ready to use. Below are simple steps to solve typical problems.
Foam Not Producing
Check if the foam maker is connected to the water source. Make sure the soap tank is filled with the right solution. Clean the nozzle to remove any blockages. Inspect the air intake for dust or dirt. Tighten all parts to prevent air leaks that reduce foam.
Leaks Or Loose Connections
Look for wet spots around joints and fittings. Tighten any loose screws or clamps carefully. Replace worn-out washers or seals to stop dripping. Use Teflon tape on threaded parts to seal gaps. Avoid over-tightening, which can cause cracks or damage.
Uneven Foam Output
Check if the foam maker is angled correctly. Clean the foam filter to remove clogs. Adjust the soap mix to balance foam thickness. Inspect the pump for proper pressure and function. Replace damaged parts that affect foam flow.
Maintenance Tips
Maintaining your foam maker is key to keep it working well. Simple care steps extend its life and ensure safe use. Follow these tips after each use and during storage.
Clean After Use
Rinse the foam maker with clean water right after use. Remove any foam or debris from all parts. Use a soft brush to clean hard-to-reach areas. Dry it completely before storing to stop rust or mold.
Store Properly
Keep the foam maker in a dry, cool place. Avoid direct sunlight to prevent damage. Store it away from dust and dirt. Use a cover or box to protect it better.
Regular Inspections
Check the foam maker regularly for cracks or leaks. Test all connections and seals for tightness. Replace worn or broken parts quickly. Routine checks prevent bigger problems later.

Credit: www.amazon.com
Frequently Asked Questions
How Do I Attach The Foam Maker To The Cannon?
To attach the foam maker, align it with the cannon’s nozzle. Secure it using the provided clamps or screws. Ensure a tight fit to prevent leaks or detachment during use.
What Tools Are Needed For Foam Maker Installation?
Typically, you need a screwdriver, wrench, and possibly pliers. Check the foam maker kit for any specific tools required. Having these ready makes installation smoother and faster.
How Can I Test If The Foam Maker Is Installed Correctly?
Turn on the foam cannon with water pressure. Observe foam output; consistent foam indicates proper installation. If no foam appears, recheck connections and fittings for tightness.
Is It Necessary To Clean The Cannon Before Installation?
Yes, cleaning removes dirt and debris that can block foam flow. Use water and mild detergent, then dry the cannon. A clean cannon ensures optimal foam maker performance.
Conclusion
Installing the foam maker into a cannon is simple and quick. Follow the steps carefully for the best fit. Check all connections before turning on the cannon. Clean the foam maker regularly to keep it working well. Enjoy creating fun foam safely every time.
This guide helps you get started with ease. Practice a few times to feel confident. Now, you are ready to add foam to your event or party. Keep safety in mind and have fun!


