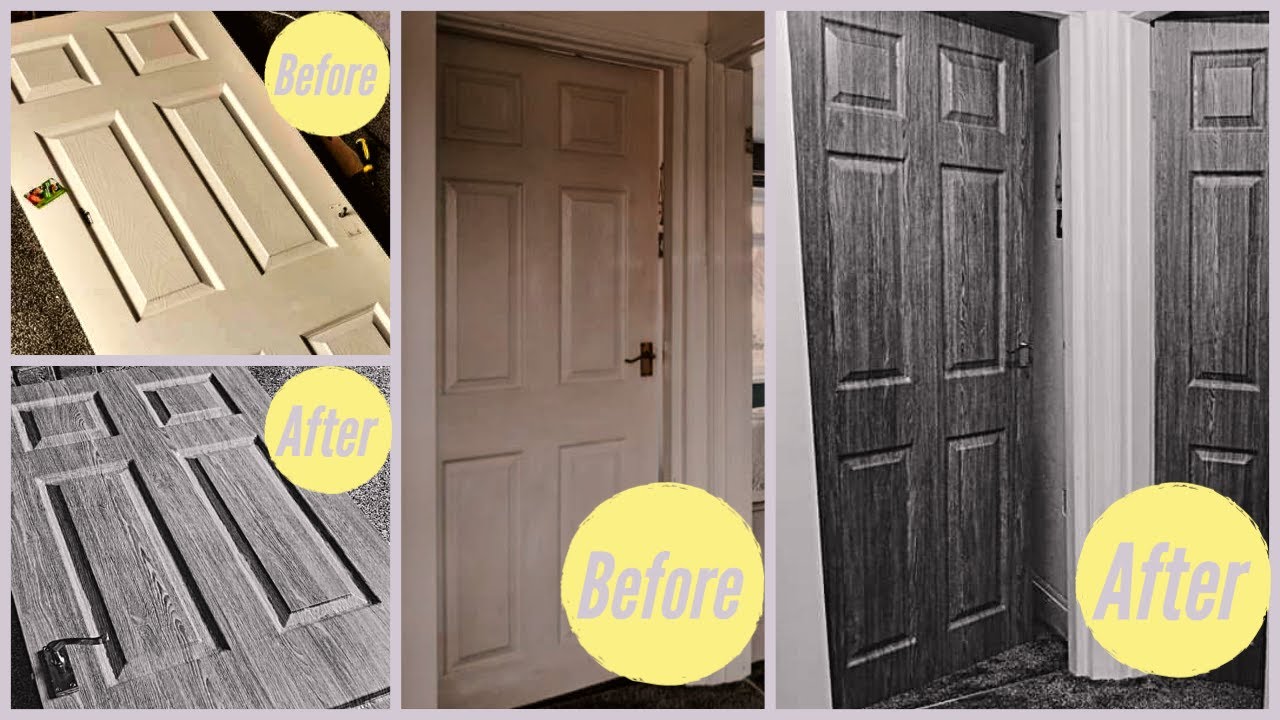
Are you looking to give your door a fresh, stylish look without spending a fortune? Vinyl wrapping your door is a simple and effective way to transform its appearance quickly.
Whether you want to add a splash of color, protect the surface, or create a unique design, this step-by-step guide will help you achieve professional results. By the end of this article, you’ll know exactly how to vinyl wrap your door like a pro—no special tools or experience needed.
Ready to start your door makeover? Let’s dive in!
Choosing The Right Vinyl Wrap
Choosing the right vinyl wrap is the first step to a great door makeover. The right wrap makes your door look fresh and protects it. Picking the best type, color, and size will help you get the best results.
Types Of Vinyl Wraps
There are many types of vinyl wraps. Some are glossy and shiny, while others are matte and smooth. Glossy wraps reflect light and look bright. Matte wraps give a soft, modern look. Some vinyl wraps have textures like wood grain or metal. Choose a type that fits your style and the door’s use.
Selecting Colors And Patterns
Colors and patterns change your door’s look a lot. Pick colors that match your room or outside wall. Light colors make spaces feel bigger. Dark colors add a bold touch. Patterns can be simple or detailed. Stripes, wood looks, or stone patterns add character. Think about the door’s style before choosing.
Measuring Your Door
Measure your door carefully. Measure height and width with a tape measure. Write down the numbers. Add a few extra inches to each side. Extra material helps avoid mistakes when wrapping. Check for handles or edges that need special care. Accurate measuring saves time and money.
Preparing The Door Surface
Preparing the door surface is the first step to a smooth vinyl wrap. A clean and even surface helps the vinyl stick better and last longer. Taking time to prepare the door will make your work easier and the results nicer.
Cleaning And Degreasing
Start by cleaning the door with a mild soap and water. Remove all dust and dirt. After that, use a degreaser to wipe the surface. This removes oils and grease that block the vinyl from sticking well. Let the door dry completely before moving on.
Removing Hardware
Take off any handles, locks, or hinges from the door. This avoids bumps under the vinyl. Removing hardware helps you wrap the door edges smoothly. Keep all screws and parts safe for reattaching later.
Sanding And Smoothing
Check the door for rough spots or old paint chips. Lightly sand these areas to make the surface flat. Use fine sandpaper to avoid deep scratches. Wipe off sanding dust with a clean cloth before wrapping.
Cutting And Aligning The Vinyl
Cutting and aligning the vinyl is a key step in wrapping a door. It ensures the vinyl fits perfectly and looks smooth. Careful work here avoids wrinkles and bubbles later. This part needs focus and patience for the best results.
Measuring And Cutting To Size
Start by measuring the door’s height and width. Add a few extra inches to these measurements. This extra space helps during application. Use a sharp utility knife or scissors for cutting. Cut the vinyl slowly and straight. Avoid jagged edges by taking your time. Precise cutting saves frustration during the next steps.
Positioning The Vinyl Correctly
Lay the vinyl on a clean, flat surface. Peel back a small part of the backing paper. Align the top edge of the vinyl with the top of the door. Slowly press the vinyl down, smoothing it as you go. Use a squeegee or credit card to push out air bubbles. Keep checking for wrinkles. Adjust the vinyl gently if needed. Proper alignment ensures a neat, professional finish.
Credit: www.youtube.com
Applying The Vinyl Wrap
Applying the vinyl wrap on a door takes care and patience. This step is key to getting a smooth, clean finish. The vinyl must stick well without wrinkles or bubbles. Follow the right methods for the best results.
Peeling The Backing Safely
Start by peeling the vinyl backing slowly. Pull it away at a low angle. Avoid ripping the vinyl or letting it fold on itself. Keep your hands clean to stop dirt from sticking. Peel just a small part at first. This makes it easier to control the wrap.
Using A Squeegee For Smooth Application
Use a squeegee to press the vinyl onto the door. Start from the center and push outward. This moves air and moisture out from under the vinyl. Apply firm, even pressure. Work slowly to keep the vinyl flat and tight. Keep the squeegee clean to avoid scratches.
Handling Air Bubbles And Wrinkles
Check the wrap for air bubbles and wrinkles as you go. Use the squeegee to smooth small bubbles toward the edge. For stubborn bubbles, gently lift the vinyl and reapply. Heat can help make the vinyl more flexible. Use a heat gun on low setting carefully. Avoid stretching the vinyl too much to stop wrinkles.
Trimming And Finishing Touches
Trimming and finishing touches are key steps in vinyl wrapping a door. These steps give your door a clean, professional look. Proper trimming removes any extra vinyl that could peel or wrinkle later.
Finishing touches help protect the vinyl and keep it looking fresh for a long time. This part of the process ensures your work stays neat and durable.
Cutting Excess Vinyl Cleanly
Use a sharp utility knife for clean cuts. Cut slowly along the door edges. Avoid pressing too hard to prevent damage.
Trim small sections at a time. This keeps the vinyl smooth and prevents tearing. Remove any leftover scraps carefully.
Reattaching Door Hardware
Put the handles, locks, and other hardware back after trimming. Check each piece fits well without lifting the vinyl. Tighten screws gently to avoid wrinkles.
Handle this step with care to keep the vinyl intact. Ensure all hardware works properly once reattached.
Sealing Edges For Durability
Apply edge sealant along vinyl borders. This stops moisture and dirt from getting under the wrap. Use a small brush or applicator for best results.
Press down edges firmly to improve adhesion. Sealing helps the vinyl last longer and look better. It also protects against peeling and damage.

Credit: www.etsy.com
Maintaining Your Vinyl Wrapped Door
Maintaining your vinyl wrapped door keeps it looking fresh and new. Proper care extends the life of the vinyl and protects your investment. Simple steps can prevent damage and keep the wrap clean and smooth.
Cleaning Tips
Use a soft cloth or sponge with mild soap and water. Avoid harsh chemicals or abrasive cleaners. Wipe gently to remove dirt and dust. Dry the surface with a soft towel to prevent water spots. Clean your door regularly to stop grime buildup.
Avoiding Damage
Do not use sharp objects near the vinyl wrap. Avoid rubbing or scrubbing hard on the surface. Keep the door away from extreme heat or direct sunlight for long times. Open and close the door carefully to prevent peeling. Avoid pressure washing the wrap as it can lift edges.
Repairing Minor Issues
Small scratches can be fixed with a vinyl repair kit. Use a heat gun on low to smooth out small bubbles. For tiny tears, apply a patch from the same vinyl material. Act quickly to repair damage before it worsens. Regular checks help catch problems early.

Credit: www.jestac.com
Frequently Asked Questions
What Tools Do I Need To Vinyl Wrap A Door?
You need vinyl wrap film, a squeegee, a heat gun, a utility knife, and a cleaning cloth. These tools help ensure smooth application and proper adhesion.
How Long Does It Take To Vinyl Wrap A Door?
Vinyl wrapping a door typically takes 1 to 3 hours. Time varies by experience, door size, and complexity of the wrap design.
Can I Remove Vinyl Wrap Without Damaging The Door?
Yes, you can remove vinyl wrap carefully using heat and slow peeling. Proper removal prevents paint or surface damage.
Is Vinyl Wrapping Better Than Painting A Door?
Vinyl wrapping is faster, less messy, and offers more design options than painting. It’s also reversible and cost-effective.
Conclusion
Vinyl wrapping a door can change its look quickly and affordably. Clean the surface well before starting to avoid bubbles and wrinkles. Take your time to align the vinyl carefully for a smooth finish. Use a heat gun or hairdryer to shape the vinyl around edges.
Small cuts help fit the vinyl perfectly. The right tools make the job easier and neater. With practice, the process becomes faster and more precise. Enjoy your refreshed door without the cost of new paint or replacement. Simple steps can give your space a fresh, modern feel.