If you want to give your truck a fresh, stylish look without spending a fortune, vinyl wrapping your bumper is the perfect solution. You might think it’s a job only pros can handle, but with the right steps, you can do it yourself and get amazing results.
Imagine turning heads every time you drive by, all while protecting your bumper from scratches and wear. In this guide, you’ll discover simple, clear instructions that make vinyl wrapping your truck bumper easy and even enjoyable. Ready to transform your ride and save money?
Let’s dive in!
Preparing The Bumper
Preparing the bumper is a crucial step before applying vinyl wrap. This phase ensures the wrap sticks well and looks smooth. Proper preparation avoids bubbles, wrinkles, and peeling later on. Taking time here saves effort and improves the final result.
Cleaning And Drying
Start by washing the bumper with water and mild soap. Remove all dust and dirt carefully. Use a soft cloth to avoid scratches. After cleaning, dry the surface completely. A dry bumper helps the vinyl stick better.
Removing Dirt And Grease
Use a grease remover or isopropyl alcohol next. This step removes oils and leftover grime. Apply with a clean cloth and wipe the entire bumper. Dirt and grease block adhesion and cause bubbles.
Sanding For Better Adhesion
Lightly sand the bumper with fine-grit sandpaper. This creates a rough surface for the vinyl to grip. Sand only enough to dull the glossy finish. Wipe off dust after sanding to keep the surface clean.

Credit: www.colorxlabs.com
Selecting Vinyl Wrap
Selecting the right vinyl wrap is key to a great truck bumper finish. It affects durability, look, and ease of application. Choose carefully to ensure your wrap lasts long and looks sharp.
Consider the type of material and the color or finish that fits your style. These choices make a big difference in the final result.
Choosing The Right Material
Vinyl wrap comes in different materials. Cast vinyl is flexible and strong. It molds well to curves and lasts longer. Calendared vinyl is cheaper but less durable. It suits flat surfaces better. Pick a material that fits your bumper shape and budget. Thicker vinyl offers better protection against scratches and weather. Look for vinyl with air-release technology to avoid bubbles during application.
Picking The Perfect Color And Finish
Colors affect the truck’s style and visibility. Bright colors stand out but show dirt easily. Dark colors hide dirt but may fade faster. Consider your climate and use. Finishes change the look too. Glossy vinyl looks shiny and new. Matte finish gives a smooth, subtle look. Satin finish offers a balance between gloss and matte. Textured finishes add unique styles like carbon fiber or brushed metal. Choose a finish that matches your truck’s personality and use.
Tools And Materials Needed
Preparing to vinyl wrap a truck bumper requires the right tools and materials. Having everything ready makes the process smoother and helps avoid mistakes. This section lists what you need to start wrapping confidently.
Essential Tools List
- Vinyl wrap film – Choose durable and flexible material.
- Heat gun – Softens vinyl for better shaping.
- Utility knife – Cuts vinyl with precision.
- Squeegee – Removes air bubbles and smooths vinyl.
- Isopropyl alcohol – Cleans the bumper surface.
- Microfiber cloth – Wipes down the surface without scratches.
- Gloves – Protect hands and prevent fingerprints.
- Measuring tape – Ensures accurate vinyl sizing.
- Masking tape – Holds vinyl in place during application.
Optional Accessories For Ease
- Surface primer – Improves vinyl adhesion on rough surfaces.
- Magnets – Help position large vinyl sheets easily.
- Felt edge squeegee – Reduces risk of vinyl damage.
- Infrared thermometer – Checks surface temperature for best results.
- Plastic scraper – Removes stubborn dirt or residue.
- Vinyl stretch tool – Helps stretch vinyl on curved areas.
Measuring And Cutting Vinyl
Measuring and cutting vinyl are key steps in wrapping a truck bumper. Getting these steps right ensures the vinyl fits well and looks smooth. Careful measuring avoids mistakes and waste. Accurate cutting makes the application easier and cleaner.
Taking Accurate Measurements
Start by cleaning the bumper surface. Use a tape measure to find the bumper’s width and height. Measure each curve and edge carefully. Write down all measurements clearly. Double-check the numbers before cutting the vinyl. Add a small extra margin for errors and adjustments.
Cutting With Precision
Place the vinyl on a flat surface. Use a sharp utility knife or scissors for cutting. Follow the measurements strictly. Cut slowly to keep clean, straight edges. Avoid jagged or rough cuts. Trim the excess vinyl after applying for a perfect finish.
Applying The Vinyl Wrap
Applying the vinyl wrap on your truck bumper is a crucial step. It shapes the final look and durability. Careful handling ensures the wrap fits perfectly and lasts long. This part requires patience and attention to detail. Follow each step carefully to avoid wrinkles and bubbles.
Positioning The Vinyl
Place the vinyl wrap gently over the bumper. Start from one side and slowly move across. Make sure the wrap covers the entire surface. Align edges carefully to avoid uneven lines. Use light pressure to keep it in place.
Using Heat For Flexibility
Heat the vinyl wrap with a heat gun or hair dryer. Warm vinyl becomes soft and easier to stretch. Focus on curves and edges where the wrap needs to bend. Keep the heat moving to avoid burning the vinyl. This step helps the wrap fit the bumper shape.
Smoothing Out Bubbles And Wrinkles
Use a squeegee or soft cloth to press the vinyl. Start from the center and push outward. This removes trapped air and smooths the surface. For stubborn bubbles, heat the area again and press. Take your time to get a clean, smooth finish.
Credit: www.colorxlabs.com
Trimming And Finishing Edges
Trimming and finishing edges is a key step in vinyl wrapping a truck bumper. It gives the wrap a clean, smooth look. This step helps the vinyl fit perfectly and stay in place longer.
Careful trimming removes extra vinyl without damaging the wrap. Finishing edges protects the vinyl from peeling or lifting over time. Both steps improve the bumper’s appearance and durability.
Cutting Excess Vinyl
Use a sharp utility knife for precise cuts. Cut close to the bumper’s edges but not into the surface. Leave a small margin to tuck the vinyl for a neat finish. Cut slowly to avoid mistakes. Replace blades often for sharp, clean cuts. Remove any loose vinyl pieces after trimming.
Sealing The Edges
Seal edges with heat using a heat gun or hairdryer. Warm the edges gently to make the vinyl flexible. Press edges down firmly to stick them well. Use a soft cloth or squeegee to smooth the edges. This prevents dirt and moisture from getting under the vinyl. Proper sealing helps the wrap last longer and look better.
Curing And Maintenance
After vinyl wrapping your truck bumper, curing and maintenance are key to keep it looking fresh. Proper curing helps the vinyl stick well and last longer. Maintenance keeps dirt and damage away. Both steps protect your investment and make your truck look sharp.
Allowing Proper Adhesion Time
Let the vinyl rest for at least 24 hours after wrapping. This time allows the glue to bond fully to the bumper surface. Avoid washing or touching the vinyl during this period. Warm, dry conditions help the vinyl cure faster. Patience now prevents peeling later.
Cleaning Tips For Longevity
Clean the vinyl gently with mild soap and water. Use a soft cloth or sponge to avoid scratches. Avoid harsh chemicals or abrasive brushes. Rinse well and dry with a microfiber towel. Regular cleaning stops dirt buildup and keeps colors bright. Check the wrap for bubbles or edges lifting. Fix small problems early to avoid bigger damage.
Troubleshooting Common Issues
Vinyl wrapping a truck bumper can have some common problems. Knowing how to fix them saves time and keeps the wrap looking good. Small issues can turn into big ones if ignored.
Below are simple ways to solve two frequent problems: air bubbles and wrinkles. These tips help keep the wrap smooth and neat.
Fixing Air Bubbles
Air bubbles happen when air gets trapped under the vinyl. Use a pin to make a tiny hole in the bubble. Press the air out gently with a soft cloth or squeegee.
Work from the center of the bubble out to the edges. Avoid pulling the vinyl too hard. This prevents stretching or tearing the wrap.
For larger bubbles, heat the area lightly with a heat gun. Heat softens the vinyl and makes air escape easier. Be careful not to overheat or burn the wrap.
Handling Wrinkles And Creases
Wrinkles form when the vinyl folds or bunches. Use a heat gun to warm the wrinkled area. The heat makes the vinyl flexible and easier to smooth out.
Gently pull the vinyl while pressing it down with a squeegee. Work slowly to avoid new wrinkles. Start from the center and move outward.
If wrinkles remain, lift the vinyl carefully and reapply. Smooth it again with heat and pressure. Patience helps get a clean, even finish.

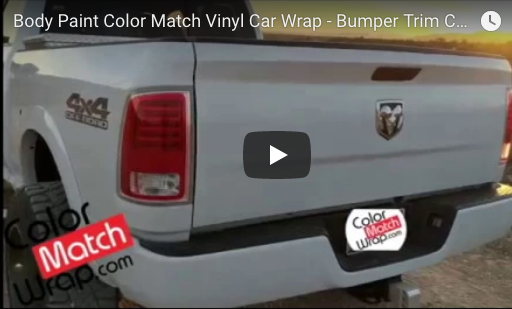
Credit: www.youtube.com
Frequently Asked Questions
How Do You Prepare A Truck Bumper For Vinyl Wrapping?
Clean the bumper thoroughly to remove dirt and grease. Sand the surface lightly for better vinyl adhesion. Ensure the bumper is dry before starting the wrap.
What Tools Are Needed For Vinyl Wrapping A Truck Bumper?
You need a heat gun, squeegee, utility knife, and cleaning solution. These tools help in smooth application and cutting of the vinyl wrap.
How Long Does It Take To Vinyl Wrap A Truck Bumper?
Vinyl wrapping a truck bumper typically takes 2 to 4 hours. Time varies based on experience and bumper complexity.
Can Vinyl Wrap Protect A Truck Bumper From Scratches?
Yes, vinyl wrap provides a protective layer against minor scratches and UV damage. It helps maintain the bumper’s original finish.
Conclusion
Vinyl wrapping a truck bumper can change its look quickly. Take your time to clean and prepare the surface well. Use steady hands to apply the wrap without bubbles or wrinkles. Heat helps the vinyl stick and bend around curves smoothly.
Small cuts make fitting easier but be careful not to damage the bumper. Practice makes the process easier and the result better. Enjoy the new style and protect your bumper at the same time. Try it yourself and see how simple it can be.