If you want to give your car a fresh, stylish look without spending a fortune, vinyl wrapping your car mirrors is a smart move. It’s an easy way to customize your ride and protect your mirrors from scratches and weather damage.
You might think it’s complicated, but with the right steps, you can do it yourself and get professional-looking results. In this guide, you’ll learn exactly how to vinyl wrap your car mirrors so they look flawless and stand out on the road.
Ready to transform your mirrors and boost your car’s style? Let’s dive in!

Credit: www.reddit.com
Tools And Materials Needed
Wrapping car mirrors with vinyl is a simple way to change their look. Getting the right tools and materials helps the job go smoothly. Using quality items makes the wrap last longer and look better. This section covers the types of vinyl wrap, essential tools, and optional accessories.
Types Of Vinyl Wrap
Vinyl wrap comes in many styles and finishes. Glossy vinyl gives a shiny, smooth look. Matte vinyl creates a flat, non-reflective finish. Satin vinyl offers a soft shine, between gloss and matte. Carbon fiber vinyl adds texture and a sporty feel. Choose a type that fits your car’s style and your taste.
Essential Tools
You need a few basic tools for wrapping mirrors. A heat gun or hair dryer helps stretch and shape the vinyl. A squeegee removes air bubbles and smooths the wrap. A sharp utility knife or blade cuts the vinyl precisely. Cleaning supplies like rubbing alcohol remove dirt and oils from the mirror. Gloves keep fingerprints off the vinyl.
Optional Accessories
Extra tools make the job easier but are not required. A microfiber cloth helps with final cleaning and polishing. A magnifying glass can help cut small, detailed areas. Masking tape holds the vinyl in place during application. A felt edge squeegee prevents scratches on delicate surfaces. These accessories improve the finish but the wrap works without them.
Credit: www.tintingchicago.com
Preparing The Car Mirrors
Preparing your car mirrors is the first step to a smooth vinyl wrap application. Clean and ready surfaces help the vinyl stick better and last longer. Taking time now saves you from problems later.
Cleaning The Surface
Start by washing the mirrors with soap and water. Use a soft cloth to remove dirt and dust. Avoid harsh chemicals that can damage the paint or plastic. Clean surfaces let the vinyl lay flat without bubbles.
Removing Old Wrap Or Debris
Check for any old vinyl or stickers on the mirrors. Peel off old wrap carefully to avoid scratches. Use a plastic scraper if needed. Remove sticky residue with rubbing alcohol or adhesive remover. A clean base is key for a smooth finish.
Drying And Inspection
Dry the mirrors completely with a microfiber cloth. Water or moisture can cause the vinyl to peel off. Inspect the surface for scratches, cracks, or dirt spots. Fix any issues before moving on. A perfect surface means a better final look.
Measuring And Cutting The Vinyl
Measuring and cutting the vinyl is an important step in wrapping car mirrors. It ensures the vinyl fits perfectly and looks smooth. Careful measurement and precise cutting prevent waste and make the wrapping process easier.
Take your time. Accuracy here saves effort later. Prepare your tools before starting. A ruler, measuring tape, and sharp scissors or a craft knife are essential.
Taking Accurate Measurements
Measure the mirror’s height and width carefully. Use a soft tape measure for curved surfaces. Note the dimensions on paper. Double-check your numbers before cutting. Add a little extra length to cover edges well.
Cutting The Vinyl Wrap
Place the vinyl on a flat surface. Lay it smooth and wrinkle-free. Cut slowly along your marked lines. Use sharp scissors or a craft knife for clean edges. Avoid jagged cuts that make wrapping difficult.
Allowing For Overlaps
Leave extra vinyl around the edges. This overlap helps wrap around curves and corners. It prevents gaps and peeling later. Trim overlaps carefully after applying the vinyl. Make sure overlaps do not create bulk or bubbles.

Credit: www.youtube.com
Applying The Vinyl Wrap
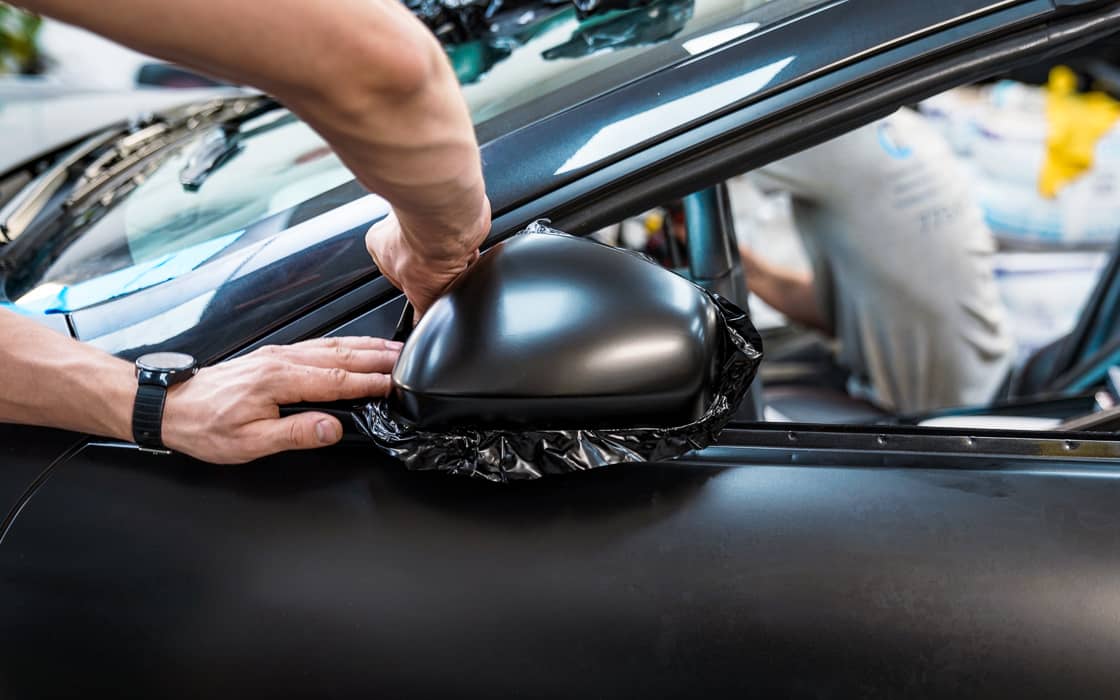
Applying the vinyl wrap to your car mirrors is a key step for a clean, smooth finish. This process needs care and patience to avoid bubbles and wrinkles. Follow simple steps to get a professional look even if you are new to wrapping.
Positioning The Vinyl
Start by aligning the vinyl sheet over the mirror surface. Hold it gently and adjust until it covers all edges. Leave a little extra vinyl around the mirror for trimming. Make sure the vinyl sits flat before pressing down.
Smoothing Out Air Bubbles
Use a soft squeegee or your fingers to push out air bubbles. Begin from the center and move toward the edges. Small bubbles are normal but try to remove as many as possible. Work slowly to avoid stretching or tearing the vinyl.
Using Heat For Flexibility
Apply heat with a heat gun or hairdryer to soften the vinyl. Warm vinyl bends better around curves and corners. Heat also helps the vinyl stick firmly to the mirror. Keep the heat source moving to prevent damage.
Trimming And Finishing Touches
Trimming and finishing touches are key steps in vinyl wrapping car mirrors. They make the wrap look clean and last longer. These steps help remove extra vinyl and protect the edges from peeling. Careful work here ensures a smooth, professional finish.
Cutting Excess Vinyl
Use a sharp blade to cut away extra vinyl around the mirror. Cut slowly and close to the edge. Avoid cutting the mirror’s surface. Keep the blade angled to prevent scratches. Small, careful cuts help the vinyl fit perfectly.
Sealing Edges
Press down the vinyl edges firmly to seal them. Use a heat gun on low to soften the vinyl slightly. This helps the vinyl stick better around curves and corners. Sealing prevents dirt and water from getting under the wrap. It also stops the vinyl from lifting over time.
Final Inspection
Look over the wrapped mirror for bubbles or wrinkles. Smooth out any small air pockets with a squeegee. Check that all edges are tight and sealed. Fix any loose areas immediately. A clean final look means your wrap will last long and look great.
Maintenance Tips For Longevity
Vinyl wrapping car mirrors gives a fresh look but needs care to last long. Proper maintenance keeps the wrap smooth and vibrant. Small habits protect the vinyl from wear and tear. Follow simple steps to keep your wrapped mirrors in top shape.
Cleaning Wrapped Mirrors
Use a soft cloth and mild soap to clean. Avoid harsh chemicals that can damage vinyl. Rinse with water and dry gently. Do not scrub hard or use abrasive materials. Clean your mirrors regularly to remove dirt and dust.
Avoiding Damage
Keep sharp objects away from wrapped mirrors. Be careful in tight spaces to prevent scratches. Avoid parking under trees to stop sap or bird droppings. Do not use high-pressure water directly on the wrap. Small dents or tears reduce the wrap’s life.
When To Rewrap
Look for signs like peeling or fading colors. If the vinyl lifts at the edges, it needs attention. Cracks or bubbles also signal time to rewrap. Regular checks help you spot problems early. Rewrapping keeps your car looking fresh and neat.
Frequently Asked Questions
How Do I Prepare Car Mirrors For Vinyl Wrapping?
Clean the mirrors thoroughly with soap and water. Remove dirt, grease, and wax. Use isopropyl alcohol for a final wipe. Ensure the surface is dry before applying vinyl wrap.
What Tools Are Needed To Vinyl Wrap Car Mirrors?
You need vinyl wrap film, a heat gun, a squeegee, and a utility knife. Also, use microfiber cloths and gloves for better handling and cleaning.
How Long Does Vinyl Wrap On Car Mirrors Last?
Vinyl wraps typically last 5 to 7 years with proper care. Avoid harsh chemicals and excessive sun exposure to extend durability. Regular cleaning helps maintain the wrap’s appearance.
Can I Remove Vinyl Wrap From Car Mirrors Easily?
Yes, vinyl wrap can be removed without damaging mirrors. Use heat to soften the adhesive, then peel carefully. Remove leftover adhesive with a gentle adhesive remover.
Conclusion
Vinyl wrapping car mirrors is a smart way to change their look fast. It saves money compared to buying new mirrors. The process is simple and you can do it at home. Take your time to clean and measure carefully.
Smooth out bubbles for a neat finish. This small upgrade adds style and protects the mirrors from scratches. Try it yourself and enjoy the fresh appearance. A little effort goes a long way in car care.