Are you tired of your old countertop but don’t want to spend a fortune on a full remodel? Vinyl wrapping your countertop could be the perfect solution.
It’s affordable, quick, and can give your kitchen or bathroom a fresh, modern look in no time. Imagine transforming your space with just a few simple steps—and no messy construction. In this guide, you’ll learn exactly how to vinyl wrap your countertop like a pro, saving time and money while achieving stunning results.
Ready to see how easy it can be? Let’s dive in!
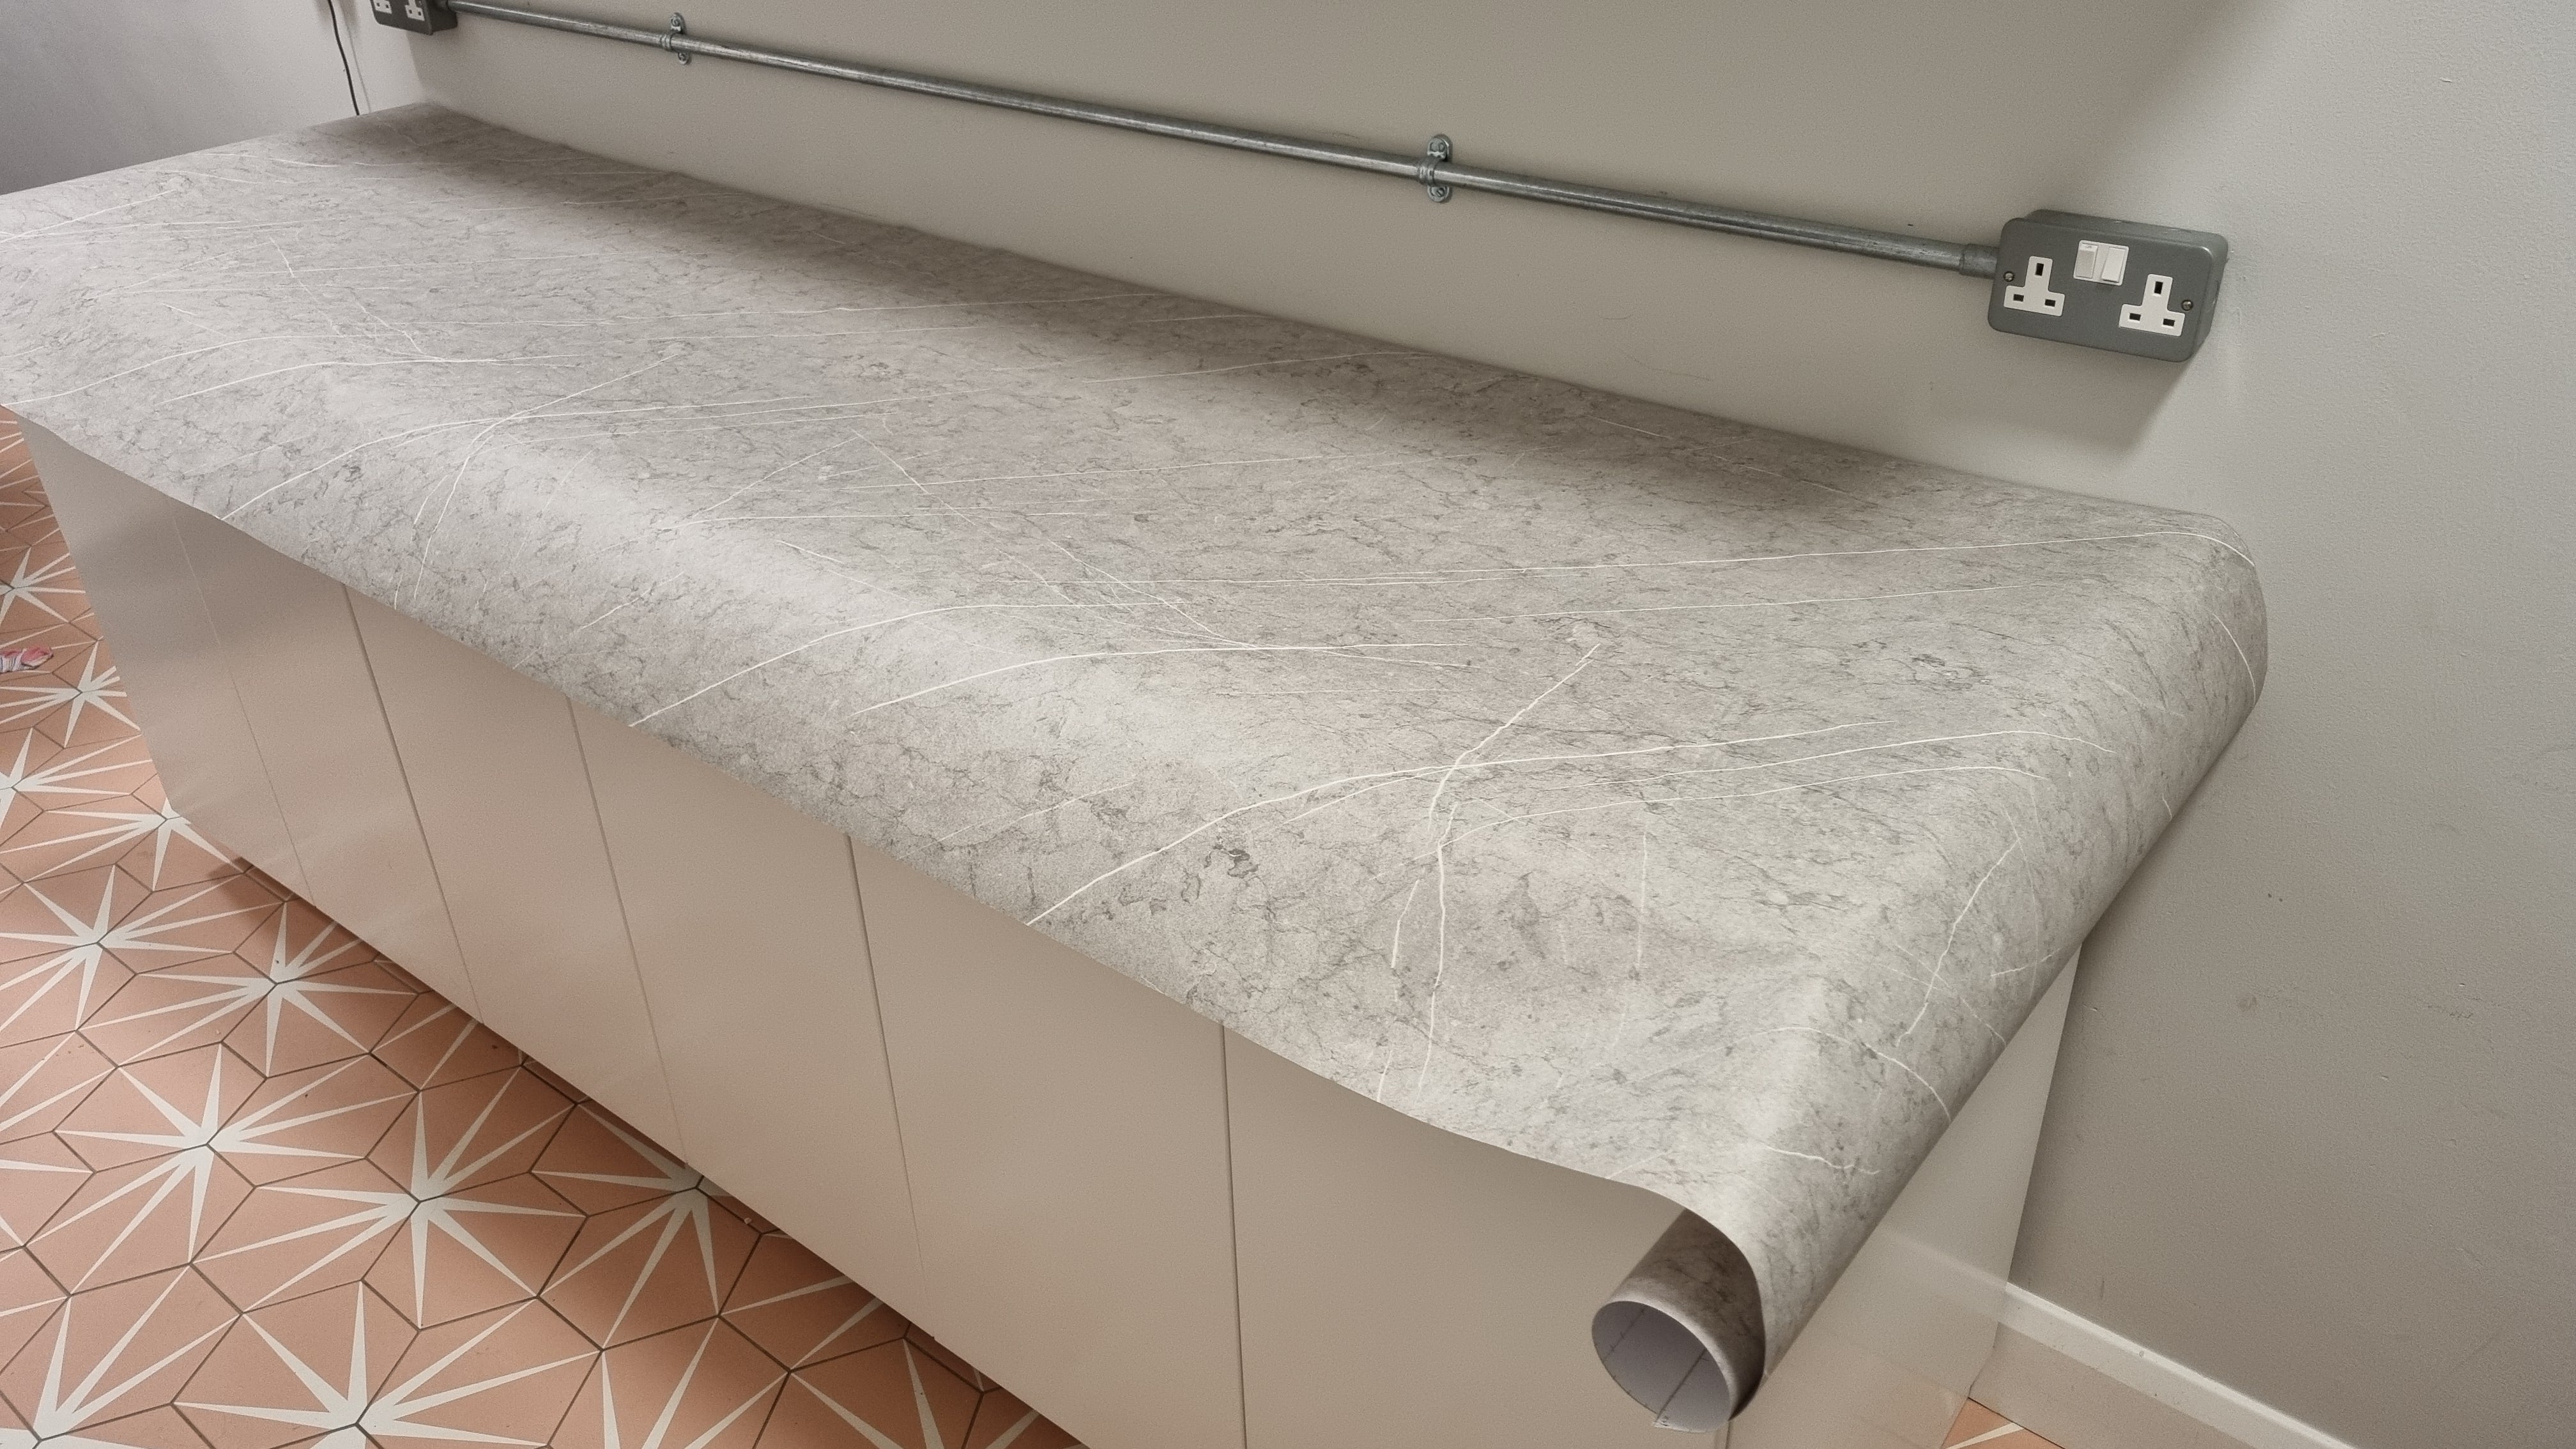
Credit: layed.com
Choosing The Right Vinyl
Choosing the right vinyl is the first step to a successful countertop wrap. The vinyl must fit your style and needs. Quality and durability matter for long-lasting results. Understanding different types and sizes helps you pick the best option.
Types Of Vinyl Wraps
Vinyl wraps come in several types. Cast vinyl is thin and flexible. It molds well around curves and edges. Calendered vinyl is thicker and less flexible. It suits flat surfaces better. Matte, glossy, and textured finishes add style. Choose based on your countertop’s shape and your look preference.
Color And Pattern Selection
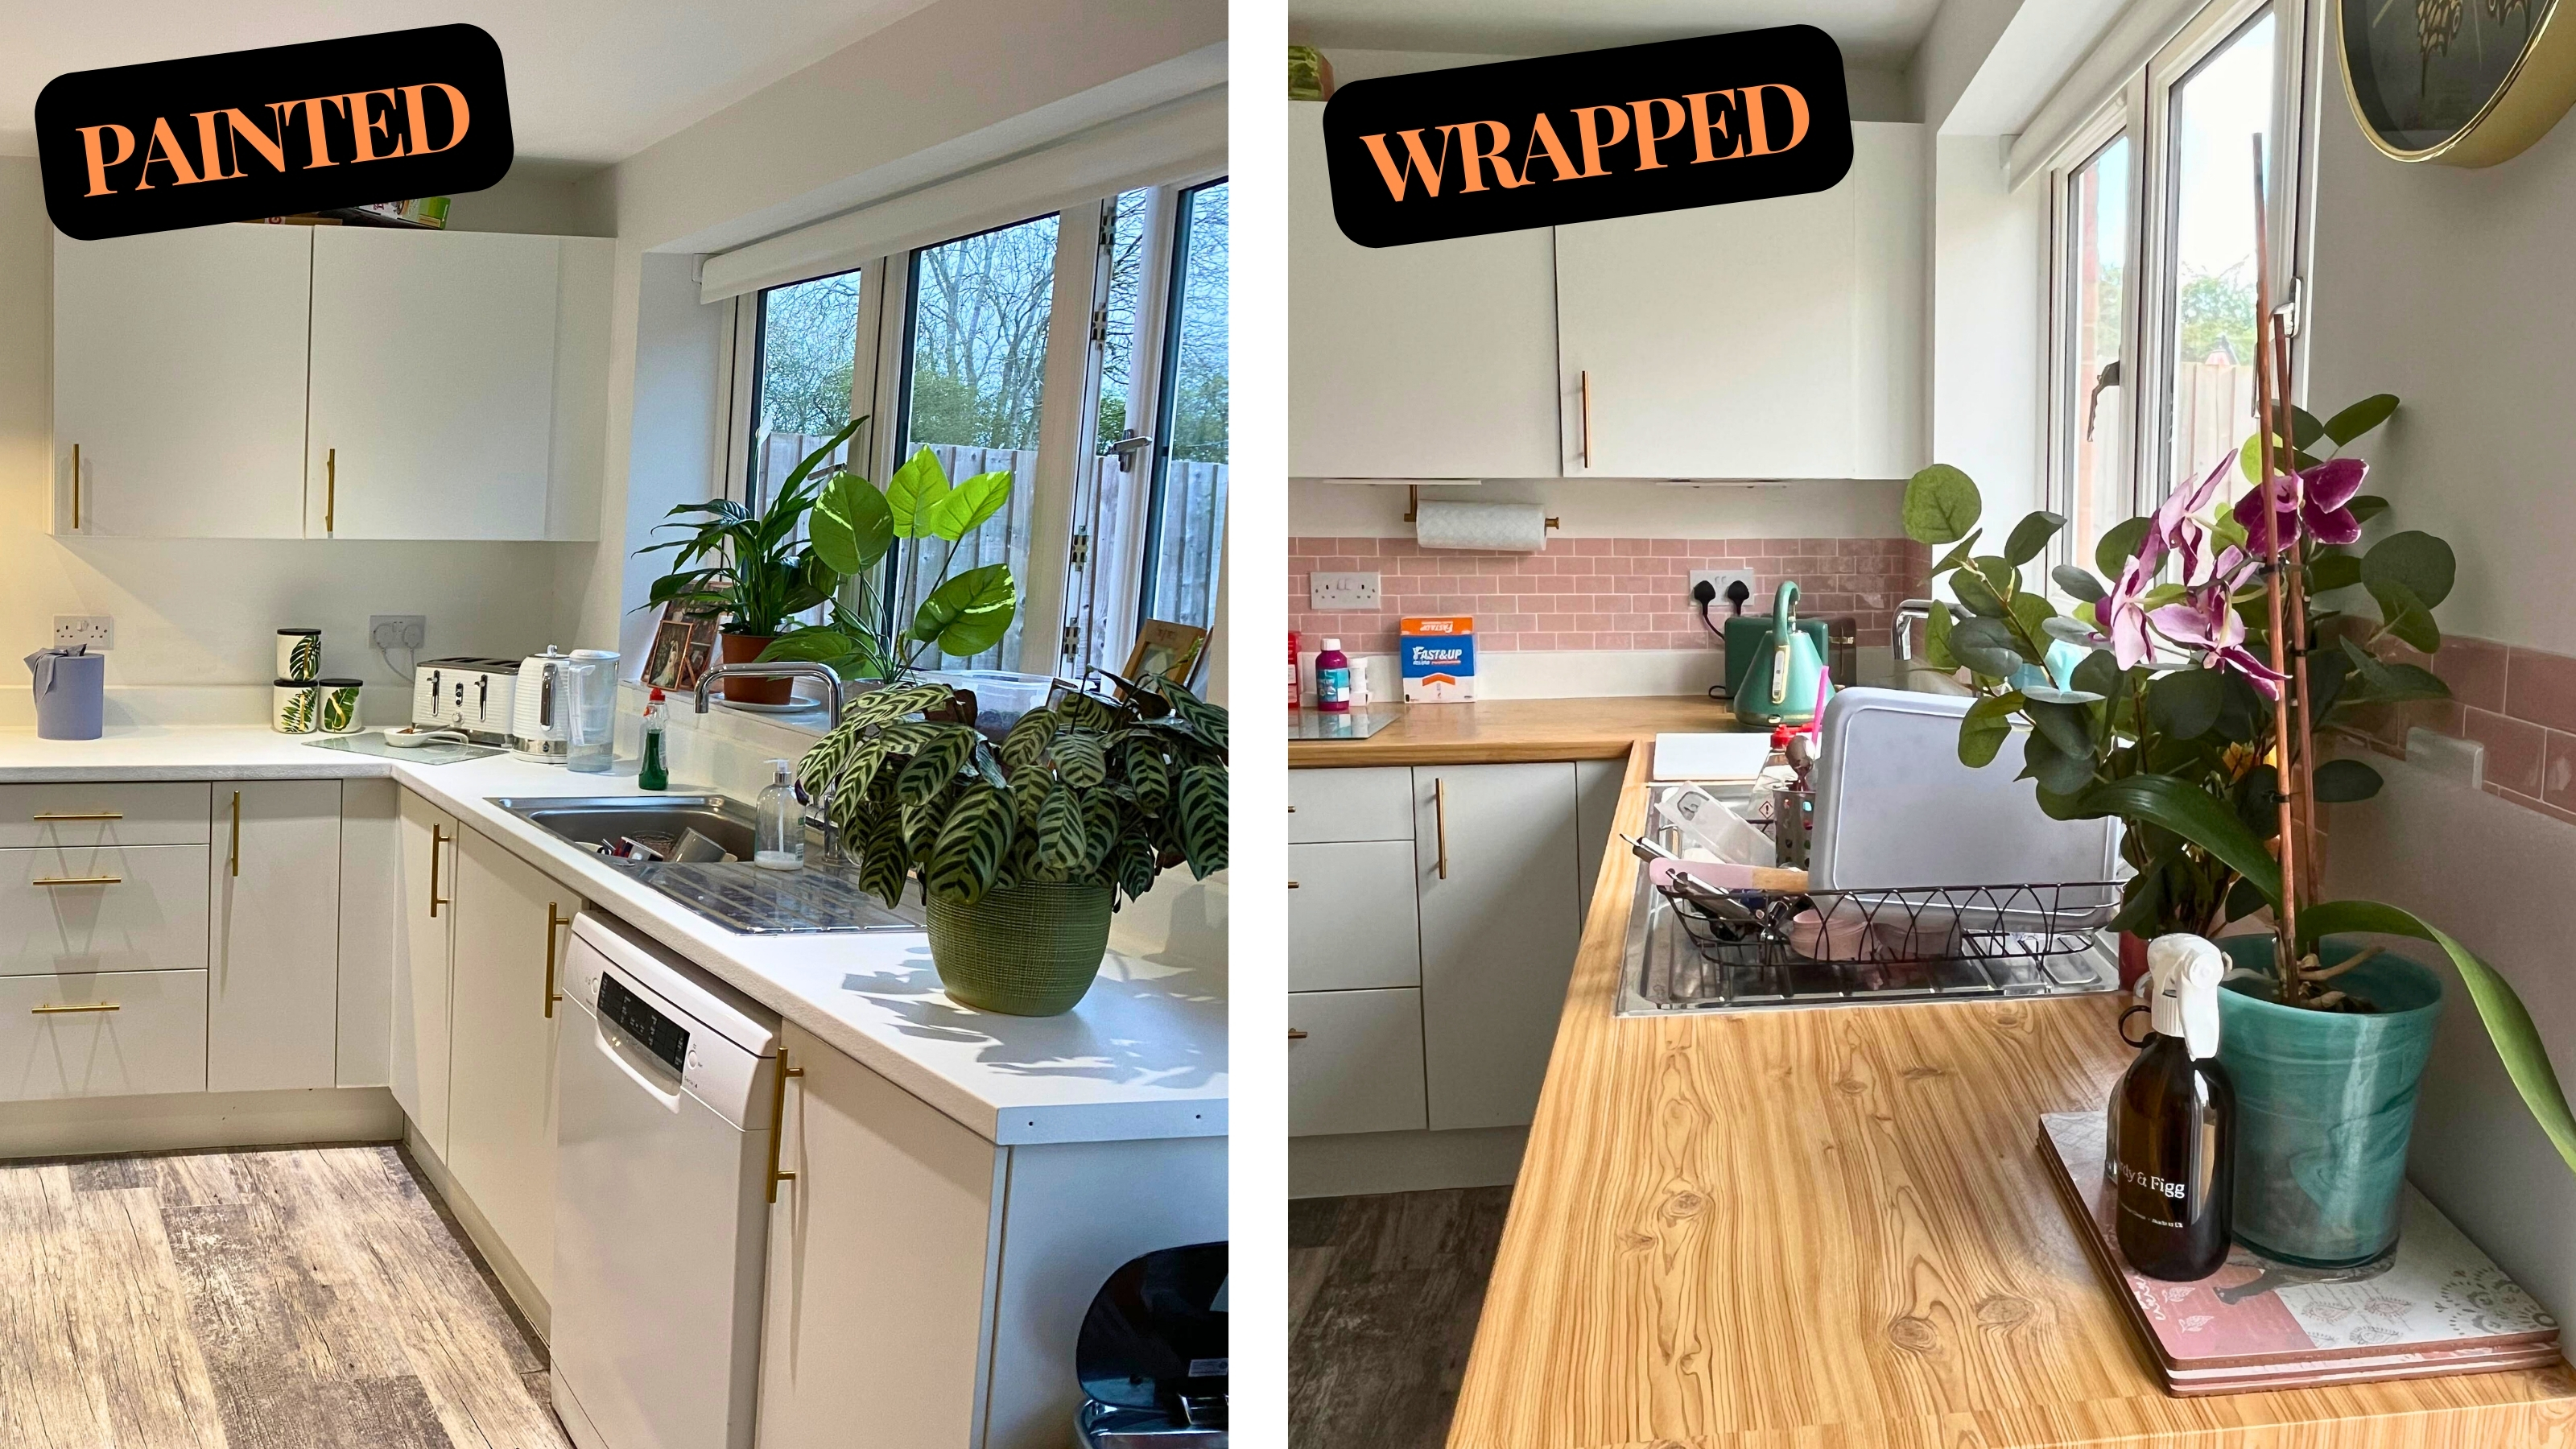
Colors and patterns change the whole room feel. Light colors make small spaces look bigger. Dark colors hide stains and scratches better. Patterns can mimic wood, stone, or metal. Pick a pattern that matches your kitchen style. Think about how it matches cabinets and walls.
Measuring Your Countertop
Measure your countertop carefully. Write down length and width in inches or centimeters. Add extra vinyl for edges and mistakes. Measure any cutouts or sinks too. Accurate measurements help avoid running out of vinyl. It also prevents buying too much, saving money.
Preparing The Surface
Preparing the surface is the first and most important step in vinyl wrapping a countertop. A clean and smooth surface helps the vinyl stick better and last longer. Take your time to get this part right for the best results.
Cleaning And Drying
Start by wiping the countertop with a mild cleaner. Remove all dirt, grease, and dust. Use a soft cloth to avoid scratches. After cleaning, dry the surface completely. Any moisture can stop the vinyl from sticking well.
Removing Old Sealants
Old sealants and adhesives can block the vinyl from sticking. Use a scraper or a chemical remover to get rid of any leftover sealant. Be gentle to avoid damaging the countertop. Make sure the surface is smooth and free of sticky spots.
Sanding And Smoothing
Lightly sand the countertop with fine-grit sandpaper. This creates a rougher surface for the vinyl to grip. Sand evenly to avoid bumps and scratches. Wipe off the dust with a damp cloth and let it dry before wrapping.
Cutting And Aligning The Vinyl
Cutting and aligning vinyl is a key step in wrapping your countertop. It ensures a smooth, clean finish without bubbles or wrinkles. Careful measurement and precise cutting help the vinyl fit perfectly. Proper alignment keeps the design straight and attractive.
Measuring And Marking
Start by measuring the countertop’s length and width. Use a tape measure for accuracy. Mark these dimensions on the back of the vinyl with a pencil. Add extra inches for overlap and trimming. Clear markings guide your cutting and placement.
Cutting Techniques
Use a sharp utility knife or scissors for clean cuts. Cut slowly along the marked lines to avoid mistakes. Keep the vinyl flat on a table while cutting. Avoid jagged edges by using a ruler as a guide. Sharp tools help prevent tearing the vinyl.
Positioning On The Countertop
Peel back a small section of the vinyl’s backing. Place this edge carefully on the countertop’s surface. Smooth the vinyl outward using a squeegee or cloth. Work slowly to push out air bubbles. Adjust the vinyl as needed to align edges and patterns.
Credit: www.realhomes.com
Applying The Vinyl
Applying the vinyl wrap to your countertop needs care and patience. This step sets the base for a smooth, lasting finish. Follow the right process to avoid bubbles and wrinkles. Work slowly, and check your progress often.
Peeling And Sticking
Start by peeling a small part of the backing paper from the vinyl. Align the vinyl carefully at one edge of the countertop. Stick it down gently to hold it in place. Slowly peel off more backing paper while pressing the vinyl down. Avoid stretching the vinyl too much. Take your time to keep it straight and smooth.
Using A Squeegee
Use a plastic squeegee to press the vinyl flat. Start from the center and push air bubbles toward the edges. Work in small sections for better control. Apply firm, even pressure to avoid creases. Clean the squeegee often to prevent scratches. This tool helps create a neat, flat surface.
Handling Curves And Edges
For curved areas, warm the vinyl slightly with a heat gun or hair dryer. This makes the vinyl more flexible and easier to shape. Press the vinyl gently into curves and edges with your fingers. Use the squeegee to smooth out the vinyl as you go. Trim any extra vinyl carefully with a sharp blade. Take your time to get clean, sharp edges.
Trimming And Finishing Touches
Trimming and finishing touches are key steps in vinyl wrapping a countertop. They make the project look neat and professional. Careful attention here ensures the vinyl stays in place and looks smooth. These steps prevent peeling and bubbles over time.
Cutting Excess Vinyl
Use a sharp utility knife for clean cuts. Cut slowly along the edges of the countertop. Leave a small margin to avoid cutting too close. Trim excess vinyl carefully to fit corners and curves. Keep the knife blade angled slightly away from the countertop.
Sealing The Edges
Seal edges with heat to help vinyl stick better. A heat gun or hairdryer works well for this. Warm the edges gently while pressing the vinyl down. This prevents lifting and water damage. Make sure edges are flat and smooth after sealing.
Avoiding Air Bubbles
Air bubbles ruin the smooth look of vinyl. Use a squeegee to push bubbles toward the edges. Work from the center outwards for best results. If a bubble stays, prick it with a pin and press flat. Take your time to avoid trapping air underneath.
Maintenance Tips
Maintaining a vinyl-wrapped countertop is simple and keeps it looking new longer. Proper care protects your investment and preserves its style. Follow easy steps to clean, prevent damage, and fix small problems quickly. This helps your countertop stay beautiful and useful every day.
Cleaning Your Vinyl Countertop
Use a soft cloth or sponge with warm water and mild soap. Avoid harsh chemicals or abrasive cleaners that can damage the vinyl. Wipe spills immediately to prevent stains. Dry the surface gently to stop water marks. Clean regularly to keep the wrap fresh and shiny.
Preventing Damage
Use cutting boards to avoid scratches from knives. Avoid placing hot pots or pans directly on the vinyl. Heat can cause bubbles or peel the wrap. Keep sharp or heavy objects away to prevent dents. Handle the countertop with care to maintain its smooth surface.
Repairing Minor Issues
Small scratches or bubbles can be fixed easily. Use a heat gun or hairdryer to warm the vinyl. Press the wrap down carefully with a soft cloth. For tiny cuts, vinyl repair kits work well. Address problems quickly to stop further damage and keep the wrap intact.
Credit: novawrap.ae
Frequently Asked Questions
What Materials Do I Need For Vinyl Wrapping A Countertop?
You need vinyl wrap sheets, a squeegee, a heat gun, scissors, and a cleaning cloth. Proper tools ensure smooth application and durability.
How Long Does Vinyl Wrapping A Countertop Take?
Vinyl wrapping usually takes 2 to 4 hours, depending on countertop size and experience. Preparation and drying time affect the total duration.
Can Vinyl Wrap Withstand Kitchen Countertop Heat And Moisture?
High-quality vinyl wraps resist heat and moisture but avoid direct contact with hot pots. Proper sealing extends the wrap’s lifespan in kitchens.
Is Vinyl Wrap Removable Without Damaging The Countertop?
Yes, vinyl wrap can be peeled off cleanly if applied correctly. Use heat to soften adhesive before removal to prevent surface damage.
Conclusion
Vinyl wrapping a countertop can change its look quickly and cheaply. The process needs patience and care for best results. Clean the surface well and measure twice before cutting. Take your time to smooth out bubbles and wrinkles. This simple update can refresh any kitchen or workspace.
Try it yourself and enjoy a new style today.