Are you looking to give your car a fresh, stylish look without spending a fortune? Vinyl wrapping your side mirrors is a simple and affordable way to do just that.
Imagine transforming those small but noticeable parts of your vehicle into eye-catching accents that turn heads wherever you go. In this guide, you’ll discover easy-to-follow steps that make vinyl wrapping your side mirrors a breeze—even if you’ve never done it before.
Ready to upgrade your ride and make your mirrors stand out? Let’s dive in and get started!
Credit: www.tintingchicago.com
Tools And Materials Needed
Before starting your vinyl wrap on side mirrors, gather all tools and materials. Proper preparation saves time and effort. Knowing what to use ensures a smooth wrapping process. This section covers the key items you need.
Choosing The Right Vinyl
Select vinyl made for car wraps. Look for durability and flexibility. Choose a vinyl with air-release technology to avoid bubbles. Pick a color or finish that matches your style. Matte, gloss, or satin finishes work well on mirrors. Thin vinyl helps wrap curved mirror surfaces easily.
Essential Tools Checklist
Prepare these tools for a neat wrap job:
- Heat gun or hairdryer to soften the vinyl
- Squeegee to smooth out air bubbles
- Sharp utility knife for precise cutting
- Isopropyl alcohol and cloth for cleaning mirrors
- Gloves to avoid fingerprints and keep vinyl clean
- Measuring tape to size the vinyl correctly
- Masking tape to hold vinyl in place during application
Having these tools ready makes the wrapping process easier and faster.

Credit: www.youtube.com
Preparing The Side Mirrors
Preparing the side mirrors is a key step before applying vinyl wrap. Clean and smooth surfaces help the vinyl stick better and last longer. This step also prevents bubbles and wrinkles on the wrap. Proper preparation saves time and effort during installation.
Cleaning And Drying
Start by washing the mirrors with soap and water. Remove dirt, dust, and oil from the surface. Use a microfiber cloth for gentle cleaning. Dry the mirrors completely to avoid moisture under the vinyl. Any wetness can cause the wrap to peel off later.
Removing Old Wrap Or Debris
Check for old vinyl or stickers on the mirrors. Peel off any leftover wrap carefully. Use rubbing alcohol or adhesive remover to clean sticky residues. Scrape gently with a plastic tool if needed. Make sure the surface is smooth and clean before wrapping.
Measuring And Cutting The Vinyl
Measuring and cutting the vinyl are crucial steps in wrapping side mirrors. Accurate measurements ensure the vinyl fits perfectly, avoiding wrinkles or bubbles. Cutting the vinyl carefully guarantees a clean, professional look that lasts long. These steps set the base for a smooth wrapping process.
Taking Accurate Measurements
Start by cleaning the side mirror surface. Use a soft cloth to remove dirt and dust. Use a flexible tape measure or a ruler. Measure the height, width, and curves of the mirror. Add an extra inch or two to your measurements. This extra space helps during the wrapping process. Write down all measurements clearly. Double-check to avoid mistakes. Accurate measurements prevent wasting vinyl and time.
Cutting For A Perfect Fit
Place the vinyl sheet on a flat surface. Use a sharp utility knife or scissors for cutting. Cut the vinyl slightly larger than your measurements. This extra vinyl will help when wrapping curves. Cut slowly and steadily to keep clean edges. Avoid jagged cuts that cause peeling later. Trim small pieces at a time for fine adjustments. Keep the cut vinyl ready before starting the wrap. This step makes the entire process smoother.
Credit: www.garagetool.app
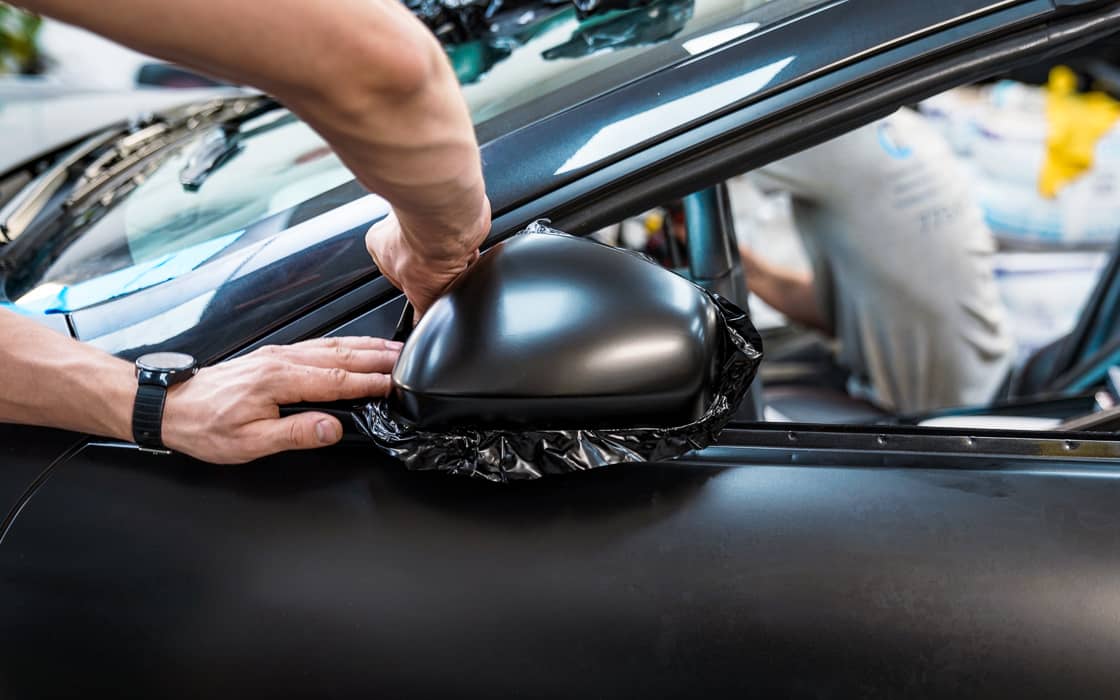
Applying The Vinyl Wrap
Applying the vinyl wrap to side mirrors requires care and patience. This step ensures the wrap fits well and looks smooth. Proper application helps the wrap last longer and stay in place. Follow these simple steps to get the best results.
Positioning The Vinyl
Start by placing the vinyl wrap over the mirror. Align the edges carefully to cover the entire surface. Make sure the wrap overlaps slightly to avoid gaps. Hold the vinyl gently without stretching it yet. Check the fit before moving to the next step.
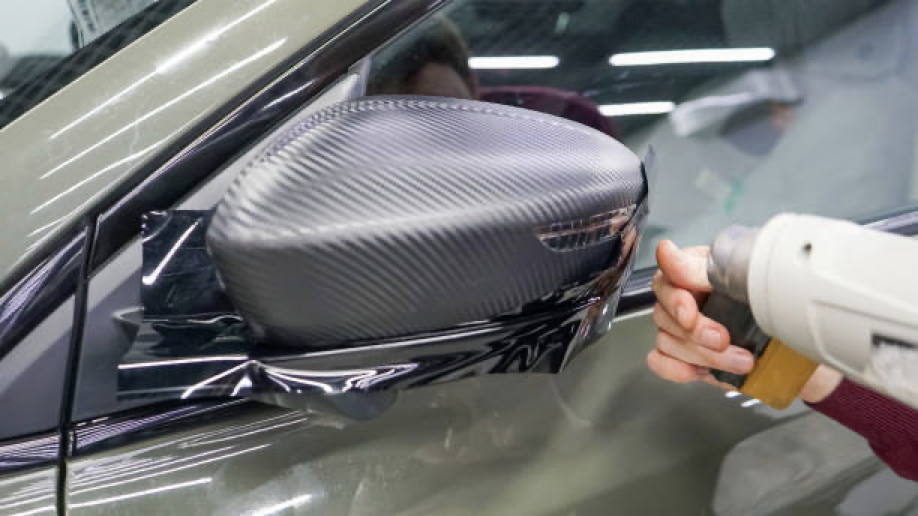
Using Heat For Flexibility
Use a heat gun or hair dryer to warm the vinyl. Heat makes the vinyl soft and flexible. This helps the wrap fit around curves and corners easily. Heat in short bursts to avoid damage. Move the heat source evenly over the vinyl.
Smoothing Out Bubbles And Wrinkles
Use a squeegee or soft cloth to press the vinyl down. Start from the center and push outwards. This removes air bubbles trapped under the wrap. Work slowly to avoid wrinkles or folds. If bubbles remain, heat and press again until smooth.
Trimming And Finishing Touches
Trimming and finishing touches are crucial for a clean, professional look. This step shapes the vinyl to fit perfectly and prevents peeling later. Carefully cutting and sealing the edges will make your side mirrors look smooth and last longer.
Cutting Excess Vinyl
Start by removing the extra vinyl around the mirror edges. Use a sharp utility knife or scissors for accuracy. Cut slowly and follow the mirror’s shape closely. Leave a tiny margin to avoid cutting too much. This margin helps secure the vinyl better.
Sealing Edges For Durability
Press down the edges firmly to stick the vinyl tightly. Use a heat gun or hairdryer to warm the edges slightly. Warm edges bond stronger and prevent lifting. Run a plastic squeegee along the edges for a smooth finish. Check all sides to ensure no gaps or bubbles remain.
Maintenance Tips
Proper care keeps your vinyl-wrapped side mirrors looking great. Maintenance helps the wrap last longer and stay smooth. Follow simple steps to avoid damage and peeling.
Cleaning Wrapped Mirrors
Use a soft cloth or sponge to clean the mirrors. Wash with mild soap and water only. Avoid strong chemicals or abrasive cleaners. Rinse gently and dry with a microfiber towel. Clean regularly to remove dirt and grime.
Avoiding Damage And Peeling
Do not use sharp objects near the wrap. Avoid high-pressure water jets close to edges. Park in shaded areas to reduce sun damage. Keep the wrap away from hot surfaces. Check the edges often and press them down if lifting starts.
Frequently Asked Questions
How Long Does Vinyl Wrap On Side Mirrors Last?
Vinyl wrap on side mirrors typically lasts 5 to 7 years. Proper installation and maintenance extend its lifespan. Avoid harsh chemicals and frequent washing to keep the wrap intact.
Can I Vinyl Wrap Side Mirrors Myself?
Yes, you can vinyl wrap side mirrors yourself. It requires patience, precision, and proper tools like a heat gun and squeegee. Follow step-by-step instructions for a smooth finish.
What Tools Are Needed To Vinyl Wrap Side Mirrors?
You need vinyl wrap film, a heat gun, squeegee, utility knife, and cleaning supplies. These tools help achieve a smooth, bubble-free application on side mirrors.
How To Prepare Side Mirrors Before Vinyl Wrapping?
Clean side mirrors thoroughly with soap and alcohol to remove dirt and oils. Dry completely before applying vinyl wrap to ensure better adhesion and lasting results.
Conclusion
Vinyl wrapping side mirrors adds style and protection. It requires patience and careful steps. Clean the surface well before starting. Use a heat gun to smooth out wrinkles. Take your time to avoid bubbles and creases. A well-done wrap can last for years.
It also saves money compared to painting. Try this DIY project for a fresh look. Enjoy your car’s new, sleek appearance.