
Want your car to look shiny and new without spending a fortune at the detail shop? Waxing your car at home is easier than you think—and it can make a huge difference in protecting your paint and boosting its shine.
Imagine driving around with that fresh, glossy finish that turns heads everywhere you go. In this guide, you’ll discover simple, step-by-step tips to wax your car like a pro. Ready to give your ride the care it deserves and save money at the same time?
Keep reading to learn how you can do it yourself, quickly and effectively.
Choosing The Right Wax
Choosing the right wax is key to a shiny, protected car. The right wax keeps your car safe from dirt and sun damage. It also makes your car look fresh and clean. Knowing the types and ingredients helps pick the best wax for your needs.
Types Of Car Wax
Car wax comes in several forms: paste, liquid, and spray. Paste wax lasts longer but takes more effort to apply. Liquid wax is easier to spread and dries fast. Spray wax works quickly but may not last as long. Each type suits different needs and skill levels.
Best Wax For Beginners
Beginners should choose wax that is simple to use. Liquid or spray wax is best for first-timers. These types spread evenly and wipe off easily. They save time and reduce mistakes. Look for wax labeled as “easy application” or “beginner-friendly.”
Wax Ingredients To Look For
Natural carnauba wax offers a deep, warm shine. Synthetic waxes provide strong protection and last longer. Some waxes mix both for shine and durability. Avoid waxes with harsh chemicals that can harm the paint. Check for safe, paint-friendly ingredients on the label.
Preparing Your Car
Preparing your car before waxing is crucial for the best results. Clean and smooth surfaces help the wax stick properly. This process removes dirt, old wax, and any damage that could affect the finish.
Spend time on preparation. It makes the waxing easier and the shine last longer.
Washing And Drying
Start by washing your car thoroughly. Use car soap and water, not household detergents. Dirt and grime can scratch the paint during waxing.
Rinse well to remove all soap. Dry the car with a clean microfiber towel. Avoid air drying as water spots can form.
Removing Old Wax And Contaminants
Old wax and contaminants block the new wax from bonding. Use a clay bar or a wax remover product. This step clears the paint surface.
Work in small sections and follow product instructions. This ensures a clean, smooth surface ready for waxing.
Checking For Paint Damage
Inspect your car’s paint for scratches, chips, or oxidation. These defects can affect how wax applies and looks.
Fix minor damage before waxing. Use touch-up paint or polish for best results. Healthy paint gives a better shine and protection.
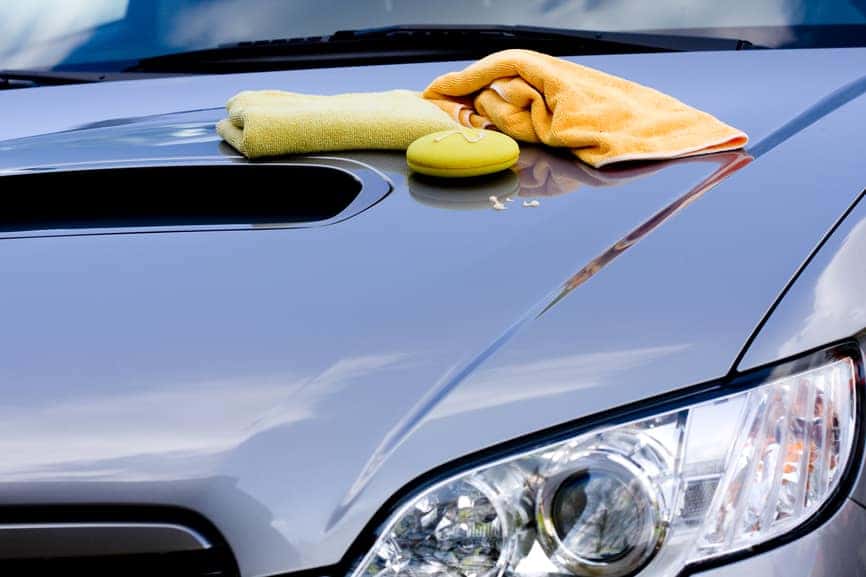
Gathering Your Supplies
Before waxing your car, gather all necessary supplies. This step helps the process go smoothly. Having everything ready saves time and avoids interruptions. Organize your tools and workspace before you start.
Essential Tools
First, get a good quality car wax. Choose one that suits your car’s paint type. Next, find a soft applicator pad to apply the wax evenly. Use clean microfiber cloths to buff the wax off without scratching. Also, have a bucket of water and car soap to wash your car first.
Optional Accessories
Consider using a clay bar to remove surface dirt before waxing. A foam or sponge applicator can help with even wax application. Use a detailing spray for quick touch-ups after waxing. Some prefer a dual-action polisher to make the job easier, but it’s not required.
Creating A Comfortable Workspace
Choose a shaded, dry area to wax your car. Avoid direct sunlight to prevent wax from drying too fast. Make sure the ground is flat and clean. Keep water and towels nearby for quick cleanup. Good lighting helps you see missed spots easily.

Credit: www.youtube.com
Applying The Wax
Applying wax to your car is a key step to protect and shine its surface. It requires care and the right method to get the best results. This process helps form a smooth, even layer that guards against dirt and weather. Patience and proper technique make waxing easier and more effective.
Choosing Application Techniques
Select an application method that suits your wax type. Some waxes work better with soft cloths, others with foam pads. Test a small spot first. Use gentle, circular motions for even coverage. Avoid pressing too hard to prevent scratches.
Using Wax Applicator Pads
Wax applicator pads help spread wax smoothly. They hold the right amount of product. Use clean, soft pads for best results. Dab wax onto the pad, not directly on the car. Apply with light, circular strokes to cover paint evenly.
Working In Small Sections
Divide your car into small parts. Wax one section at a time. This approach ensures thorough and even application. It also prevents wax from drying too fast. Finish each section before moving on to the next for a polished look.
Buffing For Shine
Buffing is the key step to bring out the shine after waxing your car. It removes excess wax and smooths the surface. This step reveals a bright, glossy finish that protects your paint. Proper buffing makes your car look clean and polished.
Waiting Time Before Buffing
After applying wax, wait for it to dry slightly. The wax should feel tacky, not wet or hard. This usually takes five to ten minutes. Waiting helps the wax bond well with the paint. Rushing can cause streaks or uneven shine.
Using Microfiber Towels
Use soft microfiber towels for buffing. They gently lift wax without scratching the paint. Avoid rough cloths or paper towels. Fold the towel to create a clean surface. Change sides often to avoid smearing wax back on the car.
Achieving An Even Gloss
Buff in small, circular motions across the car’s surface. Apply light pressure to avoid rubbing off too much wax. Work section by section for consistent shine. Check your progress by shifting your view angle. Keep buffing until the surface feels smooth and glows evenly.
Tips For Long-lasting Results
Waxing your car at home can keep it shiny and protected for longer. Applying wax correctly is just the start. Following a few simple tips helps maintain the wax and the car’s finish. These tips make your effort last and keep the car looking great.
Avoiding Harsh Weather
Harsh weather can damage fresh wax quickly. Try to wax your car on a dry, cool day. Avoid direct sunlight, rain, or strong wind during and after waxing. Parking in shade helps protect the wax. Extreme heat can soften wax, while rain can wash it away early.
Regular Maintenance
Keep the car clean between waxings. Dirt and dust can scratch the surface and wear down the wax. Use a gentle car wash soap and soft cloth or sponge. Clean the car every two weeks to protect the wax layer. This simple step extends the wax’s life and keeps the shine.
Reapplying Wax Properly
Wax should be reapplied every 3 to 4 months. Remove old wax completely before applying new wax. Use a clean cloth and follow the product instructions. Apply wax in small sections for even coverage. Buff the wax gently to enhance the shine and protection.
Common Mistakes To Avoid
Waxing your car at home can save money and keep your vehicle shiny. Avoid common mistakes to get the best results. These errors can cause streaks, damage, or wasted effort. Follow these tips to make waxing easier and more effective.
Applying Wax On Dirty Surfaces
Always clean your car before waxing. Dirt and dust trap under the wax. This can scratch the paint and ruin the finish. Use soap and water, then dry completely. Waxing on a dirty surface wastes product and effort.
Using Too Much Wax
Less is more when waxing your car. Too much wax takes longer to dry and remove. It can leave a hazy or sticky residue. Apply a thin, even layer instead. This helps the wax bond well and shine bright.
Ignoring Manufacturer Instructions
Read the wax product instructions carefully. Different waxes have specific application and removal methods. Some need time to dry; others require immediate buffing. Ignoring these steps can reduce wax effectiveness. Follow instructions for the best finish.
Credit: www.valleyhonda.com

Credit: www.youtube.com
Frequently Asked Questions
How Often Should I Wax My Car At Home?
Wax your car every 3 to 4 months for optimal protection. Regular waxing shields paint from dirt, UV rays, and moisture. It keeps your car’s finish smooth and shiny. Adjust frequency based on your climate and driving conditions.
What Materials Do I Need To Wax A Car?
You need car wax, applicator pads, microfiber towels, and water. Choose quality wax suitable for your car’s paint type. Clean your car thoroughly before waxing to avoid scratches. Use microfiber towels for buffing to achieve a glossy finish.
Can I Wax My Car In Direct Sunlight?
Avoid waxing your car in direct sunlight. Heat causes wax to dry too quickly, leading to streaks and uneven coverage. Wax your car in a shaded, cool area for best results. This ensures a smooth, shiny, and long-lasting finish.
How Long Does Car Wax Protection Last?
Car wax protection typically lasts 6 to 8 weeks. Environmental factors like rain, sun, and dirt can reduce wax durability. Regular waxing helps maintain your car’s paint and shine. Reapply wax when the water no longer beads on the surface.
Conclusion
Waxing your car at home keeps it shiny and protected. It takes time but saves money. Clean your car well before starting. Use small sections for better results. Apply wax evenly and buff gently. Regular waxing helps prevent paint damage.
You can enjoy a fresh, clean look anytime. Try this simple step to care for your car. It makes a big difference over time. Keep practicing, and waxing becomes easy and quick.


