Are you looking to transform your space quickly and affordably? Wrapping a wall with vinyl is a simple way to give any room a fresh, modern look without the hassle of paint or wallpaper.
Whether you want to add color, texture, or a unique design, vinyl wall wraps offer endless possibilities. In this guide, you’ll discover easy steps to wrap your wall like a pro, avoid common mistakes, and achieve a flawless finish that will impress everyone who sees it.
Ready to change your space and make your walls stand out? Let’s get started!
Credit: www.walldecalworld.com
Choosing The Right Vinyl
Choosing the right vinyl is a key step in wrapping a wall. The right vinyl ensures the wrap looks good and lasts long. It depends on the wall’s surface, the room’s use, and your style.
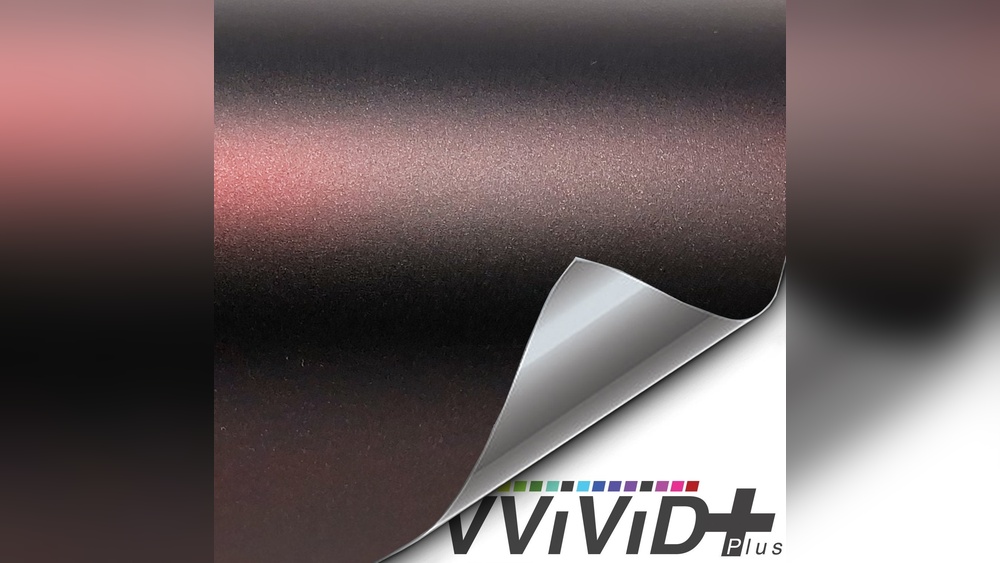
Types Of Vinyl Wraps
There are several types of vinyl wraps. Cast vinyl is thin and flexible. It works well on curved or textured walls. Calendered vinyl is thicker and less flexible. It suits flat walls and short-term use. Matte, glossy, and textured finishes give different looks. Pick the type that fits your wall and design needs.
Measuring Your Wall
Measure the wall carefully before buying vinyl. Use a tape measure for height and width. Add extra inches for trimming and mistakes. Measure twice to avoid errors. Accurate measurements help buy the right amount of vinyl. This saves money and reduces waste.
Selecting Colors And Patterns
Colors and patterns set the mood of the room. Light colors make spaces look bigger and brighter. Dark colors add warmth and coziness. Patterns add style but can be tricky to match. Choose simple patterns for easy alignment. Think about the room’s purpose before choosing colors.
Preparing The Wall
Preparing the wall is the first step to a perfect vinyl wrap. A clean, smooth surface helps the vinyl stick better. It also makes the finish look neat and professional. Take your time with this stage. It will save effort later and improve the final result.
Cleaning The Surface
Start by removing dust and dirt from the wall. Use a mild detergent and water solution. Wipe the wall with a soft cloth or sponge. Avoid harsh chemicals that can damage the paint or drywall. Let the wall dry completely before moving on.
Repairing Imperfections
Look closely for holes, cracks, or bumps. Fill small holes with spackle or wall filler. Use a putty knife to spread it evenly. For bigger cracks, consider using a patch kit. Allow the filler to dry and sand it smooth.
Ensuring A Smooth Base
Sand the wall lightly to remove rough spots. Use fine-grit sandpaper for best results. Wipe away sanding dust with a damp cloth. Check the wall again for any missed spots. A flat, even surface will help the vinyl lay perfectly.
Tools And Materials Needed
Wrapping a wall with vinyl requires some basic tools and materials. Having the right items makes the job easier and the results better. Prepare everything before starting to avoid interruptions.
Essential Tools
- A vinyl cutter or sharp utility knife for precise cuts.
- A squeegee to smooth out air bubbles and wrinkles.
- A measuring tape for accurate dimensions.
- A level to keep the vinyl straight on the wall.
- A heat gun or hair dryer to help vinyl conform to curves.
- A clean cloth or sponge to wipe the wall before application.
Additional Supplies
- Masking tape to hold vinyl in place while positioning.
- A spray bottle with soapy water to aid in sliding the vinyl.
- Gloves to protect hands and avoid fingerprints on vinyl.
- A pencil to mark guidelines on the wall.
- Extra vinyl sheets for practice or mistakes.
Credit: www.speedpro.com
Cutting And Aligning The Vinyl
Cutting and aligning vinyl on a wall is a key step in wall wrapping. It ensures the vinyl fits perfectly and looks smooth. Careful work here saves time and avoids mistakes later. Follow these simple steps to measure, cut, and place the vinyl correctly.
Measuring And Marking
Start by measuring the wall’s height and width. Use a tape measure for accuracy. Mark the measurements on the vinyl with a pencil or chalk. Mark straight lines to guide your cutting. Double-check all marks before cutting. This prevents wasted material and errors.
Cutting Techniques
Use a sharp utility knife or vinyl cutter. Cut slowly along the marked lines for a clean edge. Keep the vinyl flat on a cutting surface. Avoid jagged cuts by applying steady pressure. Cut slightly larger than needed for final trimming. This gives room for adjustments during installation.
Aligning The Vinyl On The Wall
Peel back a small part of the vinyl backing. Position the vinyl at the top of the wall. Use a level or straight edge to check alignment. Slowly press the vinyl onto the wall. Smooth out air bubbles with a squeegee or soft cloth. Work from the center outwards. Trim excess vinyl carefully along edges.
Applying The Vinyl Wrap
Applying the vinyl wrap on your wall takes care and patience. This step is key for a smooth, professional look. Follow the process carefully to avoid wrinkles and bubbles. Focus on even placement and tight edges for best results.
Peeling And Positioning
Start by peeling the backing paper from the vinyl gently. Do not remove it all at once. Peel a small section first to keep control. Align the vinyl on the wall carefully. Use a level or straight edge to help position it correctly. Stick the top edge lightly to hold the vinyl in place.
Smoothing Out Air Bubbles
Use a soft squeegee or cloth to press the vinyl down. Push from the center outwards to remove air bubbles. Work slowly and firmly. Small bubbles can pop out with gentle pressure. For bigger bubbles, lift the vinyl slightly and reapply. Keep smoothing until the surface is flat and even.
Handling Edges And Corners
Edges and corners need extra attention. Wrap the vinyl tightly around corners to avoid lifting. Use a heat gun or hairdryer to soften the vinyl for easier bending. Press edges firmly with a squeegee to secure them. Trim any excess vinyl with a sharp blade for a clean finish.
Finishing Touches
Finishing touches make your vinyl wall wrap look neat and last longer. This stage helps the vinyl fit perfectly and stay safe from damage. Small details here create a big difference in the final result.
Trimming Excess Vinyl
Use a sharp utility knife to cut off extra vinyl. Cut close to the edges but avoid cutting the wall. Take your time for clean, straight lines. Trim around corners and outlets carefully for a smooth fit. Remove small pieces to prevent bubbling or peeling later.
Sealing And Protecting
Apply edge sealant on the vinyl borders to stop lifting. Use a clear, water-resistant sealant for best protection. Press edges firmly to bond vinyl and wall tightly. Sealing helps keep moisture and dust from getting under the vinyl. This step extends the life of your wrap.
Maintenance Tips
Clean the vinyl gently with a soft cloth and mild soap. Avoid harsh chemicals or scrubbing too hard. Check edges regularly for any lifting or damage. Fix small problems quickly to prevent bigger issues. Keep the wall dry and avoid sharp objects near the vinyl.
Common Mistakes To Avoid
Wrapping a wall with vinyl looks easy but has many traps. Avoiding common mistakes helps the wrap last longer and look neat. Mistakes cause bubbles, peeling, or uneven surfaces. Focus on careful steps for a smooth finish.
Misalignment Issues
Start with a clear plan for the vinyl layout. Misalignment makes the wall look messy and unprofessional. Measure twice before sticking the vinyl. Use guides or tape to keep the vinyl straight. Fix small alignment errors early to avoid big problems.
Poor Surface Preparation
Clean the wall well before applying vinyl. Dirt, dust, or grease stop vinyl from sticking properly. Use soap and water or a mild cleaner. Let the surface dry fully before starting. Smooth out bumps or holes with filler. A clean, smooth wall helps vinyl stay flat and last longer.
Rushing The Application
Take your time applying vinyl to the wall. Rushing causes bubbles and wrinkles. Work slowly from one edge to the other. Use a squeegee to press vinyl firmly and remove air pockets. Stop and fix bubbles right away. Patience gives the best, smooth finish.

Credit: wrapguys.com
Frequently Asked Questions
What Materials Are Needed To Wrap A Wall With Vinyl?
You need vinyl sheets, a squeegee, a utility knife, measuring tape, and a cleaning cloth. These tools ensure a smooth and precise vinyl application on walls.
How Do You Prepare A Wall Before Applying Vinyl?
Clean the wall thoroughly to remove dust and grease. Ensure the surface is smooth and dry for better vinyl adhesion and durability.
Can Vinyl Wall Wrap Be Removed Easily?
Yes, vinyl wraps are removable without damaging walls. Gently peel off the vinyl, and use adhesive remover if residue remains.
How Long Does Vinyl Wall Wrapping Last?
Vinyl wall wraps typically last 5 to 7 years. Proper installation and maintenance can extend their lifespan significantly.
Conclusion
Wrapping a wall with vinyl can change any room’s look quickly. It takes patience and careful steps to do it right. Clean the surface well before starting. Measure and cut the vinyl carefully for a good fit. Smooth out air bubbles as you apply it.
Take your time to avoid mistakes. This project can refresh your space without much cost. Anyone can do it with simple tools and effort. Try it yourself and enjoy the new style on your wall.