Wrapping corners with vinyl can seem tricky at first, but once you know the right steps, it becomes simple and even enjoyable. If you want your project to look smooth and professional, mastering this skill is a must.
In this guide, you’ll discover easy-to-follow tips that make vinyl wrap corners perfectly every time. Whether you’re working on a car, furniture, or any other surface, you’ll learn how to avoid common mistakes and get flawless results. Ready to transform your project with crisp, clean corners?
Let’s dive in and make your vinyl wrap stand out!
Preparing The Surface
Preparing the surface is the first step to wrap corners with vinyl properly. A clean and smooth surface helps the vinyl stick better. It also prevents bubbles and wrinkles. Good preparation saves time and gives a neat finish.
Cleaning And Smoothing
Start by cleaning the corner area thoroughly. Use a mild soap and water mix to remove dirt and dust. Dry the surface completely with a soft cloth. Check for rough spots or bumps. Sand them lightly with fine-grit sandpaper. A smooth surface ensures the vinyl lays flat and looks good.
Removing Old Adhesives
Old glue or tape can stop vinyl from sticking well. Use an adhesive remover or rubbing alcohol to clear sticky residue. Apply the remover on a cloth and rub gently. Avoid harsh chemicals that may damage the surface. Remove all old adhesives before applying new vinyl.
Gathering Essential Tools
Collect all tools needed for surface prep. You will need soap, water, cloths, and sandpaper. Get adhesive remover and a plastic scraper too. A heat gun or hair dryer helps soften the vinyl later. Having tools ready makes the process smooth and quick.
Choosing The Right Vinyl
Choosing the right vinyl is key for wrapping corners smoothly. The wrong vinyl can wrinkle, peel, or tear easily. Good vinyl fits the shape, sticks well, and looks neat. This choice depends on the project’s needs and the surface type. Understanding vinyl types, thickness, and colors helps make the best pick.
Types Of Vinyl Films
Cast vinyl is thin and flexible. It molds well around curves and corners. This type lasts longer and resists heat and sunlight. Calendered vinyl is thicker and stiffer. It works best on flat surfaces. It is cheaper but less durable on curves. Choose cast vinyl for sharp corners and complex shapes.
Thickness And Flexibility
Thin vinyl bends easier around corners. It reduces bubbles and wrinkles. Thicker vinyl is tougher but harder to shape. Balance thickness with flexibility for smooth wrapping. A flexible vinyl film saves time and effort. It also improves the final look of the wrap.
Color And Finish Options
Vinyl comes in many colors and finishes. Glossy finishes shine and highlight curves. Matte finishes hide fingerprints and glare. Satin finishes offer a soft, smooth look. Choose a finish that matches your style and needs. Dark colors can hide dirt better than light ones.
Cutting Vinyl For Corners
Cutting vinyl for corners requires precision and care. Corners are tricky spots that need exact cuts to fit smoothly. Poor cutting can cause wrinkles or gaps. Proper cutting helps the vinyl wrap around corners neatly and last longer. This section covers key steps for cutting vinyl effectively.
Measuring Accurately
Start by measuring the corner carefully. Use a ruler or tape measure to get exact dimensions. Measure both sides of the corner and the angle. Write down the measurements before cutting. Accurate measuring prevents mistakes and waste. Always double-check measurements before you cut the vinyl.
Creating Relief Cuts
Relief cuts help the vinyl bend around corners without folding. Make small cuts along the edge of the vinyl. These cuts allow the vinyl to stretch and fit snugly. Space relief cuts evenly for a smooth finish. Avoid cutting too deep to prevent damage. Relief cuts make corner wrapping easier and cleaner.
Templates And Patterns
Use templates to guide your cutting. A paper or cardboard template matches the corner shape. Place the template on the vinyl and trace the outline. Templates reduce errors and save time. Patterns help you repeat cuts for multiple corners. This method ensures consistent and precise cuts every time.
Credit: www.vinylfrog.com
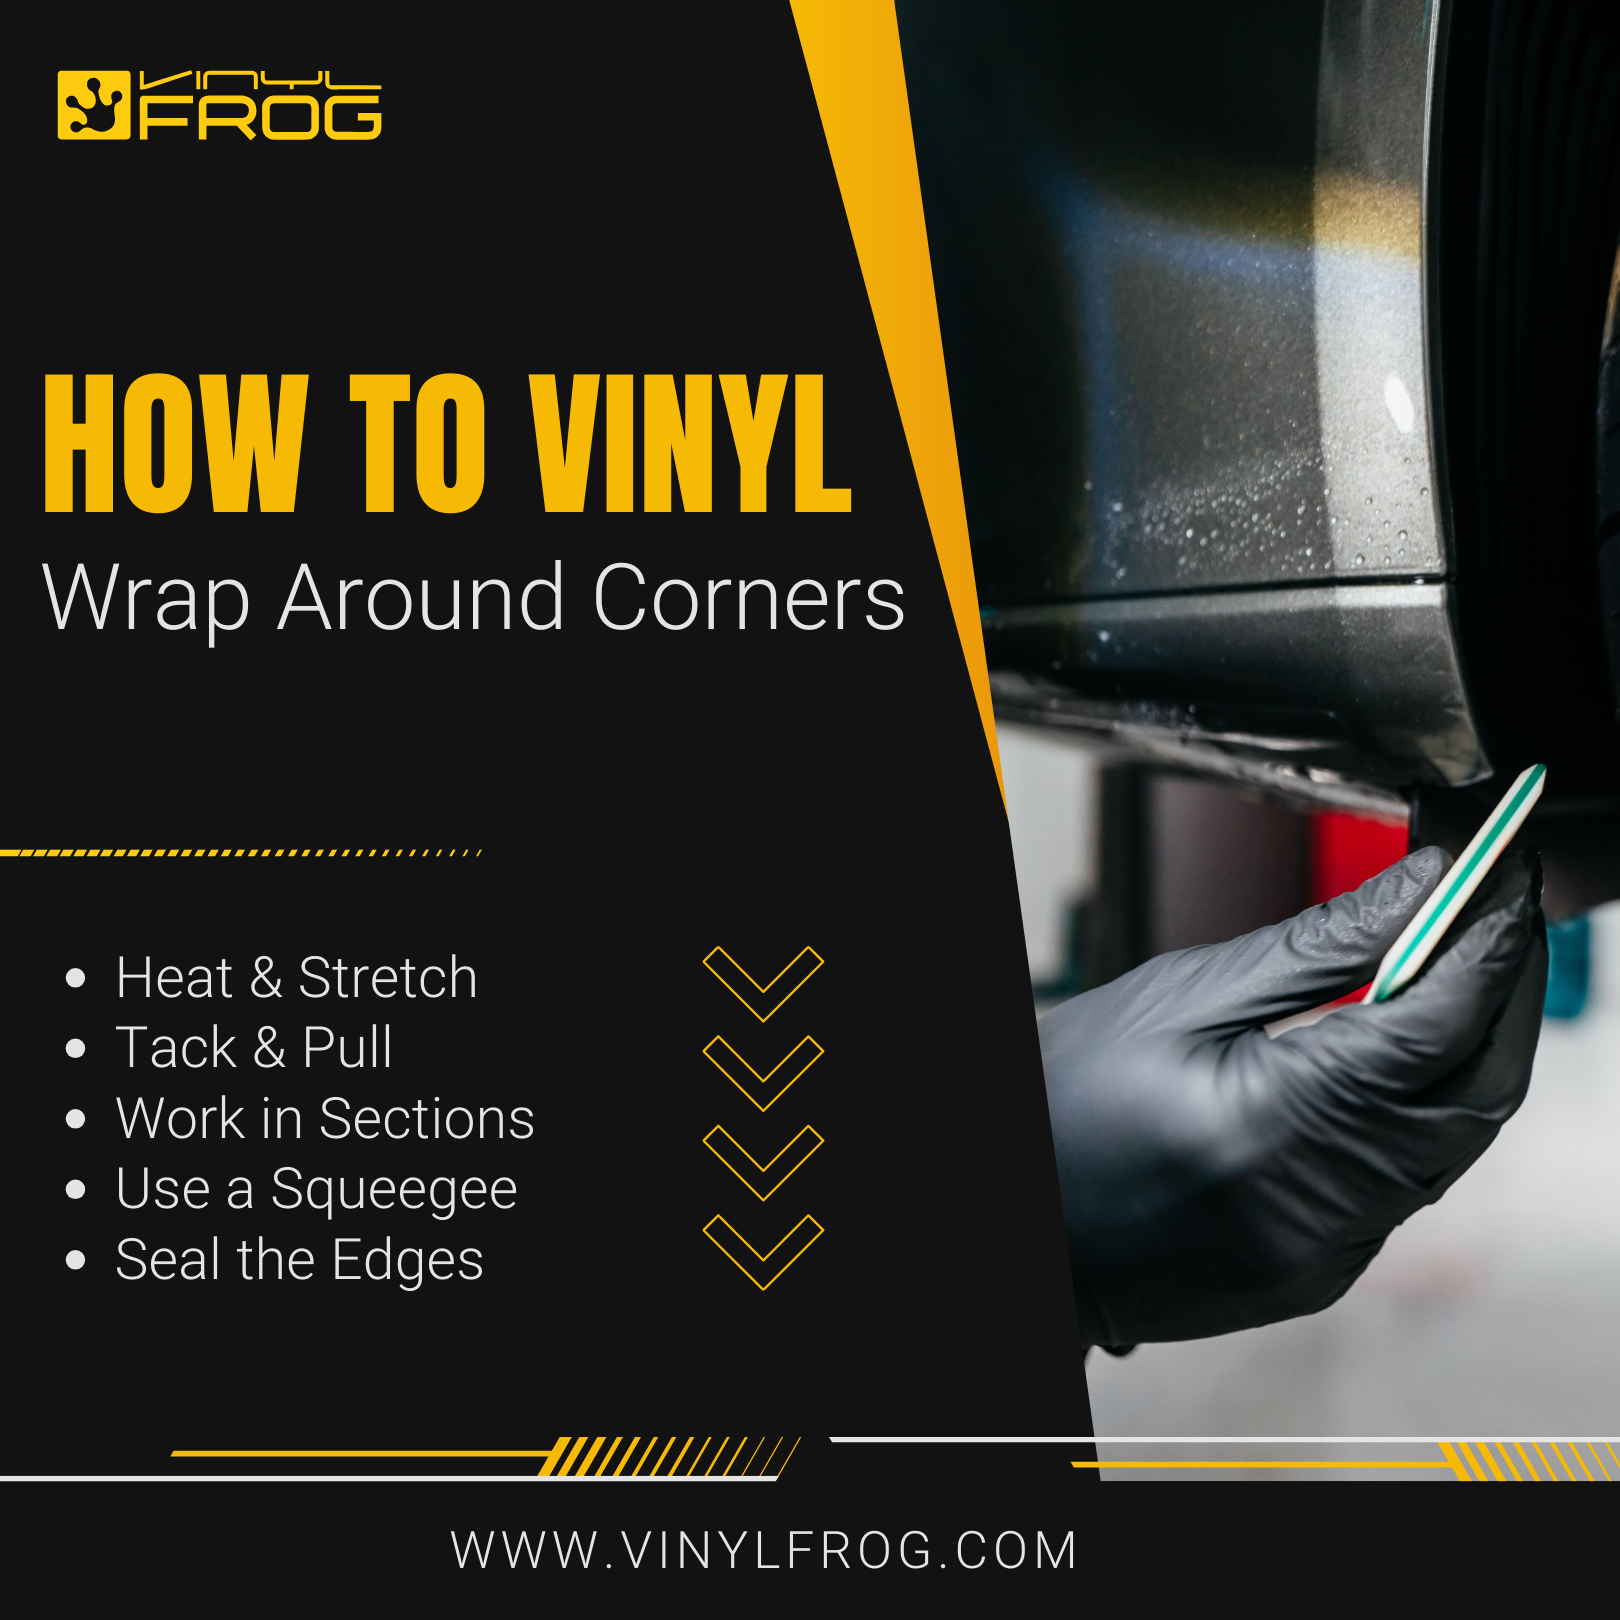
Techniques For Wrapping Corners
Wrapping corners with vinyl requires careful technique. Corners are tricky because the vinyl must stretch without tearing. The goal is a smooth, clean finish that looks like one piece. Using the right methods helps avoid wrinkles and bubbles. This section covers essential techniques for wrapping corners well.
Heat Application Tips
Heat makes vinyl soft and flexible. Use a heat gun on low to medium setting. Move the heat gun evenly over the vinyl. Avoid holding heat in one spot too long. Too much heat can burn the vinyl or cause shrinkage. Warm vinyl stretches easily around corners without damage.
Stretching And Aligning
Stretch vinyl gently around the corner. Pull it slowly to avoid ripping. Align the edges carefully before pressing down. Work from the center out to edges. Use your fingers or a squeegee to smooth the vinyl. Proper alignment prevents gaps and uneven edges.
Avoiding Air Bubbles And Wrinkles
Press vinyl firmly to remove air bubbles. Use a squeegee or soft cloth to push bubbles out. Start at the center and move outward. Small wrinkles can be fixed with gentle heat and pressing. Take your time to smooth every inch. This ensures a flat, flawless surface.
Handling Different Corner Types
Wrapping corners with vinyl requires different techniques for each corner type. Each corner shape affects how the vinyl should be cut and applied. Understanding these differences helps achieve a smooth, professional look. Let’s explore how to handle inside, outside, and rounded corners effectively.
Inside Corners
Inside corners are where two walls or surfaces meet inward. Start by cutting the vinyl slightly longer than the corner. Carefully press the vinyl into the corner using a squeegee or your fingers. Stretch the vinyl gently to avoid bubbles. Trim any extra vinyl close to the edge. Make sure the vinyl lays flat without wrinkles.
Outside Corners
Outside corners stick out, like edges of cabinets or frames. Cut the vinyl with a small overlap over the corner. Wrap the vinyl around the edge carefully. Use a heat gun to soften the vinyl for better bending. Press the vinyl firmly to keep it in place. Trim any excess vinyl for a clean finish.
Rounded Corners
Rounded corners need extra care because of their curves. Heat the vinyl to make it flexible. Stretch the vinyl gently over the curve. Work slowly to avoid creases or bubbles. Use a squeegee to smooth the vinyl along the round shape. Trim any excess vinyl neatly after applying.

Credit: www.reddit.com
Finishing Touches
Finishing touches are key to a clean, professional look. They help the vinyl wrap stay strong and smooth. Small details make a big difference in the overall result. Focus on trimming, sealing, and caring for your wrap to keep it perfect.
Trimming Excess Vinyl
Use a sharp blade to cut away extra vinyl. Cut close to the edge but avoid cutting the surface below. Take your time to prevent mistakes. Clean cuts prevent peeling and wrinkles later.
Sealing Edges
Press edges firmly to make the vinyl stick well. Use a heat gun on low heat to soften the vinyl slightly. This helps it grip corners and curves better. Seal edges with a plastic squeegee or your fingers.
Post-wrap Care
Let the vinyl set for at least 24 hours. Avoid washing or touching the wrap during this time. Keep the wrapped area away from extreme heat or cold. Clean gently with mild soap and water when needed.
Common Mistakes To Avoid
Wrapping corners with vinyl can be tricky. Many beginners make mistakes that hurt the final look. Avoiding these common errors saves time and gives a smooth finish.
Rushing The Process
Take your time with each step. Rushing causes bubbles and wrinkles. Vinyl needs gentle stretching and careful smoothing. Patience helps the vinyl stick well and look neat.
Using Incorrect Tools
Use the right tools for wrapping corners. A plastic squeegee, sharp knife, and heat gun work best. Wrong tools can tear the vinyl or leave marks. Quality tools improve the finish and ease the work.
Ignoring Surface Imperfections
Clean and smooth the surface before wrapping. Dirt and bumps show through the vinyl. Sand rough areas and wipe dust away. A flat surface helps the vinyl stick evenly.

Credit: www.youtube.com
Frequently Asked Questions
How Do You Prepare Corners Before Wrapping With Vinyl?
Clean the corner surface thoroughly to remove dust and grease. Use a primer if needed. This ensures better vinyl adhesion and a smooth wrap.
What Tools Are Essential For Wrapping Corners With Vinyl?
You need a squeegee, utility knife, heat gun, and a measuring tape. These tools help in precise application and smooth corner wrapping without air bubbles.
Can Vinyl Wrap Be Applied To Sharp Corners?
Yes, but it requires careful heating and stretching. Heat the vinyl gently to make it flexible. Avoid overstretching to prevent tearing or bubbling.
How Do You Avoid Wrinkles On Vinyl-wrapped Corners?
Use a heat gun and squeegee to smooth the vinyl gradually. Stretch the vinyl evenly and work from the center outwards to eliminate wrinkles.
Conclusion
Wrapping corners with vinyl takes patience and care. Follow each step slowly and carefully. Smooth out bubbles and press firmly for best results. Use sharp tools to trim edges neatly. Practice makes the process easier over time. Your vinyl wrap will look clean and professional.
Enjoy your refreshed surface with confidence. Keep these tips handy for future projects.