Are you unsure about how to measure your disc brake rotor size? Getting the right size is crucial for your bike’s safety and performance.
If your rotors are too big or too small, you could face braking issues that put you at risk. Don’t worry—this guide will walk you through simple steps to measure your rotor accurately. By the end, you’ll know exactly what size fits your bike, so you can ride confidently and safely.
Keep reading to learn how easy it is to get this right.
Disc Brake Rotor Basics
Disc brake rotors are key parts of a bike’s braking system. They slow down the wheel by creating friction with the brake pads. Knowing the basics of disc brake rotors helps in choosing the right size and type for your bike. This ensures better stopping power and safety.
Types Of Rotors
There are mainly two types of disc brake rotors: solid and ventilated. Solid rotors are flat and simple. They work well for casual riding. Ventilated rotors have holes or slots to help cool the brake. These rotors perform better during long or hard braking.
Some rotors also come with a floating design. This means the rotor can move slightly. It helps reduce warping and improves braking feel. Different bikes need different rotor types based on use and terrain.
Common Rotor Sizes
Rotor sizes vary by diameter. Common sizes are 140 mm, 160 mm, 180 mm, and 203 mm. Smaller rotors suit light riders and smooth trails. Larger rotors offer more stopping power for heavy riders or steep descents.
Choosing the right rotor size depends on riding style and bike type. Always check your bike’s specifications before buying a rotor. Proper size ensures safe and efficient braking.

Credit: www.researchgate.net
Tools Needed For Measurement
Measuring the disc brake rotor size requires some basic tools. These tools help you get an accurate size for your brake rotor. Accuracy matters because the wrong size can cause problems while riding. Use tools that are easy to handle and give precise measurements.
Measuring Tape Or Ruler
A measuring tape or ruler is the simplest tool to check rotor size. Use a metal tape for better accuracy. Place it across the rotor from one edge to the other. Measure the diameter in millimeters or inches. This gives you a quick idea of the rotor size.
Caliper Use
A caliper is more precise than a tape or ruler. Use a digital or manual caliper to measure the rotor diameter. Open the caliper jaws and place them across the rotor edges. Read the measurement shown on the caliper scale. This tool also measures rotor thickness accurately.
Other Helpful Tools
Sometimes, a depth gauge helps measure rotor thickness at different points. A torque wrench may be useful when reinstalling the rotor. Gloves protect your hands from sharp edges. Clean cloth wipes dirt off the rotor for clear measurements.
Measuring Rotor Diameter
Measuring the rotor diameter is a key step in choosing the right disc brake parts. The rotor diameter affects braking power and fit. Knowing the exact size helps avoid mistakes when replacing or upgrading.
Locate The Outer Edge
First, find the outer edge of the rotor. This is the round metal part that the brake pads press against. Make sure the rotor is clean so you can see the edge clearly. Dirt or rust can hide the true edge and cause wrong measurements.
Measure Across The Center
Use a ruler or tape measure. Place it across the rotor, passing through the center hole. Measure from one outer edge straight across to the opposite outer edge. This distance is the rotor diameter, usually in millimeters.
Tips For Accurate Reading
Keep the measuring tool level and steady. Take the measurement two or three times for accuracy. Avoid measuring on a curved or worn part of the rotor. Write down the size immediately to prevent forgetting it.
Checking Rotor Thickness
Checking rotor thickness is a key step in bike maintenance. Thin rotors can cause poor braking and safety risks. Measuring thickness helps decide if the rotor is still good or needs replacement.
Minimum Thickness Requirements
Each rotor has a minimum thickness limit. This limit is set by the manufacturer. It usually ranges from 1.5 mm to 2.0 mm. Using a rotor thinner than this can lead to brake failure. Always check the rotor’s edge or user manual for this number.
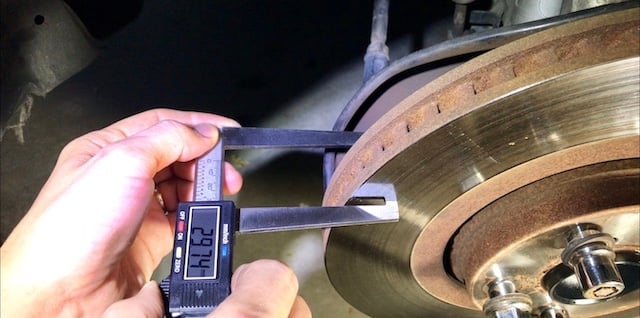
Using A Caliper For Thickness
A caliper is a precise tool to measure rotor thickness. Place the caliper jaws on the rotor’s braking surface. Take the reading carefully, avoiding dirt or rust. Measure at several spots to find the thinnest area. This ensures accuracy and safety.
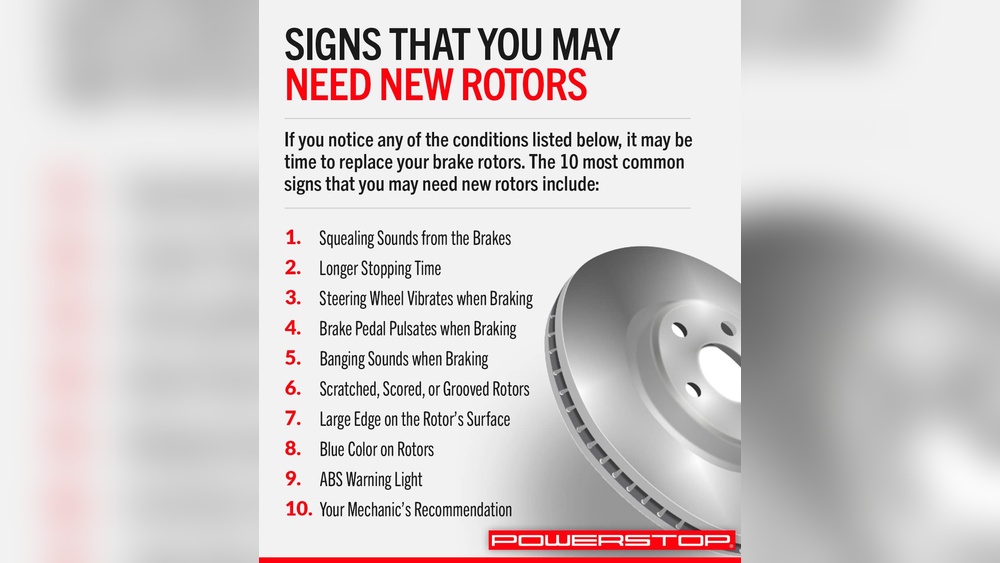
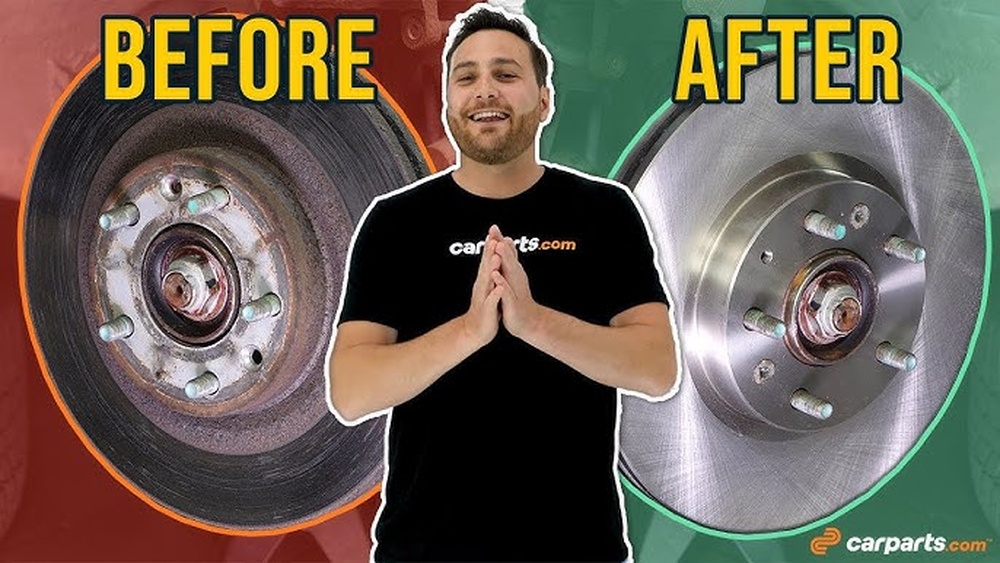
When To Replace The Rotor
Replace the rotor if thickness is below the minimum. Also, replace if you see deep grooves or cracks. Warped rotors cause vibration and reduce brake power. Regular checks keep your bike safe and brakes strong.
Measuring Rotor Bolt Pattern
Measuring the rotor bolt pattern is a key step in finding the right disc brake rotor for your bike or vehicle. The bolt pattern determines how the rotor attaches to the hub. Knowing this pattern helps you avoid buying parts that do not fit. This section explains how to measure the rotor bolt pattern correctly.
Counting Bolt Holes
Start by counting the number of bolt holes on the rotor. Most rotors have between 4 and 6 holes. Count carefully and note the total. This number tells you the bolt count, which is the first part of the bolt pattern.
Measuring Bolt Circle Diameter
The bolt circle diameter (BCD) is the distance across the circle formed by the bolt holes. Use a ruler or caliper to measure from the center of one bolt hole to the center of the bolt hole directly opposite. This distance is the BCD and is usually measured in millimeters.
Ensuring Compatibility
Match the bolt count and BCD to your hub’s specifications. Check the rotor and hub manuals or product descriptions. Using the correct bolt pattern ensures the rotor fits securely and works safely. Do not guess or use parts with different bolt patterns.
Recording And Comparing Measurements
Recording and comparing the measurements of your disc brake rotor is important. It helps confirm the correct rotor size for your bike. Accurate records prevent mistakes and ensure safe riding. This step makes it easier to match parts later on.
Documenting Your Results
Write down the rotor’s diameter in millimeters. Note the thickness if possible. Use a clear and simple format. Keep the data organized for easy reference. Taking photos with a ruler can help too. Store all details in one place. This saves time when you check again.
Matching With Manufacturer Specs
Compare your measurements with official specs from the bike maker. Check the user manual or website for exact rotor sizes. Confirm the diameter matches the recommended size. Look for thickness limits to avoid brake issues. Matching specs ensures proper fit and function. It also helps avoid buying wrong parts. Trust only reliable sources for these details.
Common Measurement Mistakes
Measuring disc brake rotor size seems simple but many make common mistakes. These errors cause wrong measurements, leading to poor brake performance. Paying attention to detail helps get accurate results. Below are two common mistakes to avoid for precise rotor size measurement.
Avoiding Parallax Errors
Parallax error happens when you do not look straight at the measurement scale. Viewing from an angle makes the reading incorrect. Always position your eyes directly above the ruler or caliper. This keeps the measurement true and reduces mistakes.
Use a flat surface and steady the rotor before measuring. Take your time to check the position of your eyes. Small shifts can change the reading by a few millimeters. These small errors affect brake fit and safety.
Checking For Rotor Warping
Warped rotors give false size readings. Warping bends the rotor out of shape. This changes the diameter and thickness in some spots. Measure at multiple points around the rotor edge to spot warping.
Spin the rotor slowly and watch for wobbling. A rotor that moves side to side is warped. Warped rotors need replacement or resurfacing. Measuring a warped rotor can lead to wrong rotor size choice.

Credit: alconkits.com
Credit: www.buybrakes.com
Frequently Asked Questions
What Tools Do I Need To Measure Rotor Size?
You need a ruler or caliper to measure rotor size accurately. Ensure the tool measures in millimeters for precision. Measuring the diameter across the rotor’s center gives the exact size. This helps choose compatible brake pads and ensure safety.
How To Measure Disc Brake Rotor Diameter?
Measure the diameter by placing the ruler across the rotor’s center. Ensure you measure from one edge to the opposite edge. Use millimeters for accuracy. This diameter determines the rotor size and compatibility with your bike or vehicle.
Why Is Rotor Size Important For Braking?
Rotor size affects braking power and heat dissipation. Larger rotors provide better stopping power and cooling. Choosing the correct size ensures optimal brake performance and safety. Incorrect sizing can cause poor braking or damage.
Can I Use A Tape Measure For Rotor Size?
A tape measure can work but may lack precision. For best results, use a caliper or rigid ruler. Accurate measurement ensures proper rotor fit and brake efficiency. Avoid flexible tools that may bend or cause errors.
Conclusion
Measuring disc brake rotor size is simple with the right steps. Use a ruler or tape to find the diameter. Check the rotor’s edge to edge carefully. Knowing the correct size helps keep your bike safe. It also improves how well your brakes work.
Take your time and measure twice for accuracy. This small task makes a big difference in riding comfort. Keep your bike ready and enjoy every ride with confidence.