
Are your brakes making strange noises or not stopping as smoothly as before? If so, it might be time to change your brakes and rotors.
Knowing how to do this yourself can save you money and give you confidence in your car’s safety. In this guide, you’ll learn simple, step-by-step instructions that anyone can follow. By the end, you’ll feel ready to tackle the job and keep your vehicle running safely.
Let’s get started and make sure your brakes are working their best!
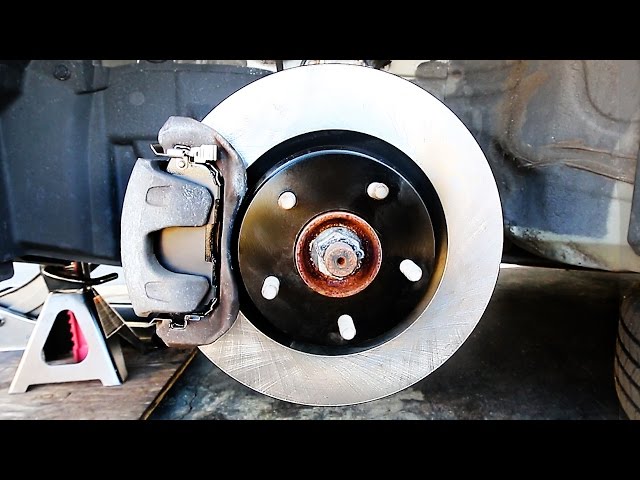
Credit: www.youtube.com
Tools And Materials Needed
Changing brakes and rotors requires specific tools and materials. Having the right items makes the job easier and safer. This guide covers everything needed to complete the task efficiently.
Basic Hand Tools
Start with basic hand tools like a lug wrench to remove wheel nuts. A socket set helps to take off caliper bolts. A ratchet and breaker bar provide extra force when needed. Don’t forget a flat-head screwdriver to pry off clips or covers.
Jack And Jack Stands
A hydraulic jack lifts the car safely off the ground. Use sturdy jack stands to support the vehicle securely. Never rely on the jack alone for safety. Proper support prevents accidents during the brake change.
Brake Cleaner And Rags
Brake cleaner removes dust and grease from parts. It helps keep the new brakes clean and working well. Use clean rags or paper towels to wipe surfaces dry. Clean parts improve brake performance and safety.
New Brake Pads And Rotors
Choose brake pads and rotors that fit your car model. Quality parts ensure better stopping power and longer life. Check the parts before starting to avoid delays. Always replace pads and rotors in pairs for balance.
Brake Grease And Lubricants
Brake grease reduces noise and helps moving parts work smoothly. Apply it on the back of brake pads and caliper pins. Use lubricants designed for brake systems only. This prevents damage and keeps brakes quiet.
Torque Wrench
A torque wrench tightens bolts to the correct pressure. Proper torque avoids loose or overly tight fasteners. Follow the manufacturer’s torque specifications for safety. This tool ensures a secure and reliable brake setup.

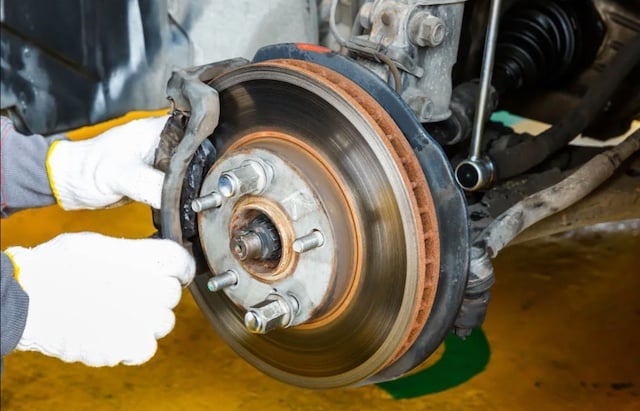
Credit: www.wikihow.com
Preparing Your Vehicle
Start by parking your vehicle on a flat surface and using wheel chocks. Gather all tools needed to remove the wheels and access the brakes safely.
Safety Precautions
Start by parking your car on a flat surface. Use the parking brake to keep it steady. Wear gloves and safety glasses to protect yourself. Keep a fire extinguisher nearby. Avoid loose clothing that can get caught in parts. Make sure your tools are clean and in good condition.
Lifting The Car
Find the right lifting point under your vehicle. Check your car’s manual for guidance. Use a strong jack to lift the car slowly. Place jack stands under the car for extra support. Never rely only on the jack to hold the car up. Make sure the car is stable before working underneath.
Removing The Wheel
Loosen the lug nuts before lifting the car if possible. Use a wrench to turn them counterclockwise. Remove the lug nuts fully once the car is raised. Pull the wheel straight off the hub. Set the wheel aside in a safe place. Now, you can access the brakes and rotors easily.
Removing Old Brakes And Rotors
Removing old brakes and rotors is the first step in a brake replacement. It clears the way for new parts to work well. This process needs care and the right tools. Taking off the old parts helps check for damage or wear. Follow each step closely to avoid problems later.
Taking Off The Brake Caliper
Start by loosening the bolts holding the brake caliper. Use a wrench to remove them carefully. Hang the caliper safely to avoid strain on the brake hose. Do not let the caliper hang by the hose. This step gives clear access to the brake pads and rotor.
Removing Brake Pads
Next, slide the brake pads out of their slots. They may be tight, so apply gentle force. Check the pads for cracks or heavy wear. Removing old pads helps prepare for new ones to fit properly. Keep track of any clips or pins for reuse.
Detaching The Rotor
Finally, remove the rotor from the wheel hub. It might stick due to rust or dirt. Tap the rotor lightly with a rubber mallet to loosen it. Clean the hub surface before placing a new rotor. This step ensures smooth wheel rotation and brake performance.
Installing New Rotors
Installing new rotors is a key step when changing brakes. Proper installation ensures smooth braking and safety. Follow each step carefully for the best results.
Cleaning The Hub
Start by cleaning the hub surface. Remove dirt, rust, and old grease. Use a wire brush or sandpaper for this. A clean hub helps the rotor sit flat. This prevents wobbling and uneven wear.
Positioning The Rotor
Place the new rotor on the hub carefully. Align the holes with the wheel studs. Make sure the rotor sits flush against the hub. Use a few lug nuts to hold the rotor in place. This keeps it steady while you work.
Installing New Brake Pads
Installing new brake pads is a key step in changing brakes and rotors. New pads help your car stop safely and smoothly. This process needs care and attention to detail. Follow the steps to fit the pads correctly and keep your brakes working well.
Compressing The Caliper Piston
Start by pushing the caliper piston back into its place. Use a C-clamp or brake tool for this. This makes room for the new, thicker pads. Do it slowly and carefully to avoid damage. Make sure the piston is fully compressed before moving on.
Placing New Pads
Take the new brake pads and place them in the caliper bracket. Match the pads to the old ones to check the position. The friction side should face the rotor. Press the pads firmly but gently into place. They should fit snugly without moving around.
Reattaching The Caliper
Put the caliper back over the new brake pads and rotor. Align it with the mounting holes on the bracket. Tighten the bolts to secure the caliper in place. Check for any loose parts and make sure everything fits well. Your new pads are now installed and ready for use.
Credit: www.buybrakes.com
Reassembling And Finishing
Reassembling and finishing the brake and rotor replacement is a key step. It ensures your vehicle is safe and ready for the road. Careful attention here prevents problems later.
Putting The Wheel Back
First, place the wheel onto the hub. Align the holes with the studs. Hand-tighten the lug nuts to hold the wheel in place. Avoid using a power tool yet. This helps prevent cross-threading the nuts.
Lowering The Car
Use the jack to slowly lower the car back to the ground. Once the car rests on the tires, remove the jack. The vehicle’s full weight will now rest on the wheels. This step is important before tightening the lug nuts fully.
Testing The Brakes
Press the brake pedal several times to set the brake pads. This ensures the pads contact the rotors properly. Take the car for a slow test drive. Listen for noises and check brake response. Good brake feel means the job is done right.
Tips For Maintaining Brakes
Brakes are one of the most important parts of any vehicle. Keeping them in good shape helps keep you safe on the road. Simple care steps extend brake life and improve performance. Small habits make a big difference.
Here are some easy tips for maintaining brakes. These tips keep your brakes working well and stop problems early.
Check Brake Pads Regularly
Brake pads wear down with use. Check them every few months. Thin pads need replacement. Thick pads work better and last longer.
Listen For Unusual Noises
Squealing or grinding sounds signal brake issues. Don’t ignore these noises. Early fixes prevent costly repairs later. Pay attention to your brakes’ sound.
Keep Rotors Clean
Rotors can get dirty or rusty. Clean them gently with brake cleaner. Dirt and rust reduce braking power. Clean rotors help brakes work smoothly.
Use Brake Fluid Properly
Brake fluid transfers force to brakes. Check fluid levels often. Replace old or dirty fluid. Fresh fluid keeps brakes responsive and safe.
Avoid Hard Braking
Sudden stops wear brakes faster. Slow down gradually. Smooth braking saves brake parts. It also keeps you safer on the road.
Frequently Asked Questions
How Often Should I Change Brake Pads And Rotors?
Brake pads typically need replacement every 30,000 to 70,000 miles. Rotors last longer but should be checked for wear regularly. Replace rotors if they are warped or below minimum thickness to ensure safe braking performance.
What Tools Are Required To Change Brakes And Rotors?
You need a jack, lug wrench, socket set, C-clamp, and brake cleaner. Also, wear safety gloves and eye protection. These tools help safely remove wheels, calipers, and old brake components for replacement.
Can I Change Brakes And Rotors Myself Safely?
Yes, with the right tools and knowledge, DIY brake replacement is possible. Follow the vehicle manual and safety guidelines carefully. If unsure, consult a professional to avoid safety risks.
How Do I Know If Rotors Need Replacing?
Look for signs like vibrations, squealing, or visible grooves on rotors. Measure rotor thickness; replace if below manufacturer’s minimum. Damaged rotors reduce braking efficiency and increase stopping distance.
Conclusion
Changing brakes and rotors is a useful skill for car care. It saves money and keeps your vehicle safe. Follow each step carefully and take your time. Use the right tools and parts for the best results. Check your work before driving to avoid problems.
Regular brake maintenance helps your car stop well and lasts longer. Practice makes the process easier over time. Stay safe and confident while working on your brakes.


