
If your brakes are making strange noises or not performing like they used to, the problem might be glazed brake rotors. You might wonder, “How do you deglaze brake rotors?”
Fixing this issue can bring back smooth, quiet braking and improve your safety on the road. You’ll discover simple, effective steps to restore your rotors without spending a fortune. Keep reading to learn how you can get your brakes working like new again—quickly and easily.
Signs Of Glazed Brake Rotors
Glazed brake rotors cause serious issues with your vehicle’s braking system. Over time, the brake pads and rotors can develop a smooth, shiny surface. This shiny layer reduces friction, making it hard to stop the car quickly. Recognizing the signs early can save you from costly repairs and keep your driving safe.
Knowing the signs of glazed rotors helps you decide when to clean or replace them. Pay attention to how your brakes feel and sound during driving. These clues reveal the condition of your brake rotors and pads.
Common Symptoms
One common symptom is a high-pitched squealing noise when braking. You might also feel a vibration or shudder in the brake pedal. The brake pedal may feel less responsive or softer than usual. The car may take longer to stop, even with normal pressure on the brake pedal. Look for a shiny, smooth surface on the rotor itself, which means glazing has occurred.
Impact On Braking Performance
Glazed rotors reduce the grip between the brake pads and rotors. This loss of friction makes it harder to stop the vehicle quickly. Braking distance increases, raising the risk of accidents. The car may pull to one side during braking. Overall brake control feels weaker, affecting driving confidence and safety.
Credit: www.autozone.com
Tools And Materials Needed
Deglazing brake rotors requires the right tools and materials. Having everything ready helps the job go smoothly. It also keeps the process safe and effective. Below are the main tools and safety gear you need.
Essential Tools
A quality brake cleaner spray is a must to remove dirt and grease. Use a fine-grit sandpaper or a brake rotor honing tool to smooth the surface. A clean cloth helps wipe away residue. A jack and jack stands lift and secure the vehicle safely. You will also need a lug wrench to remove the wheels. A torque wrench is useful to tighten bolts to the right level.
Safety Gear
Wear safety glasses to protect your eyes from debris. Gloves keep your hands clean and safe from chemicals. Use a dust mask to avoid breathing brake dust. Dress in old clothes or coveralls to stay clean. Work in a well-ventilated area to avoid inhaling fumes. Safety first makes the job easier and prevents accidents.
Preparing Your Vehicle
Preparing your vehicle is the first step to safely deglaze brake rotors. Proper preparation helps avoid accidents and makes the process smoother. Take time to set up your car correctly before starting work on the brakes.
Lifting And Securing The Car
Park your car on a flat, hard surface. Apply the parking brake firmly. Use a jack to lift the car at the recommended lift points. Place jack stands under the car to support it securely. Never rely on the jack alone to hold the car up. Check that the car is stable before moving on.
Removing The Wheels
Loosen the lug nuts before lifting the car if possible. After the car is lifted and secure, remove the lug nuts completely. Carefully take the wheels off and set them aside. Keep the lug nuts safe for later use. Removing the wheels gives full access to the brake rotors for deglazing.
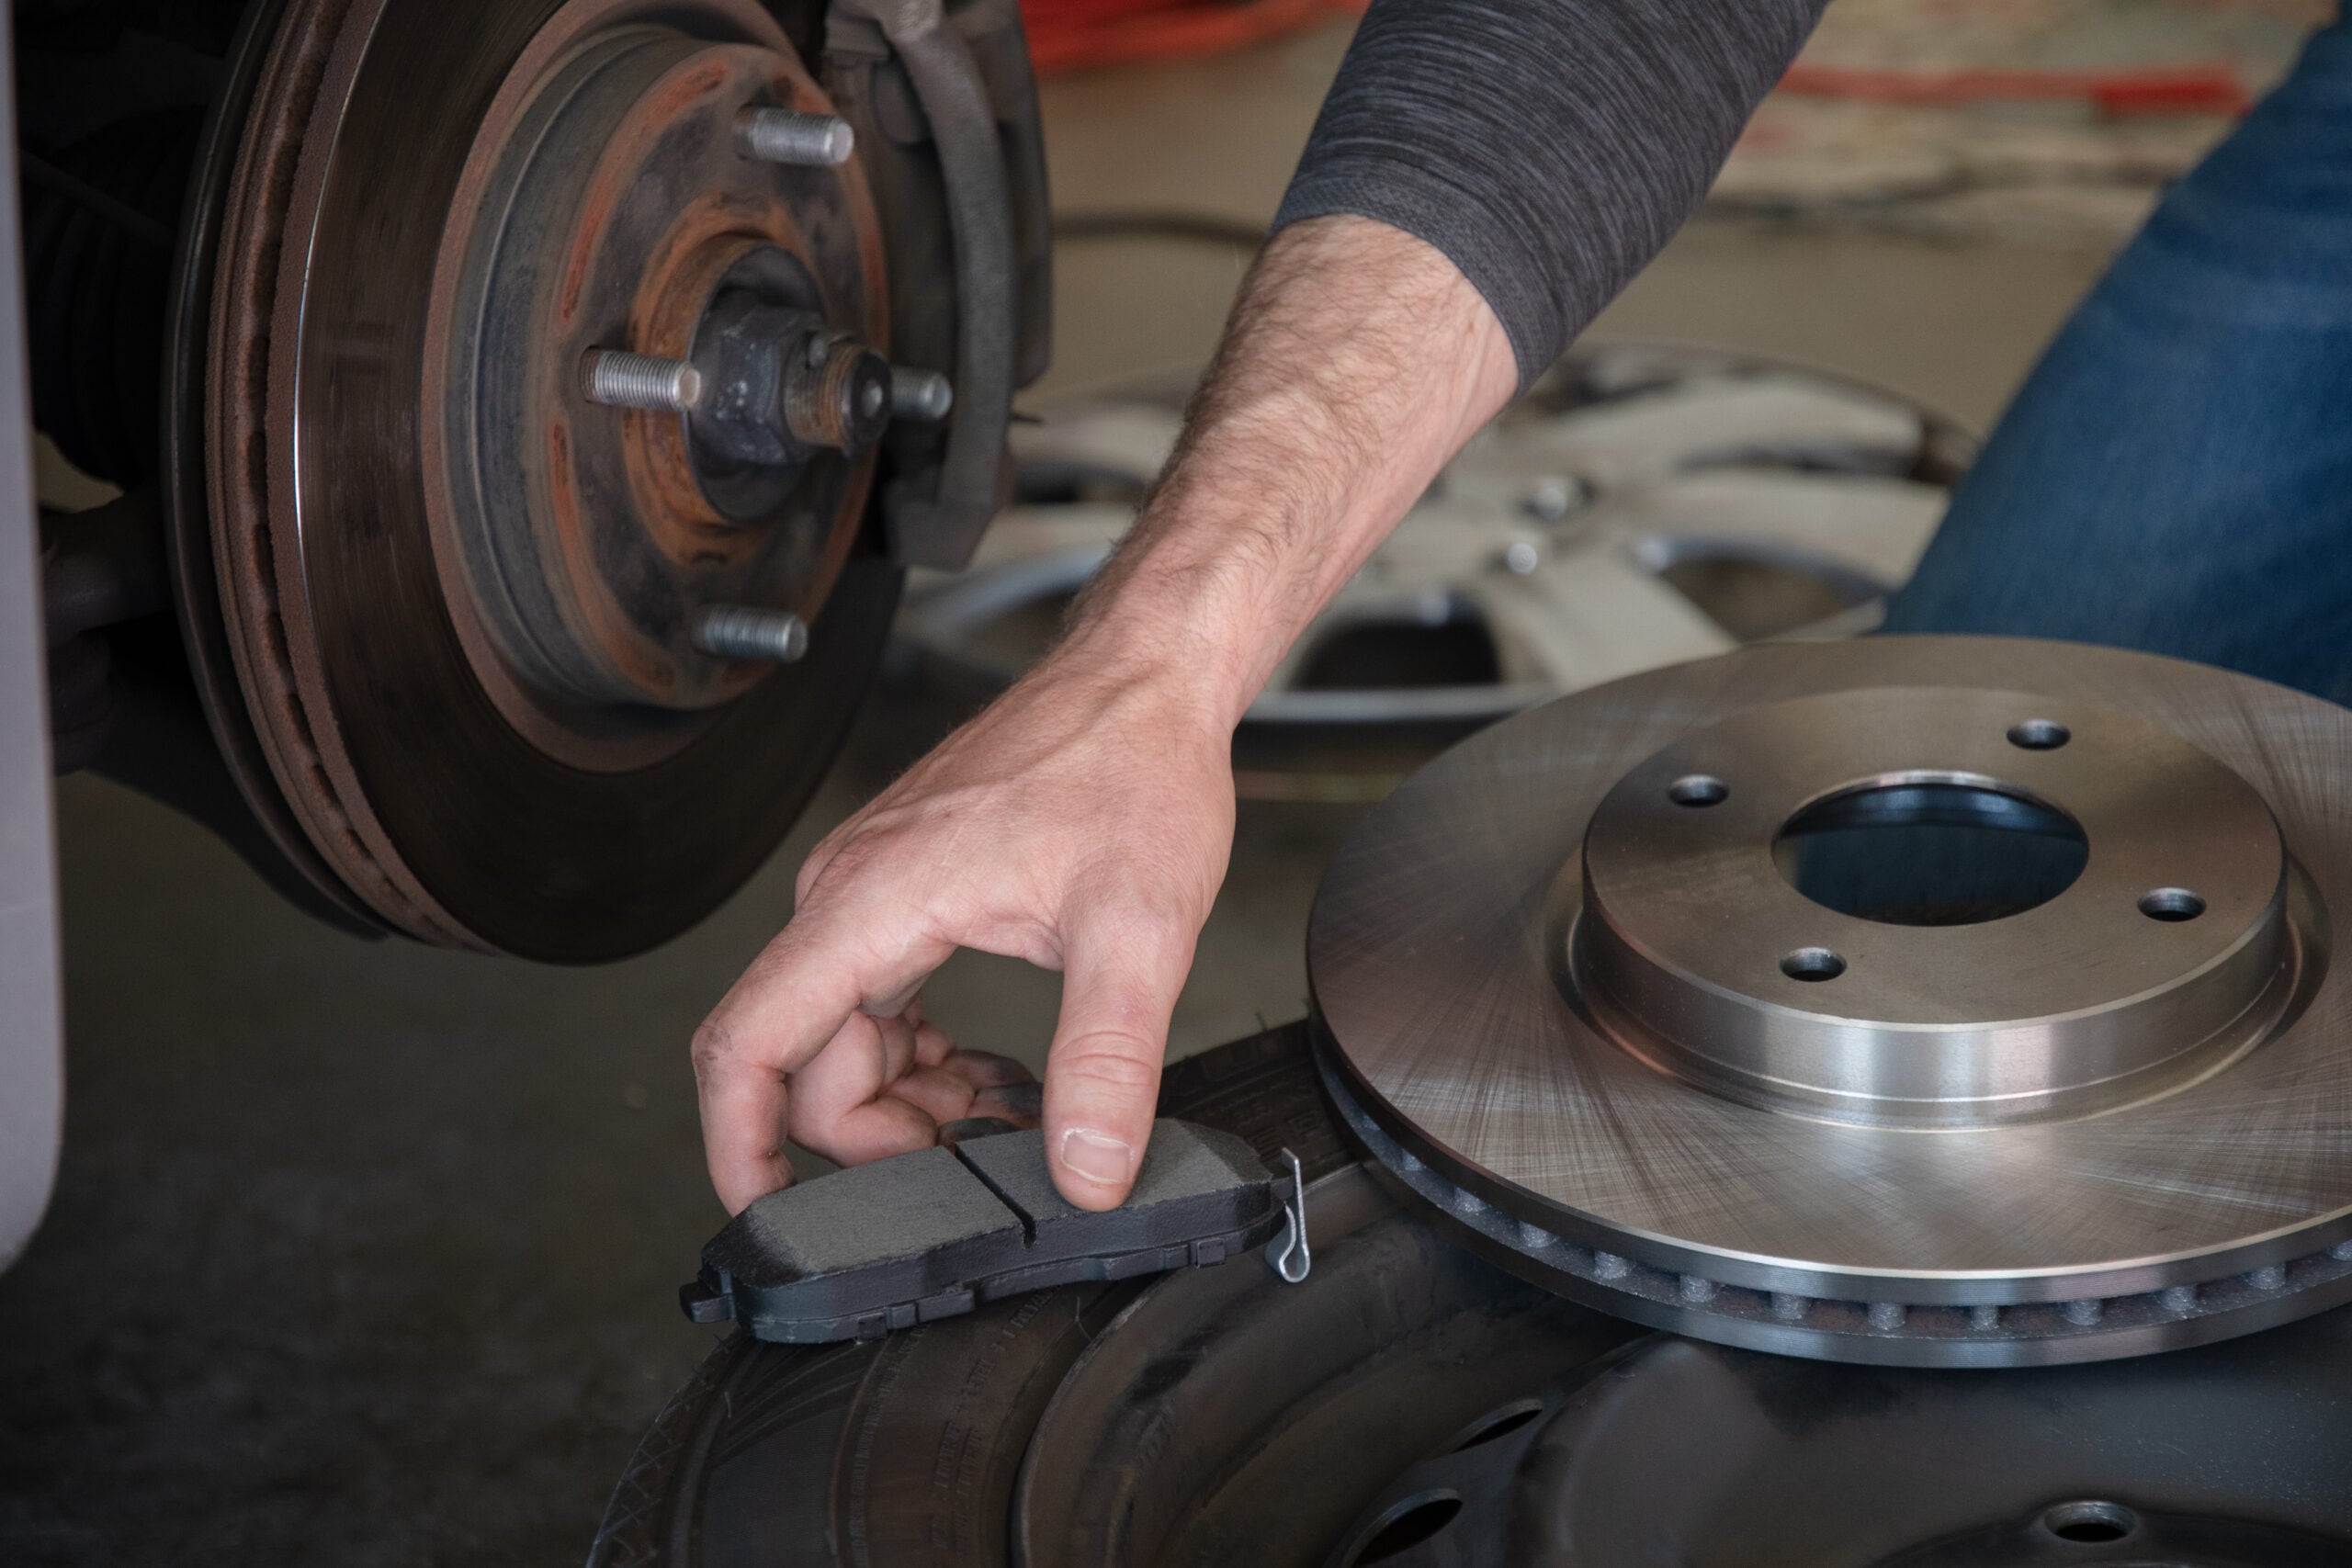
Cleaning The Brake Rotors
Brake rotors must be clean for the brakes to work well. Dirt and dust can cause noise and reduce stopping power. Cleaning the rotors helps remove harmful buildup. It also prevents uneven wear and extends rotor life.
Proper cleaning prepares the surface for smooth contact with brake pads. This step is key before deglazing the rotors. It ensures safety and better brake performance.
Removing Dirt And Debris
Start by wiping the rotors with a dry cloth. This removes loose dust and dirt. Use a soft brush to clear stubborn debris from hard-to-reach spots. Avoid using harsh tools that can scratch the surface. A clean rotor surface improves brake pad contact and stopping power.
Choosing The Right Cleaner
Select a cleaner made for brake parts. Brake cleaner sprays work best. They remove grease, oil, and brake dust quickly. Avoid household cleaners as they can damage the rotor. Spray the cleaner on the rotor and wipe it off with a clean cloth. Always follow safety instructions on the product label.
Methods To Deglaze Rotors
Deglazing brake rotors restores their smooth surface and improves braking. It removes the thin layer of glaze caused by heat and friction. This layer can reduce brake performance and cause noise. Several methods help remove this glaze effectively. Each method suits different tools and skill levels.
Using Sandpaper Or Abrasive Pads
Sandpaper or abrasive pads work well for light glazing. Choose fine-grit sandpaper, around 120 to 220 grit. Rub the rotor surface evenly in a circular motion. Avoid deep scratches by applying gentle pressure. Clean the rotor with brake cleaner after sanding. This method is simple and affordable for beginners.
Applying A Brake Lathe
A brake lathe cuts a thin layer from the rotor surface. It removes glaze and any uneven spots precisely. This tool requires skill and is common in professional shops. The rotor spins while the lathe blade shaves the surface. It creates a perfectly smooth finish for optimal braking. Rotors must have enough thickness to use this method.
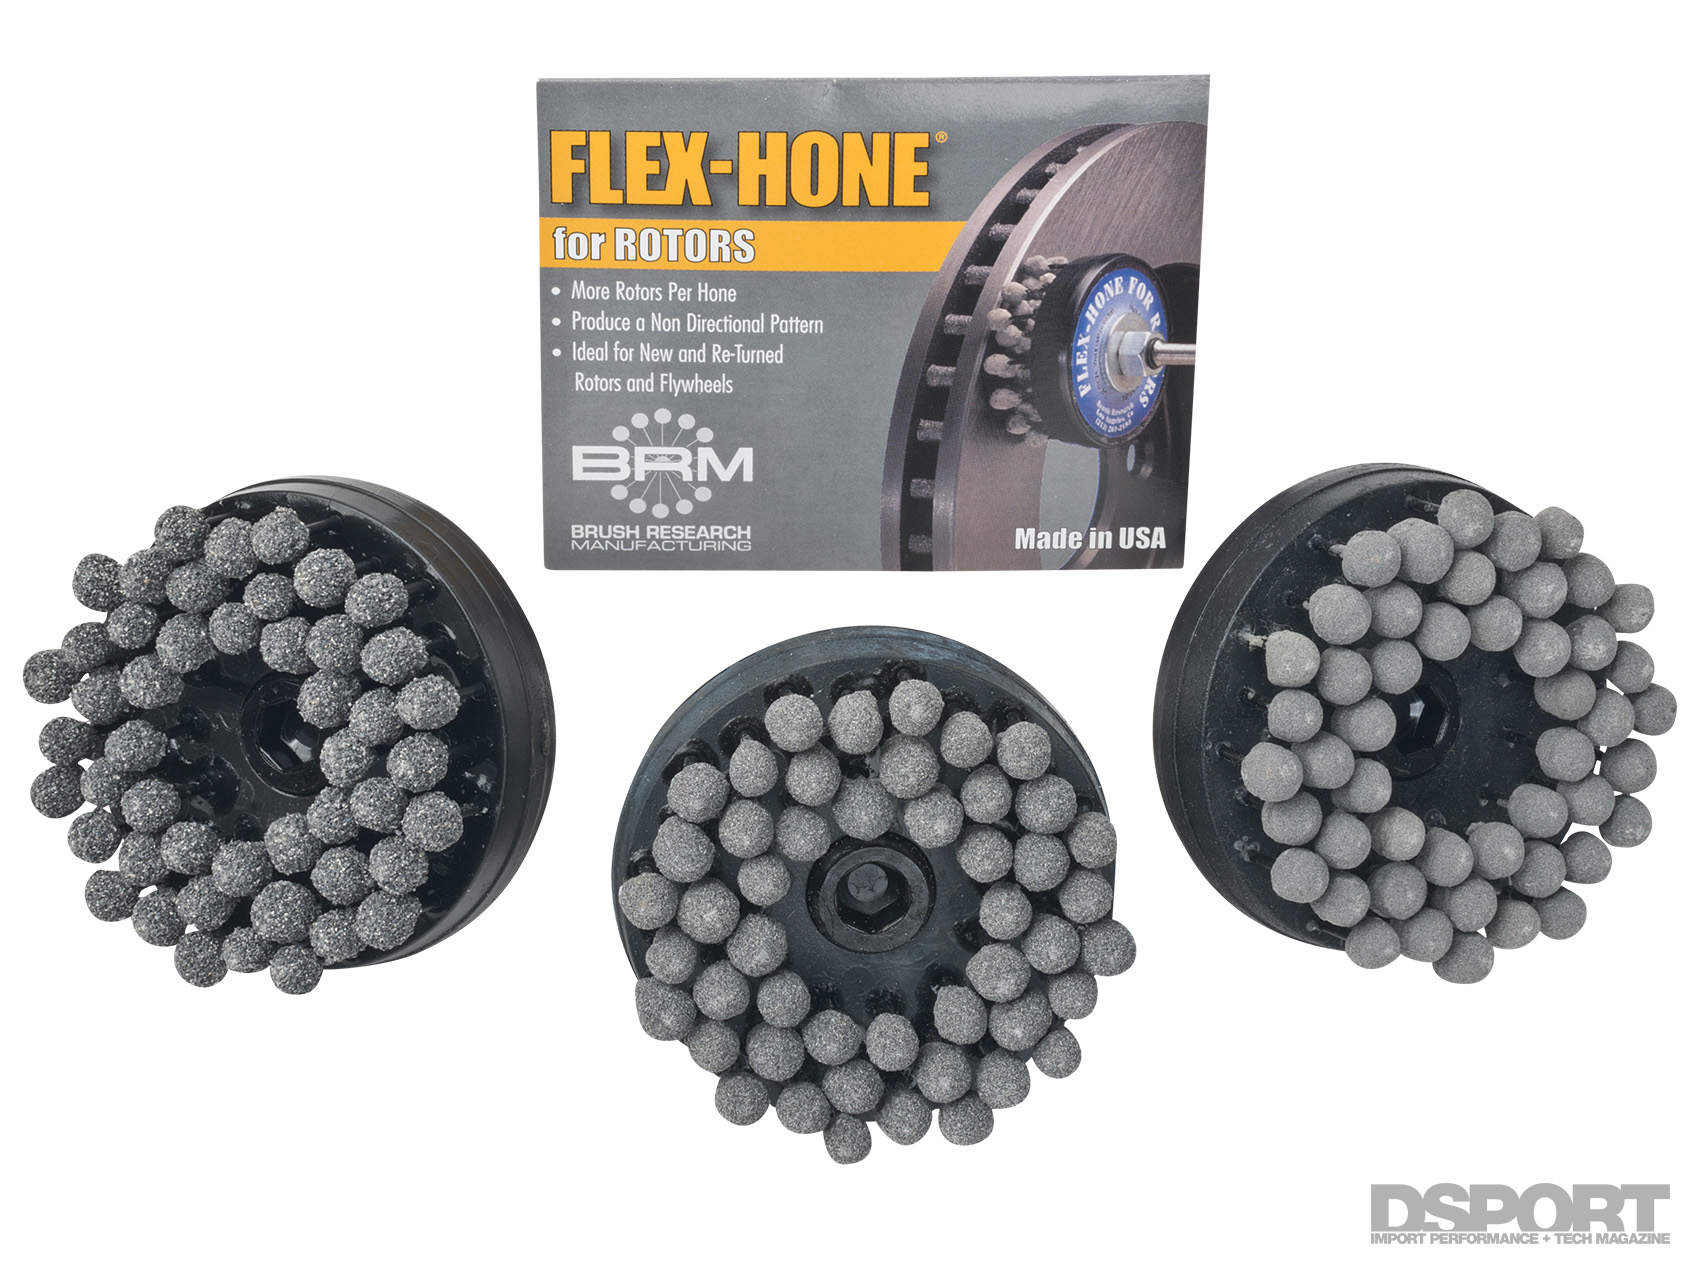
Alternative Diy Techniques
Some use grinding stones or wire brushes for deglazing. These tools help remove minor glazing quickly. Take care to avoid damaging the rotor surface. Another option is replacing rotors when damage is severe. Always check rotor condition before choosing a method. Safety gear like gloves and eye protection is necessary.

Credit: www.youtube.com
Reassembly And Final Checks
After deglazing the brake rotors, reassembly and final checks are crucial. These steps ensure the brakes work safely and smoothly. Take time to put everything back carefully. Double-check each part for a secure fit. This process helps avoid future brake problems and ensures better performance on the road.
Reinstalling Components
Start by reinstalling the brake caliper and pads. Align them properly with the rotor. Tighten all bolts to the manufacturer’s torque settings. Make sure the brake lines are connected without leaks. Replace any clips or pins that hold the pads. Check that the rotor spins freely without rubbing.
Testing Brake Performance
Press the brake pedal several times to build pressure. Listen for unusual noises like squeaks or grinding. Test the brakes at low speed in a safe area. The pedal should feel firm, not soft or spongy. If braking feels uneven, recheck the installation. Proper testing confirms the deglazing was successful.
Preventing Rotor Glazing
Preventing rotor glazing is important for safe and smooth braking. Glazing happens when brake rotors get too hot and develop a smooth, shiny surface. This reduces how well the brakes grip and can cause noise or vibration. Taking steps to avoid glazing helps keep the brake system working well and lasting longer.
Driving Habits
Gentle braking reduces heat buildup on rotors. Avoid riding the brakes during long downhill drives. Use engine braking by shifting to a lower gear. Stop smoothly instead of slamming the brakes suddenly. These habits help keep rotors cool and prevent glazing.
Regular Maintenance Tips
Check brake pads often and replace them when worn. Clean rotors to remove dust and debris. Have a mechanic inspect the brake system yearly. Use high-quality brake pads matched to your driving style. Proper maintenance keeps rotors in good shape and avoids glazing problems.
Credit: www.superhawkforum.com
Frequently Asked Questions
What Does It Mean To Deglaze Brake Rotors?
Deglazing brake rotors means removing the smooth, shiny surface caused by heat. This restores proper friction between pads and rotors for better braking. It improves braking performance and reduces noise.
Why Should You Deglaze Brake Rotors?
Deglazing removes glazing or buildup that reduces brake efficiency. It prevents brake fade and extends rotor and pad life. Deglazing ensures safer and smoother braking.
How Do You Know When To Deglaze Rotors?
Signs include brake noise, vibration, or reduced braking power. If rotors look shiny or glazed, deglazing is needed. It’s best done during brake pad replacement or maintenance.
Can I Deglaze Brake Rotors At Home?
Yes, with basic tools like sandpaper or a brake lathe. Light sanding or machining removes glazing safely. Always follow safety guidelines and consult your vehicle manual.
Conclusion
Deglazing brake rotors keeps your brakes working well and smooth. It removes the shiny layer that can cause noise and vibration. Doing this task regularly helps your car stop safely. Use simple tools and follow steps carefully. Clean rotors mean better grip and longer brake life.
Taking time to deglaze can save money on repairs later. Remember, safe brakes protect you and others on the road. Give your brake rotors some care, and they will perform better.


